Connect MFCL2710DW to a wireless computer - Windows
Learn how to connect your Brother MFC-L2710DW laser printer to a wireless computer using Windows in this video tutorial.
Models covered:
Brother MFCL2710DW
This video is for Windows users, for the Macintosh version click:
https://www.youtube.com/watch?v=tcSNr1sms5E
For more videos, tutorials, and FAQs visit our support site at: http://www.brother-usa.com/support
Quick Links / Table of Contents:
Intro 00:00
Models Covered 00:10
Insert or Download the software 00:20
Running the Installer software 00:32
Alternate connection methods 01:00
Enable Wireless window 01:18
Failed to Connect window 01:38
Locate SSID and Network Key 01:47
Machine control panel 01:56
Continue setup with the Installer 3:53
iPrint&Scan install 4:10
PaperPort Install 04:20
User’s Guide and Registration 04:35
Transcript:
Welcome. Today we're going to connect your Brother MFC-L2710DW to a wireless computer using the setup wizard
This video will cover multiple models and operating systems even though your machine may not match the model on the screen the overall process will be the same.
Insert the installation disc or download the full driver and software package from www.brother-usa.com.
Navigate to your installer file and double-click to begin installation. When the device installation window opens choose your language and click "Next."
Accept the license agreement and then click "Next."
Select wireless network connection and click "Next."
When the “Detecting existing wireless network settings” window appears verify your Network Name and click “Next”
In most cases the setup wizard will be able to automatically apply your wireless settings and connect your machine to the network.
If for some reason the setup wizard was unable to automatically connect your machine, you will be prompted to try alternate methods of connection. The next section of this video will cover those alternate methods.
If the Enable Wireless window opens you will need to go to the control panel of your Brother machine
Press the Wi FI button on the control panel. When prompted to confirm, press the up arrow
Your Brother machine will now retrieve the network settings from your computer
If you receive a Failed to Connect message click “next.”
When prompted for a USB cable select “No” and then click next
Locate your SSID or Network name and your Network Key. These can typically be found on the bottom of your router.
Now go to the control panel of your Brother machine
Press the menu key on the control panel.
Press the down arrow on the control panel repeatedly until the “Network” option is displayed. Then press “OK.”
Arrow down again until “WLAN” appears on the LCD window. Then press “OK
Arrow down until “Setup Wizard” appears then press “OK”
Use the up and down arrows to select your SSID or Network Name and press “OK” Please note that if your network is set to hide the network name you will have to manually add your network name.
Enter your Network Key, using the keypad. Repeated presses on the keys will cycle through the available characters.
Confirm that your Network Key is correct and press “OK”
When prompted to apply settings, press the up arrow
Once “Connected” appears on the LCD, press “OK”
On your computer click “Next”
Click the checkbox next to “Checked and confirmed” and click “Next”
Once your machine is connected to your wireless network, you can continue with the setup process
Select your Brother machine from the list and click "Next"
Select Standard installation and click "Next."
The iPrint & Scan application will automatically install. If you don’t wish to install at this time click “Install Later”
If your model support scanning you will be prompted to install PaperPort. Click “Install.” Once PaperPort is installed click “Next.”
Click "Next"
Click on Brother registration if you would like to register your machine at this time. You can also open the online user guides for you model. Once you are through click "Finish"
Your installation is now complete
For more Tutorials, FAQ's and Videos, visit us at www.brother-usa.com
Thank you for choosing Brother
Customers also searched:
Brother MFC L2710DW Windows wireless
Brother MFC L2710DW Windows setup wizard
An official Brother printer support resource
Видео Connect MFCL2710DW to a wireless computer - Windows канала Brother Office USA
Показать
Комментарии отсутствуют
Информация о видео
Другие видео канала
 Optimized Workflow | The Brother Workhorse Series
 MFCJ1205W set up wireless with WPS - Macintosh
 Episode 1: Monday Meeting | The Cartridge Family — presented by Brother
 Brother - Government Solutions
 Unable to clean MFCJ5845DW or MFCJ5945DW
 Wireless Color Laser Printer | Brother™ HL-L8350CDW
 Business Smart™ Inkjet All-in-One | Brother™ MFC-J4420DW
 Install MFCJ1215W or MFCJ1215W XL with USB - Macintosh
 Connect MFCL2759DW to a wireless computer - Macintosh
 Brother Government Solutions - 60 Seconds
 Install drum and toner - Brother HLL2379DW
 Install MFCJ5955DW with USB - Macintosh
 Unable to initialize MFCJ5855DW or MFCJ5855DW XL
 OmniJoin - Web Conferencing from Brother
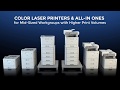 Brother Business Color Laser All-in-Ones | Brother HL-L9310CDW MFC-L9570CDW
 Keeping Confidential...Confidential | Think Optimize
 Brother Professional Desktop Scanners
 Load Letter paper | Brother MFCJ4320DW, MFCJ4420DW, MFCJ4620DW
 Installing HLL8260CDW HLL8360CDW or HLL9310CDW with a USB cable - Windows® Version
 High-Speed Wireless Document Scanner for Mid to Large Size Workgroups | ImageCenter ADS3600W
 P-touch Test Zone -- Episode 5: The Rub-A-Dub Test