MFCJ1205W set up wireless with WPS - Macintosh
Learn how to set up your Brother MFC-J1205W inkjet printer on a wireless network using Wi-Fi Protected Setup (or WPS) in this video tutorial.
Models covered:
Brother MFCJ1205W
This video is for Macintosh users, for the Windows version click:
https://www.youtube.com/watch?v=xMUv-q0Y4Uc
For more videos, tutorials, and FAQs visit our support site at: http://www.brother-usa.com/support
Chapters:
Intro 00:00
Models covered 00:10
Verify router has WPS 00:30
Start process on printer 00:55
Push WPS on router 01:13
Process success or failure 01:30
Add printer in OS - 01:50
AirPrint driver - 02:10
Install iPrint&Scan - 02:45
Transcript:
Welcome, today we are going to setup your Brother MFCJ1205W on a wireless network using the WPS button
Wi-Fi Protected Setup better known as WPS, will enable your Brother machine to connect to your wireless router with a push of a button.
Before we begin, you will need to verify that your wireless router has a WPS Button.
The router’s WPS button may be located on the top of the router, on front or back. The location will depend on your router’s make and model.
If your router does not have a WPS button, you will need to use an alternative methods for wireless setup. Click the link on the screen to see other ways to connect
To begin, confirm your Brother machine is powered ON.
On your Brother machine, press the Wi-Fi button three times to start the connection process. The Power and Wi-Fi lights will begin to blink
On the control panel of your wireless router, press the WPS button
Your Brother machine and the wireless router will now begin the connection process. It may take a minute for the process to complete.
If the connection is successful, the Power and Wi-Fi lights on your Brother machine will illuminate solid green.
If the connection fails, a confirmation page will print indicating a failed connection. You will need to reboot the power to your router and the Brother machine and try again.
Now that your machine is connected, you’ll need to add the printer in the operating system. In the top left corner click the Apple icon. Then click System Preferences. Next, double-click Printers & Scanners
Click the + plus button located below the printers list. Your machine should now display in the Add Printers window.
Select your Brother machine from the list. In the use dropdown verify that AirPrint has been selected. Then click Add.
If your machine is not found it is most likely due to an error in device discovery protocols. You will need to reboot your computer, the Brother machine, and attempt device discovery again.
Once added, your Brother machine is ready to print.
If your model features a scanner you will need to download the Brother iPrint&Scan app in order to scan to your computer.
From the Finder, navigate to Applications and then App Store. In the search box type brother iprint&scan. Then press Enter. On the listing for iPrint&Scan click get or the cloud icon.
After the download is complete, click Open. Click OK on the privacy agreement. and then click Select your Machine.
Verify the connection is set to Network. Select your model, then click OK
Click OK again
All the functions your machine supports will be displayed in the iPrint&Scan window. You are now ready to scan and print
For more Tutorials, FAQ's and Videos, visit us at brother-usa.com/support
Thank you for choosing Brother
Customers also searched:
Brother MFC J1205W wireless WPS Mac
Brother MFC J1205W wireless WPS setup Mac
An official Brother printer support resource
Видео MFCJ1205W set up wireless with WPS - Macintosh канала Brother Office USA
Показать
Комментарии отсутствуют
Информация о видео
Другие видео канала
 Printing loan or notary from your Brother printer – macOS13 and above
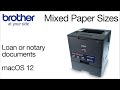 Printing loan or notary from your Brother printer – macOS12 and below
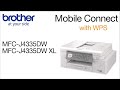 MFCJ4335DW set up wireless with WPS - mobile device
 MFCJ5955DW find machine password – Brother quick fix
 Brother Professional Desktop Scanners
 Bigger & Bolder Business Printing: Brother Workhorse Enterprise Color Laser Printers and All-in-Ones
 MFCJ4345DW find machine password – Brother quick fix
 MFCJ5340DW MFCJ6540DW MFCJ6940DW set up wireless with WPS - Macintosh
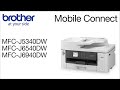 MFCJ5340DW, MFCJ6540DW, MFCJ6940DW – Connect to a mobile device
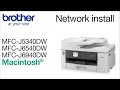 Install MFCJ5340DW on a wired network - Macintosh
 Highlight Reel | The Cartridge Family - presented by Brother
 Episode 2: Phishing Scam | The Cartridge Family — presented by Brother
 Meet The Cartridge Family — presented by Brother
 ADS1700W wireless setup from control panel - Windows
 ADS1700W wireless setup from control panel - Macintosh
 MFCJ5855DW Chromebook wireless - New
 Set up your Brother MFCJ5855DW
 Clearing No paper error –MFCL2759DW
 USB Install MFCL2759DW - Macintosh
 Connect MFCL2759DW to a wireless computer - Macintosh
 How to load paper - Brother MFC-L2759DW