Install Skype for Business Server 2019
Donate Us : paypal.me/MicrosoftLab
Install Skype for Business Server 2019
- DC2 : Install Certificate Services
+ Server Manager - Manager - Add Roles and Features - Next to Server Roles : Select 'Active Directory Certificate Services' - Add Features - Next to Install - Close
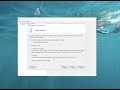
+ Server manager - Notifications - Configure Active Directory Certificate Services on the destination server - Next to Role Services : Select 'Certification Aothority'
- Next to CA Name : change "pns-DC11-CA" to "ROOT-CA" - Next to Configure - Close - Restart
- DC1 : Create a record for Skype service
+ Server Manager - Tools - DNS - DC1 - Forward Lookup Zones - Right-click pns.vn : Other New Records... - Select a resource record type : Service Location (SRV) - Create Record... :
+ Service : _sipinternaltls + protocol : _tcp + Port number : 5061 + Host offering : DC3.Yi.vn - OK - Done
- DC3 : Installing requirement and Skype for Business Server 2019
+ Click 'File Explorer' - C: - Create and share new folder named "Share" - Add Administrators local and Administrators domain full permission
+ Install Slilverlight, UcmaRuntimeSetup, .NET Framework 4.7 === Restart
+ Mount .ISO OS Window Server to D: drive - Server Manager - Manager - Add Roles and Features - Next to Features - Select '.NET Framework 3.5 Features'
- Confirmation : Click 'Specify an alternate source path' - Path : D:\sources\sxs - OK - Install
+ Start - Windows PowerShell, type :
+ Add-WindowsFeature RSAT-ADDS, Web-Server, Web-Static-Content, Web-Default-Doc, Web-Http-Errors, Web-Asp-Net, Web-Net-Ext, Web-ISAPI-Ext, Web-ISAPI-Filter, Web-Http-Logging,
Web-Log-Libraries, Web-Request-Monitor, Web-Http-Tracing, Web-Basic-Auth, Web-Windows-Auth, Web-Client-Auth, Web-Filtering,Web-Stat-Compression,
Web-Dyn-Compression, NET-WCF-HTTP-Activation45, Web-Asp-Net45, Web-Mgmt-Tools, Web-Scripting-Tools, Web-Mgmt-Compat, Server-Media-Foundation, Telnet-Client === Restart
+ Mount .ISO Skype for Business Server 2019 to D: drive - D:\OCS_Eval\Setup\amd64 - Right-click Setup.exe - Run as administrator - Check for Update ? choose 'Don't check...' - Install :
+ Click 'Prepare Active Directory' :
+ Step 1 : Prepare Schema - Click Run - Finish
+ Step 3 : Prepare Current Forest - Click Run - Universal Group Location : Choose 'Domain FQDN' : Yi.vn - Finish
+ Step 4 : Verify Replication of Global Catalog - Click Run - Finish --- Back
+ DC1 : add account Yi\administrator into CSAdministrator group
+ Server Manager - Tools - Active Directory Users and Computers - Yi.vn - Users OU - Double-Click CSAdministrator - Members tab - Add... : Yi\Administrator
+ Click 'Prepare first Standard Edition server' - Next - Finish
+ Click 'Install Administrative Tools' - Next - Finish
+ Start - Skype for Business Server Topology Builder - Topology Builder : Choose 'New Topology' - File name : Skype2019 - Save :
+ Primary SIP domain : Yi.vn - Define the fist site, Name : Yi - Specify site details, City : Ha Noi, Country/Region Code : Viet Nam - Finish
+ Define the New Front End pool - Define the Front End pool FQDN, Pool FQDN : DC3.Yi.vn, choose 'Standard Edition Server'
- Select features : Select Conferencing, 'Enterprise Voice' and 'Call Admission Control' - Next to 'Select an Office Web Apps Server'
- New... - Office Web Apps Server FQDN : Yi.vn - Ok - Finish
+ Action tab - Edit Properties... :
+ Simpl URLs - Administrative access URL : https://admin.Yi.vn + Central Management Server : DC3.Yi.vn Yi
+ Action tab - Publish Topology... - Next - Finish
+ Click 'Install or Update Skype for Business Server System' :
+ Step 1 : Install Local Configuration Store - Click Run - Configure Local Replica Central Management Store : Choose 'Retrieve directly from the Central Management store' - Next - Finish
+ Step 2 : Setup or Remove Skype for Business Server Components - Click Run - Next - Finish
+ Step 3 : Request, Install or Assign Certificates - Click Run :
+ Click Request - Organization : Yi + Organizational unit : Yi + Country/Region : Viet Nam + State/Province : Ha Noi
+ City/Locality : Ha Noi + Select one or more... : Select All - Next - Finish
+ Click Assign - Next - finish
+ Restart
+ Start - Skype for Business Server Control Panel - Users tab - Enable users :
+ Add... : HiepIT, VietIT + Assign users to a pool : DC3.Yi.vn + Generate user's SIP URI : choose 'Use the user principal name (UPN)' - Enable
- WIN101, WIN102 : Test Skype for Business
+ Start - Skype for Business 2016 (in Office 2016)
Видео Install Skype for Business Server 2019 канала microsoft lab
Install Skype for Business Server 2019
- DC2 : Install Certificate Services
+ Server Manager - Manager - Add Roles and Features - Next to Server Roles : Select 'Active Directory Certificate Services' - Add Features - Next to Install - Close
+ Server manager - Notifications - Configure Active Directory Certificate Services on the destination server - Next to Role Services : Select 'Certification Aothority'
- Next to CA Name : change "pns-DC11-CA" to "ROOT-CA" - Next to Configure - Close - Restart
- DC1 : Create a record for Skype service
+ Server Manager - Tools - DNS - DC1 - Forward Lookup Zones - Right-click pns.vn : Other New Records... - Select a resource record type : Service Location (SRV) - Create Record... :
+ Service : _sipinternaltls + protocol : _tcp + Port number : 5061 + Host offering : DC3.Yi.vn - OK - Done
- DC3 : Installing requirement and Skype for Business Server 2019
+ Click 'File Explorer' - C: - Create and share new folder named "Share" - Add Administrators local and Administrators domain full permission
+ Install Slilverlight, UcmaRuntimeSetup, .NET Framework 4.7 === Restart
+ Mount .ISO OS Window Server to D: drive - Server Manager - Manager - Add Roles and Features - Next to Features - Select '.NET Framework 3.5 Features'
- Confirmation : Click 'Specify an alternate source path' - Path : D:\sources\sxs - OK - Install
+ Start - Windows PowerShell, type :
+ Add-WindowsFeature RSAT-ADDS, Web-Server, Web-Static-Content, Web-Default-Doc, Web-Http-Errors, Web-Asp-Net, Web-Net-Ext, Web-ISAPI-Ext, Web-ISAPI-Filter, Web-Http-Logging,
Web-Log-Libraries, Web-Request-Monitor, Web-Http-Tracing, Web-Basic-Auth, Web-Windows-Auth, Web-Client-Auth, Web-Filtering,Web-Stat-Compression,
Web-Dyn-Compression, NET-WCF-HTTP-Activation45, Web-Asp-Net45, Web-Mgmt-Tools, Web-Scripting-Tools, Web-Mgmt-Compat, Server-Media-Foundation, Telnet-Client === Restart
+ Mount .ISO Skype for Business Server 2019 to D: drive - D:\OCS_Eval\Setup\amd64 - Right-click Setup.exe - Run as administrator - Check for Update ? choose 'Don't check...' - Install :
+ Click 'Prepare Active Directory' :
+ Step 1 : Prepare Schema - Click Run - Finish
+ Step 3 : Prepare Current Forest - Click Run - Universal Group Location : Choose 'Domain FQDN' : Yi.vn - Finish
+ Step 4 : Verify Replication of Global Catalog - Click Run - Finish --- Back
+ DC1 : add account Yi\administrator into CSAdministrator group
+ Server Manager - Tools - Active Directory Users and Computers - Yi.vn - Users OU - Double-Click CSAdministrator - Members tab - Add... : Yi\Administrator
+ Click 'Prepare first Standard Edition server' - Next - Finish
+ Click 'Install Administrative Tools' - Next - Finish
+ Start - Skype for Business Server Topology Builder - Topology Builder : Choose 'New Topology' - File name : Skype2019 - Save :
+ Primary SIP domain : Yi.vn - Define the fist site, Name : Yi - Specify site details, City : Ha Noi, Country/Region Code : Viet Nam - Finish
+ Define the New Front End pool - Define the Front End pool FQDN, Pool FQDN : DC3.Yi.vn, choose 'Standard Edition Server'
- Select features : Select Conferencing, 'Enterprise Voice' and 'Call Admission Control' - Next to 'Select an Office Web Apps Server'
- New... - Office Web Apps Server FQDN : Yi.vn - Ok - Finish
+ Action tab - Edit Properties... :
+ Simpl URLs - Administrative access URL : https://admin.Yi.vn + Central Management Server : DC3.Yi.vn Yi
+ Action tab - Publish Topology... - Next - Finish
+ Click 'Install or Update Skype for Business Server System' :
+ Step 1 : Install Local Configuration Store - Click Run - Configure Local Replica Central Management Store : Choose 'Retrieve directly from the Central Management store' - Next - Finish
+ Step 2 : Setup or Remove Skype for Business Server Components - Click Run - Next - Finish
+ Step 3 : Request, Install or Assign Certificates - Click Run :
+ Click Request - Organization : Yi + Organizational unit : Yi + Country/Region : Viet Nam + State/Province : Ha Noi
+ City/Locality : Ha Noi + Select one or more... : Select All - Next - Finish
+ Click Assign - Next - finish
+ Restart
+ Start - Skype for Business Server Control Panel - Users tab - Enable users :
+ Add... : HiepIT, VietIT + Assign users to a pool : DC3.Yi.vn + Generate user's SIP URI : choose 'Use the user principal name (UPN)' - Enable
- WIN101, WIN102 : Test Skype for Business
+ Start - Skype for Business 2016 (in Office 2016)
Видео Install Skype for Business Server 2019 канала microsoft lab
Показать
Комментарии отсутствуют
Информация о видео
Другие видео канала
 Building Skype for Business Server 2019
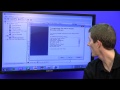 How to properly configure the SSD as boot drive and HDD as storage drive
 How to Create and Link a Group Policy Object in Active Directory
 Skype for Business Server 2019 installation Part 2 - 2020
 Skype for Business Server - Tutorial/Architecture
 Complete AD Migration with FSMO Role Transfer Step By Step in Hindi
 Microsoft Skype For Business Server 2015 - Step By Step Installation
 Skype for Business Server 2019 installation Part 1 - 2020
 Prevents running PowerShell via GPO in Windows Server 2022
 Customize Logon Hours for user in domain windows server 2022
 Installing a New Child Domain on Windows Server 2022
 اموزش نصب بیگ بلو باتن (install bigbluebutton)
 Windows Server 2019 Active Directory Domain Controller Install | For The Beginner
 Skype for Business Server 2019 installation Part 3 - 2020
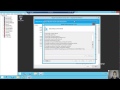 installing and configuring skype for business Edge Server Part 1
 Skype for business 2015 enterprise installation step by step
 Install Edge Server for Skype for Business Server 2019
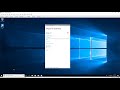 Install Certificate for Skype for Business client (for Workgroup)
 Setting Disk Quotas on Windows Server 2022
 Disable Remote Desktop via Group Policy (Windows Server 2022)