Table Saw CROSS CUT SLED w/ Stop Block & DUST COLLECTION // How To Make
Learn how to build a table saw cross cut sled, complete with a t-track stop block and hold downs plus a custom DUST COLLECTION hood! A cross-cut sled is one of the ultimate table saw jigs, allowing you to safely cut long parts to length. Purchase the crosscut sled plans here : https://bit.ly/crosscutplans
5 Cut Method Calculator : https://www.windridgewoodcrafts.com/topics/five_cut/
📹 SUBSCRIBE : https://goo.gl/V5gcNJ
💰 BECOME A MEMBER : https://www.youtube.com/channel/UC-hTi9atsD6wAl2s46LpAVw/join
📦 Materials Used On The Crosscut Sled (affiliate):
🔹 2 x 24”x30” ¾” Baltic Birch Plywood : https://www.rockler.com/3-4-baltic-birch-plywood
🔹 Double T-Track : https://www.rockler.com/double-t-track-fence-cap
🔹 2 x Universal T-Track, 2 ft : https://www.rockler.com/universal-t-track-universal-t-track
🔹 2 x Miter Bar, 24” : https://www.rockler.com/rockler-18-24-aluminum-miter-bar
🔹 Tape Measure Insert Kit : https://www.rockler.com/t-track-tape-measures-t-track-tape-measures
🛥 TotalBoat Halycon Clear : https://amzn.to/2ziBSnN
🛥 TotalBoat Elixir Paint : https://amzn.to/2XlNgIt
Stop Block : http://bit.ly/KatzMosesDovetailJig
Wood Glue : https://amzn.to/3hXuy1Y
#6 Screws : https://amzn.to/2XezgjM
4 ¾” Screws : https://amzn.to/33bXoXZ
¼” Acrylic : https://amzn.to/39J2OuV
Acrylic Cement : https://amzn.to/2Pf5SFQ
🛠 Tools Used On The The Crosscut Sled (affiliate):
Table Saw : https://amzn.to/2WrrNMm
Push Stick : https://amzn.to/2XIvgFq
Router Table : https://youtu.be/awsU-tIPwbM
Calipers : https://amzn.to/3g02Hxd
Countersink Bit : https://amzn.to/3eX5GFE
Magnetic Screw Holder (for my impact driver) : https://amzn.to/2xGYPwD
Cordless Drill : https://amzn.to/2wOFM2S
Dado Stack : https://amzn.to/3fliYf6
Sjobergs Workbench : https://amzn.to/2s4mffP
👕 Get your Build It Yourself merch! http://bit.ly/BuildItYourselfMerch
📲 FOLLOW CRAFTED WORKSHOP!
INSTAGRAM: http://instagram.com/craftedworkshop
FACEBOOK: http://facebook.com/craftedworkshop
TWITTER: http://twitter.com/craftedworkshop
PINTEREST: http://pinterest.com/craftedworkshop
SCRIPT:
I started the crosscut sled build by ripping a piece of ¾” Baltic Birch plywood into strips at the table saw. These pieces would make up the front and back fences on the sled, and to help beef up these fences, I glued two of the strips together to form 1 ½” thick fences.
Also, in case you’re interested in building one of these sleds for yourself, I do have plans available that include all of the specific dimensions I used, and I’ll link to those in the cards and in the video description below.
After the glue had a chance to dry, I took the fence blanks out of the clamps and then squared them up at the table saw, scraping off any excess glue squeeze out from one edge before doing so.
Once I had the edges cleaned up, I first cut the back fence to length by cutting one of my fence blanks roughly in half, and this was again because I was creating fences for two sleds.
I could then clean up the ends of the front fence, which I kept as long as possible, removing just enough material to square things up.
While I had my stop block set to length for the front fence, I also went ahead and cut the double t-track I’d be using on top of the front fence to length as well. I had to cut off a bit from one end of the double t-track to make sure the screw locations worked out for my fence size, but this aluminum t-track cut easily with my miter saw.
Next, I could get a slot cut into the top edge of the front fence to house the bottom portion of the double t-track. This piece actually helps to keep the fence straight, so I tried to keep the slot nice and snug, while also making sure the t-track was just shy of the face of the fence so it didn’t interfere.
Before screwing on the t-track, I went ahead and chamfered the edges of the fence at the router table, adding a heavy chamfer to the front edge of the fence. This chamfered area will give a place for sawdust to pile up without affecting the accuracy of the fence.
Видео Table Saw CROSS CUT SLED w/ Stop Block & DUST COLLECTION // How To Make канала Crafted Workshop
Показать
Комментарии отсутствуют
Информация о видео
Другие видео канала
 How to make a ROUTER TABLE w/ Bit Storage & Dust Collection
 DIY 4K HOME THEATER MAKEOVER REMODEL 🎬 Smart & Stealth Media Room
 SMALL Cross-Cut Sled with ADJUSTABLE Fence, EXTENSION wing and BEVEL Feature!
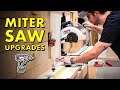 3 BIG Miter Saw Station Upgrades! Stop Block, Dust Collection & Zero Clearance
 Building a modern LEANING Bookshelf w/ Ebonized Oak // How To - Woodworking
 Ⓕ Make A Table Saw Cross Cut / Miter Sled Combo (ep58)
 Making a Nightstand with Hidden Drawer & Epoxy Inlay
 SHOP TOUR 2019, All of My Woodworking and Metalworking Tools!
 Building the ULTIMATE Music Studio & Gaming Desk Setup // Woodworking
 DIY WORKBENCH / MITER SAW Station PART 2! Building Dust Hood, T-Track & Drawers
 $10,000 Dining Table Build - Reclaimed Epoxy Table - How to Woodworking
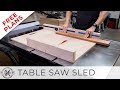 Simple Table Saw Sled with FREE Plans | DIY Woodworking
 Building an Expandable Pedestal Dining Table — My most ambitious build yet!
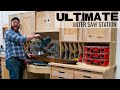 ULTIMATE Miter Saw Station with Downdraft Table!
 Building DIY WOOD COUNTERTOPS from PLYWOOD & LAMINATE for $300 // Kitchen Remodel Pt. 2
 Build Cabinets The Easy Way | How to Build Cabinets
 BALTIC BIRCH Plywood - PRO TIPS for WOODWORKERS
 Make a Router table
 Maybe the Best Table Saw Crosscut Sled Ever?
 New Level of Safety and Function for the Table Saw || Clamp On In Feed Table