3 BIG Miter Saw Station Upgrades! Stop Block, Dust Collection & Zero Clearance
Learn how to add a t-track stop block to your miter saw station, plus covers for your dust collection hood and a zero clearance insert plate! These upgrades to my miter saw station have been a long time coming! // Learn more about the JET 12" Sliding Miter Saw here : https://bit.ly/JETmitersaw
📦 Materials Used On The Miter Saw Station Upgrades (affiliate):
🔹 T-Track, T-Slot Bolt, Knob : https://www.rockler.com/17-piece-universal-t-track-kit
🔹 Tape Measure : https://www.rockler.com/self-adhesive-measuring-tape
🔹 Hairline Indicator : https://www.rockler.com/t-track-tape-measures-t-track-tape-measures
CA Glue : https://amzn.to/2WYoONd
Magnets : https://amzn.to/2WX3OGC
🛠 Tools Used On The Miter Saw Station Upgrades (affiliate):
♦️ JET Miter Saw : https://bit.ly/JETmitersaw
🟨 Powermatic Drum Sander : https://amzn.to/2ZFwZQd
Router : https://amzn.to/32MFF9w
Edge Guide : https://amzn.to/3hzUYXi
¾” Bit (for routing t-track grooves) : https://amzn.to/32QAghC
Table Saw : https://amzn.to/2WrrNMm
Push Stick : https://amzn.to/2XIvgFq
Calipers : https://amzn.to/3g02Hxd
Countersink Bit : https://amzn.to/3eX5GFE
Magnetic Screw Holder (for my impact driver) : https://amzn.to/2xGYPwD
Cordless Drill : https://amzn.to/2wOFM2S
Sjobergs Workbench : https://amzn.to/2s4mffP
📹 SUBSCRIBE : https://goo.gl/V5gcNJ
💰 SUPPORT ME : https://www.youtube.com/channel/UC-hTi9atsD6wAl2s46LpAVw/join
📲 FOLLOW CRAFTED WORKSHOP!
INSTAGRAM: http://instagram.com/craftedworkshop
FACEBOOK: http://facebook.com/craftedworkshop
TWITTER: http://twitter.com/craftedworkshop
PINTEREST: http://pinterest.com/craftedworkshop
SCRIPT :
My miter saw station build was one of the earliest woodworking projects on this channel and was by far the largest project I had untaken at that point. This miter saw station is based on Jay Bates’ popular design and it has served me well over the last four years.
That said, I never really got it set back up properly after I moved into my new shop about a year ago, and, after receiving this beast of a new miter saw from JET a few weeks ago, I decided it was finally time to give the miter saw station a few upgrades.
These upgrades included adding a t-track stop block system for making more accurate, repeatable cuts, adding removable panels to the saw opening to improve dust collection, and finally making a zero clearance insert plate for the new JET miter saw.
I got started by working on getting some t-track added to the work surface, and this was a fairly straightforward process of routing a few grooves to house the t-track pieces. I used an edge guide to ensure I had a nice, straight groove, and I did have to remove the maple trim on this left side before routing.
I snuck up on the depth and got to my final depth after two passes and ended up with a really nice, snug fit with the t-track just below the surface of the plywood.
I repeated the same process on the right half of the miter saw station, although I don’t really see myself using a stop block on this side very frequently, and then I could route another groove for the peel-and-stick measuring tape.
This tape, which I got from Rockler, is actually made of metal and is just thick enough to catch on boards as I slide them across the work surface, and I figured housing the tape in a shallow groove would also help the numbers keep from being worn off over time.
I initially routed the groove for the tape measure right next to the groove for the t-track, but I realized this wasn’t going to work with the stop block design I was planning to use. Because of this, I needed to re-route the groove, this time routing it about an inch and a half from the t-track groove. That extra groove wasn’t a problem, as it was shallow enough where it wouldn’t cause any issues.
Once again, I repeated the process on the right half of the miter saw station and also cleaned up that maple trim, which had seen better days, while I was at it using my low angle jack plane.
When I went to install the t-track, I realized I had actually mistakenly ordered the wrong type of t-track from Rockler, where I get all of my t-track, and had received pieces with no holes pre-drilled. Because of this, I needed to drill holes for my mounting screws and also countersink the holes so the screw heads would sit flush with the surface of the t-track
Of course, I didn’t have a small enough countersink bit on hand, so I just went ahead and got the t-track mounted in the grooves temporarily before coming back to countersink them later.
Since there wasn’t a ton of plywood left for the screws to thread into after routing the grooves for the t-track, I decided to add a little more strength to the connection by adding some CA glue before screwing down the t-track and this made for a rock solid bond.
Видео 3 BIG Miter Saw Station Upgrades! Stop Block, Dust Collection & Zero Clearance канала Crafted Workshop
Показать
Комментарии отсутствуют
Информация о видео
Другие видео канала
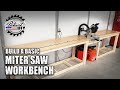 Basic Miter Saw Workbench / Miter Station Part 1
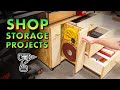 3 MORE Shop Storage Projects! Table Saw Cabinet, Plywood Rack, Drill Press Cabinet
 11 common workshop dust collection mistakes
 How to INSTALL KITCHEN CABINETS (and remove them)! // DIY Kitchen Remodel Pt. 1
 Table Saw CROSS CUT SLED w/ Stop Block & DUST COLLECTION // How To Make
 Can I Improve the Dust Collection of my Miter Saw with Excessive Mahogany?
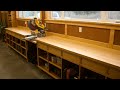 Huge Miter Saw Station Upgrade!!!
 No Fence Miter Station
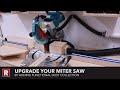 Miter Saw Dust Collection
 Making The Mitre Saw Station
 Completely Rebuilding My Old Table Saw - Part 1: The Base
 How To Build and Install DIY Frameless Kitchen Cabinets // Home Bar Pt. 1
 Mobile Cart to Miter Saw Station & Why I Switched
 How to make a ROUTER TABLE w/ Bit Storage & Dust Collection
 SMALL Cross-Cut Sled with ADJUSTABLE Fence, EXTENSION wing and BEVEL Feature!
 Shop Work: Improving Dust Collection
 Outfeed Assembly Table | Functional & Gorgeous
 Using Your Suggestions to Improve the Miter Saw Station | I Like To Make Stuff
 Building a Miter AND Radial Arm Saw Station in One!
 Miter Saw Dust Collection - New Custom Fence