Rusty coffee grinder - Restoration
In today's episode we will show you the renovation of a tin coffee grinder. Coffee grinder was bought by my wife Veronika and I was renovating at her request.
Something about the history of coffee grinding
Initially, the coffee beans were crushed in mortars, or milled in stone grinders to fine powder. Only later, various small and large metal stone grinders were produced. During the First World War, soldiers bought only internal movements for price reasons and then made their own packaging from used ammunition. These models can still be found in collectors' collections.
In the past, practical tools for day-to-day use are more like decoration.
If you have any information about coffee grinder and companies that made them (period brochures, ads, model names, years of production), you can share them with others on my facebook site:
https://www.facebook.com/groups/951735661652138/
I love coffee, and what about you?
Write me in comments :)
If you have any questions about the process, use machines or other things, ask me in the comments. I'm trying to answer everyone and as soon as possible.
I'm sorry for my bad English, it's not my language.
I'm uploading videos about restoring mechanical things. I'm uploading videos about restoring old wooden things I try to keep as many original parts as possible..
If you like this restoration please share and subscribe :)
Thanks for your advice on how to improve this channel !
Action Index:
00:01 Presentation of the original state of the coffee grinder.
00:17 Disassembling
06:40 Degreasing with kitchen detergent
07:43 After degreasing and drying the steel disc came :)
09:15 To make it easier to clean the brass parts, I used a "brass cleaner", it's a ready-made blend of several acids. Wear protective equipment!
10:20 Water rinsing is required.
10:35 Use a small hammer and anvil to straighten the bent sheets.
11:25 To prevent the metal parts from getting cut again, apply a rust remover. I use my favorite tannin rust remover.
12:45 Before the rust remover has dried up, we will clean the brass and metal parts that will not be sprayed with a rag wheel and abrasive paste.
13:44 Clean the residue after the rust remover has dried with a metal wool.
14:10 and we can move on to riveting. I made a tool for recessed sheet metal.
15:00 There is little room for hammer swing inside the grinder. I had to use a piece of iron.
15:50 After riveting, we can spray the coffee grinder with a primer.
16:18 We're going to make the missing knob knob
18:55 To darken the button, I used the spirits stain Canadian shade. Then we wax.
20:50 For proper anchoring of the pin we use two-component glue.
21:45 Topcoat application according to my wife Veronika.
23:15 I applied food-friendly oil to cleaned and polished wooden parts.
24:05 I used a paint marker for gold lines
25:01 Assembly follows
28:57 Comparison before and after renovation
29:43 Grinding test
Thank you for 31:51 minutes of your time.
And if you would like to support our channel, thank you:
To support our YouTube channel:
My Patreon Page: https://www.patreon.com/VeradonaRestoration
My PayPal: veradona@email.cz
Thank you
Видео Rusty coffee grinder - Restoration канала Veradona Restoration
Показать
Комментарии отсутствуют
Информация о видео
Другие видео канала
 Rusty Mining Lamp - Restoration
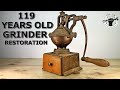 Rare and Rusty Coffee Grinder - Restoration
 Carpenter's Bench ( ponk ) - Restoration
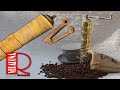 Rusty Old Coffee Grinder - Perfect Restoration
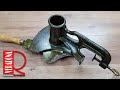 Marmalade cutter - Restoration
 Rusty old Excelsior nut grinder - Restoration
 Pencil Sharpener Restoration
 Old small flashlight - Restoration
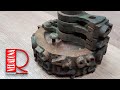 Numbering machine - Restoration
 Do you know this press? - Restoration
 Door closer - Restoration
 Tutti Frutti juicer - Restoration
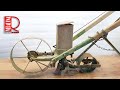 Antique Seed Planter - Restoration
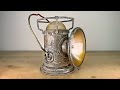 1960s Rusted Military Lantern Restoration
 Rusty Bread Slicer - Restoration
 Old Rusted Coffee Grinder - Restoration | Workshop DC
 Old hand drill Zbrojovka - Restoration
 Electric fan (ventilator)- Restoration
 Old ship lamp - Restoration
 Rusty Coffee Grinder - Restoration