How to Create Simulated Panels with Molding | Ask This Old House
Ask This Old House general contractor Tom Silva creates a simulated stile and rail wainscoting on a dining room wall by using base cap molding.
SUBSCRIBE to This Old House: http://bit.ly/SubscribeThisOldHouse
Time:
4-5 hours
Cost:
Under $100
Skill Level:
Moderate
Tools List:
Miter saw
23-gauge pin nail gun
Measuring tape
Rag
Caulking gun
Shopping List:
1/16” x 1 3/8” primed finger jointed base cap molding
23-gauge headless pin nails
Wood glue
Wood filler
Fine grit sandpaper
Caulk
1x4 scrap wood for a gauge block
Steps:
1. Measure the height of the space between the chair rail and the baseboard using a measuring tape.
2. The base cap molding frame should be centered all around the room. An easy way to measure, take two pieces of 1x4 and place them against the top of the baseboard and the bottom of the chair rail. The distance between the two blocks is a good height for the frame.
3. To get the horizontal measurements of the frame, measure the entire width of your wall. Divide the measurement up evenly and allow for spacing between each frame. Using a piece of 1x4 as a gauge block between each frame is a good way to separate the frames evenly.
4. To cut the vertical portion of the frames, set the stop on the outfeed of a miter saw and place the base cap molding just beyond the stop.
5. Set the miter saw to a 45-degree angle, hold the molding tight to the saw and make the first cut. Repeat the process for the necessary amount of vertical sides.
6. Reverse the angle of the miter saw to the opposite 45-degree angle.
7. Set the outfeed stop to desired length for the horizontal pieces, press the molding firmly against the miter saw and make a cut. Repeat the process for the necessary amount of horizontal sides.
8. Take two vertical molding sides and two horizontal molding sides and create a frame.
9. Use wood glue to connect each corner and a 23-gauge pin nail gun with headless pin nails to tack all of the connections together.
10. Be sure to remove any excess glue immediately with a rag. Repeat the process for the necessary amount of frames.
11. Let the frames dry for ten minutes.
12. Lay out the frames in place using a piece of 1x4 as a gauge block to set the spacing from the chair rail, the baseboard, and between each frame side by side.
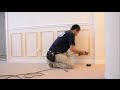
13. Use wood glue and a 23-gauge pin nail gun with headless pin nails to tack up the molding frames to the wall.
14. To finish off the look of the frames, fill in any holes with wood filler. Then sand it down using a fine grit sandpaper.
15. If there are any imperfections between the inside and the outside of the frames in relation to the wall, fill in those gaps with caulking using a caulking gun.
16. Paint to desired color.
About Ask This Old House TV:
Homeowners have a virtual truckload of questions for us on smaller projects, and we're ready to answer. Ask This Old House solves the steady stream of home improvement problems faced by our viewers—and we make house calls! Ask This Old House features some familiar faces from This Old House, including Kevin O'Connor, general contractor Tom Silva, plumbing and heating expert Richard Trethewey, and landscape contractor Roger Cook.
Follow This Old House and Ask This Old House:
Facebook: http://bit.ly/ThisOldHouseFB
Twitter: http://bit.ly/ThisOldHouseTwitter
http://bit.ly/AskTOHTwitter
Pinterest: http://bit.ly/ThisOldHousePinterest
Instagram: http://bit.ly/ThisOldHouseIG
http://bit.ly/AskTOHIG
Tumblr: http://bit.ly/ThisOldHouseTumblr
For more on This Old House and Ask This Old House, visit us at: http://bit.ly/ThisOldHouseWebsite
How to Create Simulated Panels with Molding | Ask This Old House
https://www.youtube.com/user/thisoldhouse/
Видео How to Create Simulated Panels with Molding | Ask This Old House канала This Old House
SUBSCRIBE to This Old House: http://bit.ly/SubscribeThisOldHouse
Time:
4-5 hours
Cost:
Under $100
Skill Level:
Moderate
Tools List:
Miter saw
23-gauge pin nail gun
Measuring tape
Rag
Caulking gun
Shopping List:
1/16” x 1 3/8” primed finger jointed base cap molding
23-gauge headless pin nails
Wood glue
Wood filler
Fine grit sandpaper
Caulk
1x4 scrap wood for a gauge block
Steps:
1. Measure the height of the space between the chair rail and the baseboard using a measuring tape.
2. The base cap molding frame should be centered all around the room. An easy way to measure, take two pieces of 1x4 and place them against the top of the baseboard and the bottom of the chair rail. The distance between the two blocks is a good height for the frame.
3. To get the horizontal measurements of the frame, measure the entire width of your wall. Divide the measurement up evenly and allow for spacing between each frame. Using a piece of 1x4 as a gauge block between each frame is a good way to separate the frames evenly.
4. To cut the vertical portion of the frames, set the stop on the outfeed of a miter saw and place the base cap molding just beyond the stop.
5. Set the miter saw to a 45-degree angle, hold the molding tight to the saw and make the first cut. Repeat the process for the necessary amount of vertical sides.
6. Reverse the angle of the miter saw to the opposite 45-degree angle.
7. Set the outfeed stop to desired length for the horizontal pieces, press the molding firmly against the miter saw and make a cut. Repeat the process for the necessary amount of horizontal sides.
8. Take two vertical molding sides and two horizontal molding sides and create a frame.
9. Use wood glue to connect each corner and a 23-gauge pin nail gun with headless pin nails to tack all of the connections together.
10. Be sure to remove any excess glue immediately with a rag. Repeat the process for the necessary amount of frames.
11. Let the frames dry for ten minutes.
12. Lay out the frames in place using a piece of 1x4 as a gauge block to set the spacing from the chair rail, the baseboard, and between each frame side by side.
13. Use wood glue and a 23-gauge pin nail gun with headless pin nails to tack up the molding frames to the wall.
14. To finish off the look of the frames, fill in any holes with wood filler. Then sand it down using a fine grit sandpaper.
15. If there are any imperfections between the inside and the outside of the frames in relation to the wall, fill in those gaps with caulking using a caulking gun.
16. Paint to desired color.
About Ask This Old House TV:
Homeowners have a virtual truckload of questions for us on smaller projects, and we're ready to answer. Ask This Old House solves the steady stream of home improvement problems faced by our viewers—and we make house calls! Ask This Old House features some familiar faces from This Old House, including Kevin O'Connor, general contractor Tom Silva, plumbing and heating expert Richard Trethewey, and landscape contractor Roger Cook.
Follow This Old House and Ask This Old House:
Facebook: http://bit.ly/ThisOldHouseFB
Twitter: http://bit.ly/ThisOldHouseTwitter
http://bit.ly/AskTOHTwitter
Pinterest: http://bit.ly/ThisOldHousePinterest
Instagram: http://bit.ly/ThisOldHouseIG
http://bit.ly/AskTOHIG
Tumblr: http://bit.ly/ThisOldHouseTumblr
For more on This Old House and Ask This Old House, visit us at: http://bit.ly/ThisOldHouseWebsite
How to Create Simulated Panels with Molding | Ask This Old House
https://www.youtube.com/user/thisoldhouse/
Видео How to Create Simulated Panels with Molding | Ask This Old House канала This Old House
Показать
Комментарии отсутствуют
Информация о видео
Другие видео канала
 How to Install Chair Rail and Picture Frame Moulding
 How to Build a Custom Built-In Using Stock Shelving | Ask This Old House
 DIY Board & Batten
 How to Build a Custom Fireplace Mantel | Ask This Old House
 How to Install Interior Window Trim | Ask This Old House
 How To Cut and Install Foam Crown Molding | This Old House
 How to Install Wainscoting | DIY Board and Batten
 How to Install Wood Crown Molding | Ask This Old House
 60 Wainscoting Ideas
 Would you do this to your ceiling? Accent Trim Install
 Intrim Mouldings | How to Create & Install Wainscoting Wall Panelling
 DIY chair rail & boxes
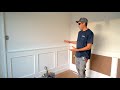 FINALLY installing the trim on the wainscot project
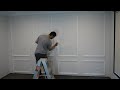 make a feature wall under $100 - budget DIY interior design
 How to Hang Crown Molding on Kitchen Cabinets | Ask This Old House
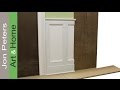 Tips on designing and installing chair rail and panel molding by Jon Peters
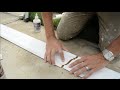 Get Perfect Seams Joining Trim and Mouldings
 How to Build a Coffered Ceiling | This Old House
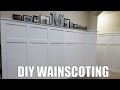 DIY WAINSCOTING for HALF THE COST 💵
 How to Update Oak Stair Treads and Risers | Ask This Old House