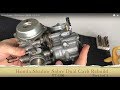
Honda Shadow VT1100 Carburetor Rebuild - Part 1 of 2
This is the first in a two part series on the complete disassembly, cleaning and reassembly of my dual Keihin CV carbs for the Shadow VT-1100. It goes into much much much detail. The first observation is that there is no easy way to separate the two carbs so this will be done as a single unit keeping the components separate and doing one side at a time.
Again, fitted tools are important to not strip out screws. Starting from the top the cover for the main jet's needle diaphragm is removed to expose the diaphragm and needle which is removed and put off to the side. An observation shows some sort of significant contamination on the top side.
Next is the side spring loaded diaphragm, also contaminated and removed off to the side as a separate group. This brings the operation to the bowl cover which is loosened and removed from the carb. Surprisingly, the bottom of the carb didn't look to bad, the opposite of what I expected.
Next, all jets and emulsion tubes are removed from the carb and put off to the side. The values of the jets are recorded. Also a visual inspection is done to see if any of the jets were physically blocked. With all of that removed finally, the float and needle come out.
Next the Mixture screw is turned in to get the count of its position to full stop and then drawn out. it is put with the rest of the brass after recording the value [3].
With that the first side is completely stripped after removing a few more small parts, I move to the next side. Same procedure. On the second side one jet is found to be completely clogged. Turns recorded on the second side [4]
Now with the carb completely stripped an inspection is done and a visit to Jason to determine the cause of corruption is due to a failed filter that fits on the carb.
At this point the entire carb is cleaned with carb cleaner and blown out with air through each port as well as the outer surfaces..
With the carb itself cleaned, The individual parts are now attended to. This included mating surfaces. polishing of jets, emulsion tubes, the bottom of the bowl and the complete cleaning and servicing of the needle of the main jet and associated diaphragm.
The rubber from the diaphragm is then lightly oiled and the the excess is removed.
MORE OF THE REBUILD IN PART 2.....
Видео Honda Shadow VT1100 Carburetor Rebuild - Part 1 of 2 канала Retro Tech & Electronics
Показать
Комментарии отсутствуют
Информация о видео
Другие видео канала
 Honda Shadow VT1100 Carburetor Rebuild - Part 2 of 2
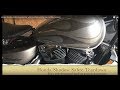 Honda Shadow 1100 Disassembly with Carb Removal for General Maintenance and Repair
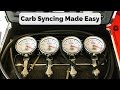 Carb Syncing: How to Fine Tune Your Carburetors
 Honda VT1100 Common Issues: Weekly Wrench
 Coleman Stove Model 425 Teardown Maintenance Rebuild and Leak Repair
 2003 Honda Shadow 750 Dual Carburetor Removal
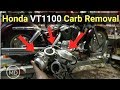 Honda VT1100 Carburetor Removal
 Deceleration Backfire: Tuning your carburetor
 How to install a Jet Kit Honda VT750 #how2wrench #jetkit #howtoinstallajetkit #dynojet vt750dc
 Basic Motorcycle Maintenance How To's - Honda 2002 VT1100 Shadow Sabre (2000-2007)
 Honda Shadow VT1100 Carb Install after General Maintenance
 Honda Shadow carb rebuild
 EASIEST Carburetor Rebuild for Honda Shadow: Part 2 of 4
 Pilot Air/Fuel Screw Adjustment Explained - Multiple Carbs - Part 2
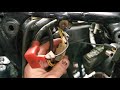 Common Honda Shadow 1100 problem
 Carburetor Float Height Adjust/Check
 EASIEST Carburetor Rebuild for Honda Shadow: Part 4 of 4
 Complete Charging System Overhaul - Custom Honda VT1100 Aero
 1995-1996 Honda Shadow 1100 ACE Carb removal and disassembly (Part 1)
 Honda Shadow 1100 Engine Removal