Vacuum Forming Machine - DIY Restoration Preparation [How To Make]
In this video, I build a technical jig for my next restoration project. However, I will not yet reveal what I am going to restore
I am going to use this jig as a vacuum forming machine. I will use the process „thermoforming“, so build this tool.
In this case, I will deep draw PET-G. The construction is quite simple and possible for everyone to copy without problems.
▬ What I did ▬▬▬▬▬▬▬▬
At first, I assemble the frame, to which I screw the base plate. I install four supports inside the Frame, so the perforated plate remains stable when the vacuum is created. Now I seal all joints with acrylic so that the vacuum can become as strong as possible. Then I screw the perforated plate onto the base frame of the thermoformer and seal the edge with sealing tape. In the next step, I build the clamping frame. I need to cut a large area out of the perforated plate; I do this with a jigsaw. From the cut out part, I make the clamping jaws. Later I attach these to the frame with wing screws and drive-in nuts. Finally, I build the frame for heating. I assemble this from four parts of a Multiplex and four pieces of squared lumber. At the end the reward - a small function test... pay attention to my tips in the test!
▬ Good to know ▬▬▬▬▬▬▬▬
Used tools: cordless screwdriver, hole cutter, electric grill, disco lamp, cartridge press, popsicle stick, jigsaw, miter clamp, wood drill
Material used:
Base frame: 4 pieces 9mm Multiplex 100mm x 600mm, 1 piece 9mm Multiplex 609mm x 609mm, 1 piece perforated plate 609mm x 609mm, 4 pieces squared timber 25mm x 25mm 100mm long.
Heating frame: 4 pieces 9mm Multiplex 300mm x 600mm, 4 pieces squared timber 25mm x 25mm 250mm long
Clamping frame: 1 piece 9mm Multiplex 760mm x 760mm (make clamping jaws from leftover)
Miscellaneous: 10 pieces wing screws M8x20mm, 10 pieces washers M8, 10 pieces drive-in nuts M8, wood screws 4x35, about 2,5m sealing tape, acrylic, wood glue, 2mm PET-G plate
▬ Chapter ▬▬▬▬▬▬▬▬
0:00 Introduction
0:23 Base frame
4:27 clamping frame
6:02 heating frame
6:18 Overview of all components
6:29 function test and tips
Thank you for watching, subscribe for more, leave a comment below and see you next time.
Видео Vacuum Forming Machine - DIY Restoration Preparation [How To Make] канала Forgotten Shine Restoration
Показать
Комментарии отсутствуют
Информация о видео
1 апреля 2021 г. 21:56:44
00:08:41
Другие видео канала
 Genius Woodworking Tips & Hacks That Work Extremely Well ▶3
 How to Make Chicken Plucker / Feather Cleaning Machine at Low Cost
![Scissors Restoration [Decay Stopped – Black Scissors]](https://i.ytimg.com/vi/AtsnQcwibvc/default.jpg) Scissors Restoration [Decay Stopped – Black Scissors]
Scissors Restoration [Decay Stopped – Black Scissors]
 The Ultimate DIY Vacuum Former - Part 1
 How to Make a Larger Vacuum Former | I Like To Make Stuff
 vacuum molding race fenders
 Extremely Rare Lighter Restoration - Soviet Union Era
![Pincers Restoration [Very Rusty Restoration]](https://i.ytimg.com/vi/5xqIKnpfUNE/default.jpg) Pincers Restoration [Very Rusty Restoration]
Pincers Restoration [Very Rusty Restoration]
![Hammer Restoration [Very Rusty Restoration] - Awesome Restorations Remake - Etching Metal](https://i.ytimg.com/vi/okE4S2-d7wQ/default.jpg) Hammer Restoration [Very Rusty Restoration] - Awesome Restorations Remake - Etching Metal
Hammer Restoration [Very Rusty Restoration] - Awesome Restorations Remake - Etching Metal![1900s Door Mortiser [Restoration]](https://i.ytimg.com/vi/183LhfiZcHw/default.jpg) 1900s Door Mortiser [Restoration]
1900s Door Mortiser [Restoration] DIY Vacuum Forming Machine
 Yes, You Can Vacuum Form EVA Foam! (Part 2 Layering)
 How to Make a Homemade Chicken Plucker Out of a Washing Machine.
 1970s Rusty Swivel Vise RESTORATION AND REPAIR
![Cleaver Restoration [Golden Cleaver With Golden Handle]](https://i.ytimg.com/vi/VrGtIesy91E/default.jpg) Cleaver Restoration [Golden Cleaver With Golden Handle]
Cleaver Restoration [Golden Cleaver With Golden Handle]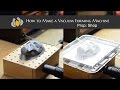 Prop: Shop - How to Make a Vacuum Forming Machine
 Adam Savage's Favorite Tools: Great Budget Vacuum Former!
![Tap Wrench Restoration [Powder Coating And Paint Trick]](https://i.ytimg.com/vi/cwmB61BMSzI/default.jpg) Tap Wrench Restoration [Powder Coating And Paint Trick]
Tap Wrench Restoration [Powder Coating And Paint Trick]