IoT Based Bidirectional Visitor Counter using ESP8266 & MQTT
Free Download PCB design checker: https://www.nextpcb.com/nextdfm.html?code=Htoeletric
Register and get $100 from NextPCB: https://www.nextpcb.com/?code=Htoeletric
....................................................................................................................................................................................................................................
In this project, we will make IoT IR Based Bidirectional Visitor Counter using NodeMCU ESPP8266 & Ubidots MQTT. You can use this project for monitoring the total number of incoming, outgoing, and current visitors online from any part of the world using Ubidots Dashboard. To count the incoming and outcoming visitors, it is better to use an Infrared or IR Sensor. The Visitors data uploads automatically to Ubidots cloud using the NodeMCU ESP8266 WiFi Module.
You can use this NodeMCU Bidirectional Visitor counter in the hall, Shopping mall, office, functions in the entrance gate to count the total number of visitors. The device counts the total number of people entering through the gate & also counts the total number of people leaving through the different gates. And finally, it calculates the total number of current people by subtracting the outgoing visitor from the incoming visitor. When even a single person is found inside the room, the light turns on automatically. When no people are present in the room, the light turns off automatically.
In one of my previous projects, I made the Visitor Counter Project using Arduino. But this time we will send the data to the cloud instead of watching it on OLED Screen. We can make this IoT Visitor Counter using ESP8266 Wifi Module, a pair of IR Sensor, OLED Display, and a Relay Module. Apart from these main components we also need some passive electronic components & PCB Board. The project is simply easy and even a beginner can make it without any difficulty.
Project Details, Code & PCB Gerber File: https://how2electronics.com/iot-bidirectional-visitor-counter-using-espp8266-mqtt/
....................................................................................................................................................................................................................................
Drop a like if you liked this video.
Don't forget to subscribe to our channel for more Electronics projects and tutorials.
Website: https://www.how2electronics.com
Facebook: https://www.facebook.com/electronicsbyalex/
Instagram: https://www.instagram.com/how2electronics/
Видео IoT Based Bidirectional Visitor Counter using ESP8266 & MQTT канала How To Electronics
Показать
Комментарии отсутствуют
Информация о видео
Другие видео канала
 RFID RC522 Based Door Lock Security System using Arduino & Solenoid Lock
 IoT DC Energy/Power Meter using ESP8266 & Blynk (36V, 30A)
 Advanced Mecanum Wheels Robot using Arduino & ESP32 CAM || 4WD Omnidirectional Movement
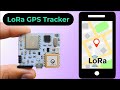 DIY LoRa Based Low Power GPS Tracker | Live Location Tracking in Google Maps
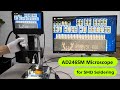 Microscope for SMD Soldering & Biological Observations || Andonstar AD246SM
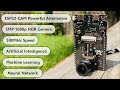 Powerful Alternative to ESP32 CAM | Realtek AMB82-Mini IoT AI Camera Board - Getting Started
 IoT Based Battery Monitoring System + DIY LiPo/Lithium-ion Battery Charger with BMS
 Lucid ONE: AI Planning 7-DOF Robotic Arm Review
 World Smallest Thermal Camera | Infiray P2 PRO Affordable Smartphone Thermal Camera
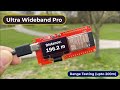 ESP32 UWB Pro | Ultra Wideband Module with Power Amplifier | 200 meters Range
 IoT Based Water Level Control & Monitoring System with ESP8266 & Blynk
 The 20$ Oscilloscope & Function Generator Solution for Cost-Conscious DIYers
 DIY Thermal Imaging Camera using AMG8833 Temperature Sensor with ESP8266 & LCD Display
 ADS1115 16-Bit Analog-to-Digital Converter: In-Depth Tutorial with Arduino, ESP8266 & ESP32
 Smart Soil Moisture & Air Temperature/Humidity Monitoring with LoRaWAN on TTN Server
 Top 10 IoT Projects using Raspberry Pi Pico W with MicroPython Code
 IoT Smart Electricity Energy Meter using ESP32 & Blynk 2.0
 DIY Thermal Camera using AMG8833 Thermal Image Array Temperature Sensor & Raspberry Pi
 DIY 12V to 220V, 300W PWM Inverter using IC SG3525
 High Accuracy Ranging & Localization with ESP32 DW3000 UWB (Ultra Wideband) Module
 Smart Home Controller using DWIN HMI LCD Display & ESP32 (Display BME280 Reading & Control Relays)