Replacing, repairing, refurbishing old dead pool table rubber bumper cushions.
Replacing, repairing, refurbishing old dead pool table rubber bumper cushions.
Several Penguins were harmed or killed during the making of this video. Not by me, but I'm sure somewhere, somehow that it happened. Maybe Fry and Leela did it.
Things I learned:
1. Had no idea bumpers could go "dead", but makes sense now.
2. This replacement process was more difficult for my older table than I anticipated.
Other videos and websites made it seem easy, but the old industrial glue on mine was very hard to remove and clean.
The old cushions on mine were a lot harder to get off than other videos and sites made it seem.
I spent about 30 man hours total on the whole replacements, but with more knowledge and experience guessing it could have been a lot less.
Most of the time spent was cleaning the rails of the old debris and industrial glue.
Lots of sanding and chiseling to get the parts off and cleaned properly.
Had no idea what tools I would use going into this other than a staple gun, so kinda wingin it through each step.
I took a slightly different approach to each step than others I had witnessed and again, just winged it through some.
3. I Didn't know anything about bumpers or types of rubber cushions and thought they were all standard size and shape.
Recommended read up on "pool table rail rubber profile".
If you are not as impatient as I was to get them replaced, you may be able to disassemble and find out exactly what you need to order first.
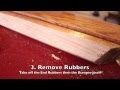
4. There is a top to the rubber cushion as it does not form a perfect triangle, but has a slightly rounded top side.
Mine had some kind of white fabric tape or something on the top side either as a marker or part of the production process.
Again, read up on the rubber cushion profile for more info.
5. The Penguin brand cushion glue got real stringy and tacky quick so it was a little difficult to spread fast without overspill on the rails.
Once the rubber cushions were set in place, they were fairly difficult to adjust so be careful actually applying them to the rails.
Eyeball down them to make sure uniform fit and flush with the top of the rail, etc.
The cushion facings were fairly easy to glue and actually had to wait for the glue to become tacky enough to keep the facings in proper place.
The glue seemed expensive when ordering, but I have no idea about what works best and I'm happy with how it turned out.
Unfortunately I don't have enough experience with the competition to acknowledge any other brands.
6. Always use a new blade on a razor knife when cutting. Makes a world of difference.
7. I didn't record the before and after effects of old/new cushions and regretting it, but this video shows a good comparison:
https://www.youtube.com/watch?v=O7vJNNuAKBc
and his "how to" vid was a good overview too - https://www.youtube.com/watch?v=KnI2q2KvD6g
Thanks Eaglerunner Bill!
8. Thanks to the few other youtube videos on how to replace bumpers. I learned a lot going through this and appreciate all the info.
The only reason I decided to post this is due to not a whole lot of comprehensive vids on this subject.
Видео Replacing, repairing, refurbishing old dead pool table rubber bumper cushions. канала DevilDog Dad
Several Penguins were harmed or killed during the making of this video. Not by me, but I'm sure somewhere, somehow that it happened. Maybe Fry and Leela did it.
Things I learned:
1. Had no idea bumpers could go "dead", but makes sense now.
2. This replacement process was more difficult for my older table than I anticipated.
Other videos and websites made it seem easy, but the old industrial glue on mine was very hard to remove and clean.
The old cushions on mine were a lot harder to get off than other videos and sites made it seem.
I spent about 30 man hours total on the whole replacements, but with more knowledge and experience guessing it could have been a lot less.
Most of the time spent was cleaning the rails of the old debris and industrial glue.
Lots of sanding and chiseling to get the parts off and cleaned properly.
Had no idea what tools I would use going into this other than a staple gun, so kinda wingin it through each step.
I took a slightly different approach to each step than others I had witnessed and again, just winged it through some.
3. I Didn't know anything about bumpers or types of rubber cushions and thought they were all standard size and shape.
Recommended read up on "pool table rail rubber profile".
If you are not as impatient as I was to get them replaced, you may be able to disassemble and find out exactly what you need to order first.
4. There is a top to the rubber cushion as it does not form a perfect triangle, but has a slightly rounded top side.
Mine had some kind of white fabric tape or something on the top side either as a marker or part of the production process.
Again, read up on the rubber cushion profile for more info.
5. The Penguin brand cushion glue got real stringy and tacky quick so it was a little difficult to spread fast without overspill on the rails.
Once the rubber cushions were set in place, they were fairly difficult to adjust so be careful actually applying them to the rails.
Eyeball down them to make sure uniform fit and flush with the top of the rail, etc.
The cushion facings were fairly easy to glue and actually had to wait for the glue to become tacky enough to keep the facings in proper place.
The glue seemed expensive when ordering, but I have no idea about what works best and I'm happy with how it turned out.
Unfortunately I don't have enough experience with the competition to acknowledge any other brands.
6. Always use a new blade on a razor knife when cutting. Makes a world of difference.
7. I didn't record the before and after effects of old/new cushions and regretting it, but this video shows a good comparison:
https://www.youtube.com/watch?v=O7vJNNuAKBc
and his "how to" vid was a good overview too - https://www.youtube.com/watch?v=KnI2q2KvD6g
Thanks Eaglerunner Bill!
8. Thanks to the few other youtube videos on how to replace bumpers. I learned a lot going through this and appreciate all the info.
The only reason I decided to post this is due to not a whole lot of comprehensive vids on this subject.
Видео Replacing, repairing, refurbishing old dead pool table rubber bumper cushions. канала DevilDog Dad
Показать
Комментарии отсутствуют
Информация о видео
Другие видео канала
 Replacing Bumpers on Rails
 How to Replace Your Pool Table Cushion Rubber
 EDISON BILLIARD CUSHION PROFILE TOOL
 How NOT To Pour Table Top Epoxy Resin & How To Fix Uncured Epoxy
 How to Cover and Restore Pool Table Rails
 The Fastest Rail System
 how to re clothe snooker steel cousin border
 How to Tell if You Have BAD Pool Table Cushion Rubber! (and How to Remove it)
 Felting Rails
 Valley Pool Table Recover at Sunset Biliards
 American Heritage-Pool Table Installation Video
 Billiards Table Steel Cushions
 Installing new Simonis 860HR on a set of 7' Diamond Smart Table rails.
 Billardbanden beziehen Anleitung
 How to level a pool table the right way
 52. Changing a Tip - When and how
 How to Install Pool Table Cloth - Home Billiards
 How to Level a Pool Table
 How to Recover a Pool Table (START TO FINISH!)
 Part 1 Replacing Pool Table Rail Cushion/Bumper