Post Beam and Floor Board Installation | Sawmill Shed Build - Episode 4
Post beam and floor board installation is the name of the game today in episode 4 of the sawmill shed build. With much work in previous episodes making the floating shed platform square and level, I finish the job today by adding various width floor boards. I also finish off the last of the 7 vertical posts by standing them up and bracing them in place. I also get ambitious and finish off the two beams at the rear of the sawmill shed.Those beams are special in that they are strengthened with construction adhesive and plywood. Check out some of the little tricks I use throughout the build today to move around heavy beams and tighten up floor board gaps. You'll also notice that every piece of wood that I build with has come directly from my Woodland Mills HM130 without much drying time in between. As a result, all wood you see me building with is considered "green" and has a fairly high moisture content. The wood will shrink and so check out how I only put one nail in the center of each floor board to prevent cracking as the board shrinks. As I'm building today I"ll also point out somethings that I do to keep the posts firmly seated where they should be since this sawmill shed doesn't have a concrete foundation to secure the posts to. Also check out the tip I give for making your floor boards firmly seated on a joist all the way around protrusions like posts that stick up through the floor. Glad everyone is here and surely before long I'll be completing this sawmill shed build as the snow is knocking on my door. Here we go!
Видео Post Beam and Floor Board Installation | Sawmill Shed Build - Episode 4 канала Sawing with Sandy
Видео Post Beam and Floor Board Installation | Sawmill Shed Build - Episode 4 канала Sawing with Sandy
Показать
Комментарии отсутствуют
Информация о видео
Другие видео канала
 How I Lifted a Heavy Beam for my Sawmill Shed | Sawmill Shed Build - Episode 6
 Cutting Logs and Breaking Blades | The Ups and Downs of Sawing Logs
 Sawing Logs Covered in Ice
 Shrinking Will Damage Deck Boards | Building with Green Lumber
 Chainsaw Digs 2 Foot Hole in the Dirt (No Joke) | I'd Rather Be Resourceful Than Smart
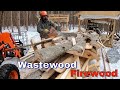 Easiest Way to Handle Waste Wood | Processing Sawmill Waste with a Chainsaw
 How Long Does it Take to Cut My Own Lumber
 Regrets I Have About My Sawmill Setup
 Standing up heavy posts and strengthening floor | Sawmill Shed Build - Episode 3
 Building a Sawmill Shelter without a Foundation | Sawmill Shed Build - Episode 1
 Don't Laugh, It worked! Snow, Ice and Mud while Skidding and Loading Logs with my Tractor
 Making Firewood Gathering Easier
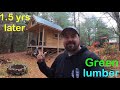 Tiny House Built with Green Lumber and Floating Foundation
 Making Lap Siding with Woodland Mills Lap Siding Attachment
 How I Made a Sawmill Offcut Rack | Sawmill Shed Build - Episode 16
 Cutting Your Own Lumber for Beginners | Getting Started with a Portable Sawmill
 Putting on a Shed Roof When Scared of Heights | One Man Metal Roof Install | Equip. Shed Build- Ep 6
 Building a Shed Roof by Myself | Equipment Shed Build - Ep. 5
 Woodland Mills Lap Siding Attachment Installation