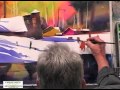
Stretching Paper Tutorial : Cheap Joe's Watercolor
http://www.cheapjoes.com -- Welcome to Cheap Joe's Test Studio!
I'm told from time to time that people - artists - would like to know how to stretch paper.
I do a lot of paintings on stretched paper and I enjoy doing it that way a lot.
But people tell me they don't know how to do it, or it takes too long. I'm going to show y ou the easiest way in the world to do this.
The first thing you want to do is do your drawing on dry paper. You can draw fairly heavily on dry paper, be sure that you get enough where you can tell what you have in here.
Once you've completed your drawing you will soak this paper. The thing to remember is you can't get too much water on it. You can put it in the bathtub if you want. There's a little color in this water so I can see where I'm getting it nice and wet. It must be thoroughly, thoroughly soaked. If it isn't this won't work.
It takes about 10 - 15 minutes to get the paper wet enough.
Stretching really is a misnomer because there really isn't any stretching involved.
Once the paper has soaked thoroughly, you'll see where some bubbles may rise in the paper. With a nice wet brush, you lift the paper up just past the bubble and wet the backing board down. Then lay the paper back down like this. This will help the paper to stay flat.
The next step - and this will sound really funny - but we need to take the water away from the paper.
Lay your paper towels over the paper in strips, adding layers, and with flat hands, apply pressure and rub the paper down. Then I lift the paper towels off (be sure to hang your paper towels back up because you can use them over and over again!) and there is my paper "stretched" laying on the gator board which later we will staple.
Next I want to show you how easy it is to apply color. Since we "stretched" the paper I have an enormous amount of time to work without getting these runs and rings in it. If you start on dry paper you'll have these issues. If you start on stretched paper you usually don't get that.
I've activated four different colors here on my palette. I've activated Raw Sienna, Lucky Penny, Sap Green and Ultramarine Blue.
I'm going to pick those up one at a time with this brush and just simply pick up another color without stirring. When I come in here with the brush I want you to notice how the edges are staying hard even though the paper is really damp.
Isn't that fun? It's so easy because the paper will allow me to work for a very long time without any runs or rings. I can soften these edges up here and let it float up into the sky.
I'll repeat the same process over here. The point is not what I'm doing but how well it's working. The color will stay right where you put it, you can keep a hard edge, and you don't have to worry about it running away from you.
I've laid down some of this color and allowed it to run together and form some of these beautiful colors. This is rough paper by the way, Fabriano 140 lb. watercolor paper.
I can just keep working and working on this. Once it begins to dry it will curl up on the edge. At that point we will take a stapler gun and staple it down. We'll leave it on that gatorboard until it's dry which usually takes a couple of days.
I appreciate your business and I wish you Happy Painting!
Видео Stretching Paper Tutorial : Cheap Joe's Watercolor канала Cheap Joe's Art Stuff
Показать
Комментарии отсутствуют
Информация о видео
Другие видео канала
 Painting a Country Scene Pt3 with Watercolor Artist Frank Francese
 Best Daniel Smith Watercolors! My Picks :)
 How to Stretch Watercolor Paper PERFECTLY!
 Cheap Joe's 2 Minute Art Tips - It's Different Every Single Time
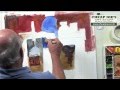 "Cheap" Joe Miller-Non Traditional Watercolor
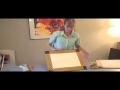 Linda Aman - How to prepare watercolor paper
 Watercolour Fundamentals - Guidance and Demonstration with Andrew Pitt
 Stretching Watercolor Paper – 6 Frequently Asked Questions
 fresh and simple watercolor cards
 WATERCOLOUR PAPER: What does stretching paper mean (and should you do it?) Are There ALTERNATIVES?
 Cheap Art Tips from Cheap Joe - Joe's All Time Favorite Palette
 Cheap Joe's 2 Minute Art Tip(Extended) - Julies Take on Colored Pencil
 4 Easy Steps to Watercolor Control
 Linda Baker Watercolor Techniques- The Pouring Process-Part 1
 Cheap Joe's 2 Minute Art Tips - Schmincke's Super Granulating Watercolors
 How to Stretch Watercolour Paper THE EASY WAY!
 Cheap Joe's 2 Minute Art Tips - Julie’s Favorite Art Stuff...Nickel Azo Yellow
 Watercolor Basics ~ How Much Water To Use :)
 Cheap Joe's 2 Minute Art Tips - You Heard of Lutradur?