How To Install Ring Doorbell 4
Ring Doorbell 4: https://amzn.to/3baPiC4
Favorite Smart Home Devices: https://www.amazon.com/shop/onehoursmarthome
In this video we teach you how to install the Ring Video Doorbell 4. Which is a New Ring Doorbell 4 launched in May of 2021. The new Ring Doorbell features better resolution and faster response times than previous generations of the Ring Doorbell like the Ring 2 or Ring 3. The Ring 4 Doorbell allows the option to either hard wire the doorbell or use it wirelessly with the provided rechargeable battery pack. This means even if you don't have an existing doorbell or any existing doorbell wiring you can use the Ring Doorbell 4 as a smart wifi video doorbell.
Another advantage of the Ring Doorbell 4 is that it can work with your existing hardwired doorbell chime or can connect via wifi network to the Remote Ring Doorbell Chimes: https://amzn.to/3baK6hE which can be placed at any outlet in your home.
How To Install The New Ring Doorbell 4:
1. Turn off the power to your existing doorbell at the circuit breaker. Remove the cover plate on the bottom of the Ring Doorbell 4 and remove the battery to charge it up while completing other parts of Ring Doorbell 4 install.
2. Confirm the power is off.
3. Remove the existing doorbell and wiring.
4. Decide if you will install the Ring Doorbell with the tilt wedge or if you will install it flat.
5. Secure the wires to the Ring Video Doorbell 4 terminals on the back of the device.
6. Secure the Ring Doorbell 4 with the provided screws to the door frame.
7. Insert the rechargeable battery into the device.
8. Turn the power back on at the circuit breaker for your Ring Doorbell 4.
9. Open the Ring App and create a username and password if you have not done so already and login to the Ring App.
10. Once logged in click "add a device" in the menu and follow the Ring Doorbell 4 setup instructions. Scan the QR code on the side of the Ring Video Doorbell 4 to start the set up.
11. Follow the instructions and when the setup is complete you can then reinstall the cover plate for the Ring Doorbell. Secure the cover plate with the proper short screw as shown in the instructions.
12. Congratulations your Ring Video Doorbell 4 Installation is complete.
***Join the email list: http://eepurl.com/0KDob ***
Our Website: https://www.onehoursmarthome.com/
Podcast: https://www.onehoursmarthome.com/podcasts
DID THIS HELP? You can support us: https://www.buymeacoffee.com/OneSmartHome
Videos produced by One Hour Smart Home are provided for informational purposes only. All material provided within this website or youtube channel is for informational, educational, & entertainment purposes only. Some of these projects, materials, and techniques may not be appropriate for all ages or skill levels. Please use use all safety precautions when performing a DIY project. One Hour Smart Home does not make any claims of the safety of the projects, techniques, or resources listed on this site and will not take responsibility of what you do with the information provided by this site or youtube channels. Viewers must be aware by doing projects on their homes they are doing it at their own risk and One Hour Smart Home cannot be held liable if they cause any damage to their homes, themselves or others. With different codes around the world and constantly changing standards, regulations and rules, it is the sole responsibility of the viewer to educate themselves on their local requirements and codes before undertaking any sort of project. Hire competent professionals when needed to perform a task which you are not or do not feel qualified for. Use at your own risk. Links included may be affiliate links which help support this channel.
Видео How To Install Ring Doorbell 4 канала One Hour Smart Home
Показать
Комментарии отсутствуют
Информация о видео
Другие видео канала
 How To Set Up The New 2023 Echo Show 5 3rd Gen
 New 2023 Echo Buds Review
 What Is The New Echo POP? #alexa #smarthome #echopop #ai
 How To Set Up The New Echo Pop
 How To Set Up New Ring Indoor Cam Gen 2 With Privacy Shutter
 How To Install Ring Battery Doorbell Plus
 Sensi Touch 2 Smart Thermostat Review
 How To Install Sensi Touch 2 Smart Thermostat (New In 2023!)
 Sensi Lite Smart Thermostat Review (New 2023 Model!)
 How To Replace Ring Alarm Motion Sensor Batteries (2nd Generation)
 How To Install Sensi Lite Smart Thermostat (Launched Spring 2023!)
 How To Replace Ring Alarm Contact Sensor Batteries (2nd Generation)
 How To Set Up Ring Alarm Motion Detector
 How To Set Up Ring Alarm Contact Sensor
 How To Set Up Ring Alarm Security System
 Sensi Touch Wifi Smart Thermostat Review
 How to Set Up Lutron Caseta Wireless Range Extender & Repeater
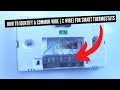 How To Identify A Thermostat Common Wire (C Wire) & What It Does For Smart Thermostats
 How To Set Up Ring Alarm Range Extender
 How To Install Sensi Touch Smart Thermostat (ST75)
 How To Set Up Lutron Caseta Motion Sensor & Occupancy Sensor