emec KPLUS Dosing Pump - how to Change Mode, Prime and read the Scale
There are three vital elements to know about our emec KPLUS chemical dosing pumps. How to change the mode, how to prime the pump and how to read the scale on the small dial. Please watch to learn about these 3 elements to succesfully operate the emec KPLUS dosing pump.
Other topics that may interest you:
- Changing mode on emec KMF Pumps: https://youtu.be/dj3eiV6GqxE
- Different valve configurations of emec chemical dosing pumps: https://youtu.be/AZTmyaKSaQ8
Hi, I'm Larry from CWC. Today I'm going to explain three aspects of our emec KPLUS pump to you. I'm going to explain how to prime the pump, how to change the mode on the pump and also how to read the scale on the small dial.
So firstly, to prime the pump, the pump on the left-hand side is currently in constant mode and if I turned the dial up, you can hear the pump is operating. If I want to prime the pump, I press the power button, which puts it into standby mode. You can see the LEDs flashing. Then I'll hold the button down for four seconds (the same button). When the pump starts dosing, as you can see now it's actually stroking at maximum capacity. It will run like that for 30 seconds until the pump primes. However, you can interrupt it by pressing the button again, which puts it back into standby mode. And then to put it back into operation mode, press it again to turn it on. The LED goes on solid and the pump carries on as per normal.
I'm now going to explain how to change the mode on the pump from constant mode to multiply mode. The first step is to press the power button once which puts the pump into standby. We then hold the programming button or the settings button down constantly until all the LEDs flash. What you do then, is press that one more time, and then you can scroll in order to move the LED to another position. So the power button also doubles up as a scroll button and what one does, is you move it to the right position. It's now on multiply 1-10. And what we do is we press these settings or programming buttons, which saves that setting, and then what we do is we put the bump back on by pressing the power button, which takes it out of standby. And as you can see now that the LED is on solid in multiply 1-10, and then when the pump receives an external pulse, it will stroke and start pumping.
The third thing I want to explain is the scale on the small dial. As you can see, there are two scales. There is zero to a hundred percent, which is in green, but that only pertains to constant mode because you can see the constant mode is in green, whereas all the other modes are in white so when you're actually in one of the white modes, such as the one we are in now, which is multiply 1-10, the actual dial serves as a factor rather than a percentage. So if I turn the dial to position six in white, that means that it's multiplying by six, which means that one pulse in will give you six strokes out.
If I turn it to say number two, one pulse in will give you two strokes out. And that explains how to change the mode in the pump. The other modes that we have are multiply. We have multiply 1-10, we also have dividing modes, which means that you have to receive a number of pulses before you give one stroke.
The pump can also dose proportional to an external mA signal, which can be 4-20 mA or 0-20 mA and of course in a constant mode. One more led indication on the pump is level, which is a red light, which comes up if the chemical drum runs out a chemical and the float on the foot valve drops down.
Видео emec KPLUS Dosing Pump - how to Change Mode, Prime and read the Scale канала Convergent Water Controls (CWC)
Показать
Комментарии отсутствуют
Информация о видео
2 марта 2021 г. 6:24:19
00:03:25
Другие видео канала
 Quick Summary of DICE Smart Chemical Dosing Module
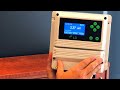 What to do when a Warning Message is displayed on an emec Controller
 How to Calibrate a pH controller with pH buffer Solutions
 Latest Version of Corrosion Coupon Racks compliant to ASTM D2688
 CWC New Website May 2020
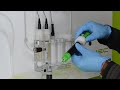 1 Do It Right SCL Probe Commissioning
 Understanding the various Valve Configurations on emec Chemical Dosing Pumps
 Introducing the DICE Smart Chemical Dosing Module - Features & Benefits
 How to Change the Mode on the EMEC KMF Dosing Pump
 Changing Diaphragm in EMEC PRIUS Pump
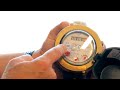 How to read the Pulse Rate on an Arad Pulse Water Meter
 How to Calibrate Conductivity in the DIGICHEM Plus+ Controller
 Assembling ARGAL ASTRAevo DDE Air Operated Double Diaphragm pump
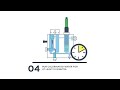 SCL3S SVCL3S AMPEROMETRIC CELL CALIBRATING
 ERMES Dashboard menu User
 EMEC pH Probe Video Tutorial
 DICE™ DS DM How to Install a Pulsation Dampener on a DICE™ Module
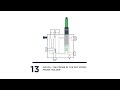 SCL3S SVCL3S AMPEROMETRIC CELL PREPARATION
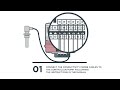 EMEC Conductivity Probe Video Tutorial
 Stenner Head & Tube Replacement