How to Assemble Deck Railings with Wickes
Deck railings come in a variety of attractive styles and are essential if your deck ins't at ground level. Learn how to assemble railings for your deck with this step by step guide from our Wickes experts.
Subscribe to the Wickes YouTube channel here: http://po.st/YijIE1
For more Wickes garden and landscaping videos click here: http://po.st/jAXyHE
Deck Posts
1. Cut deck posts to whatever size you like, as long as the hand rails can attach to them at at least 900mm from the deck. You can buy your posts pre-notched but if you need to extend your notch further, you can do this using a hand saw or a circular saw.
2. Drill pilot holes before fixing the deck posts to the bearer using two 130mm exterior coach bolts per post and tighten with a socket set.
3. Measure and mark the top of the deck and the fascia where the post will be.
3. Remove the fascia and saw off the section you’ve marked out using a handsaw.
4. Use a jigsaw to remove the top section, put the post into position and check that it’s flush to the decking.
5. Secure the post as before and reattach the fascia.
Assembling the Railing
1. Measure the gap between the posts so you can cut the top and bottom rails to fit between them.
2. Measure 81mm from the end of the top rail and mark a line (this line will be where you place your first spindle). Repeat this step the whole way along the top railing until you've marked out where all your spindles will be.
3. Repeat the above for the bottom railing with the addition of drilling a 3mm pilot hole through each mark.
4. Attach the spindles to the bottom rail using 76mm deck screws.
5. Attach the top rail to the spindle using 64mm galvanised finished nail.
Fitting the Railing
1. Using L brackets, place the long side centrally into the fillet slot underside of the bottom rail (check the L brackets do not stick out past the end of the rail before fixing the bracket to the bottom rail).
2. Mark on your deck post where you want the top railing to be, making sure it’s at least 900mm from the deck.
3. Centrally place the short side of the L bracket on to the mark and fix the bracket on to each deck post using two 25mm screws.
4. Place the railing assembly on the fixed post L brackets and secure to the underside of the top rail.
5. Centrally locate the bottom rail on the deck post before fixing the bottom rail L bracket using two 25mm screws.
6. Measure and mark 25mm from the end of the rail and mark on each side of the top and bottom rails.
7. Drill a countersunk 3mm pilot hole approximately 30 degrees through the rails and into the post.
8. Finally, use two 50mm screws to secure the rail to the post.
Shop Wickes railing kits and deck panels here: http://po.st/yUs05U
Shop power tools at Wickes here: http://po.st/HykIHP
Learn how to build a raised deck on YouTube here: http://po.st/WT2gkw
For more information and advice on gardens and landscaping visit the Wickes website here: http://www.wickes.co.uk/garden
Subscribe to the Wickes YouTube channel here: http://bit.ly/1WHJIIr
In addition to our video, we recommend you read our 'How To Guide - How to create storage space'. Use this guide to find out how to choose and calculate your materials, tools and safety equipment. http://www.wickes.co.uk/how-to-guides...
For more tips and general advice on how to do it yourself from Wickes, you can visit;
Wickes Website: http://www.wickes.co.uk/
Wickes Facebook: https://www.facebook.com/Wickes.co.uk
Wickes Twitter: https://twitter.com/Wickes
Wickes Google+: https://plus.google.com/1153898122995...
Wickes YouTube channel: https://www.youtube.com/user/wickesvideo
Видео How to Assemble Deck Railings with Wickes канала Wickes
Показать
Комментарии отсутствуют
Информация о видео
Другие видео канала
 How to build an economical deck railing out of wood
 FTF #54 How To Install Handrail Posts, Quick And Easy
 How to Install Deck Spindles from S&L Spindles
 How to Lay Decking with Wickes
 DIY Deck Part 12 - Attaching Railing & Balusters
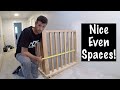 How to get EVENLY SPACED Spindles!
 Options for Fastening Deck Guardrails
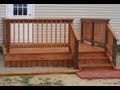 How to Build an 8 x10 Deck for Beginners
 Installing Wood Railings and Stairs on a Deck
 Best Deck Railing Ideas & Designs //Awesome Balcony Railing Design Ideas To Beautify Your Exterior
 Building A Ground Level DECK - (Part 1)
 How To Replace Deck Handrails (Easy Tips For Replacing Deck/Porch Handrails + Railings!)
 Building the Porch Rail
 How to Build a Porch Rail | This Old House
 DIY Deck Railing - Under 25 dollars!
 How to Install Handrail and Stair Spindles (Staircase Renovation Ep 4)
 DIY Deck Rebuild, Complete Process From Deck Evaluation to Installing Cable Railing.
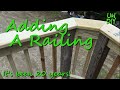 Adding a railing to a deck - DIY Tutorial
 Simple Porch Railing Build