GIMP Cartoon Effect Tutorial | Photoshop Alternative | #44
GIMP Tutorial #44
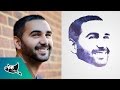
Hi Everyone, In this video I'm gonna show you How to create a Cartoon Version of Yourself or Someone using the Open Source Software called GNU Image Manipulation Program. I already posted a video about this topic.
How to create a raster Cartoon - .https://www.youtube.com/watch?v=4FfVsQxbWTg
So this video is the second method to create a Cartoon Version.
Note:
GIMP is the Alternative for Photoshop. Hence you can try this same method in Photoshop as well.
Steps:
1. Open an Image
2. Select the Path tool
3. Create a New Transparent Layer and Name it as Cartoon Layer
4. Draw the Path Around the Subject
5. Make Path into Selection
6. Fill the Selection with Subject's Skin Tone Color
7. Then Select the Facial Features and Shirts and Fill it with their Respective Colors using Bucket Fill Tool
8. Move the Source Layer to the top of the Cartoon Layer
9. Add Alpha Channel to the Source layer
10. Make its Mode to Overlay
11. Reduce its Opacity to 50
12. Create a Background
That's It. This is Cool Method to Create the Cartoonify Yourself or Someone using the Photoshop's Alternative GIMP.
Thanks for Watching. Thumbs up, Share with your Photo Editing Freaks.
Subscribe f&D for more and Awesome GIMP Tutorials
Also Watch:
How to Draw in GIMP: https://www.youtube.com/watch?v=8PmYeNUwVjk
Subscribe us: www.youtube.com/fDFerozDaniel
Видео GIMP Cartoon Effect Tutorial | Photoshop Alternative | #44 канала f&D
Показать
Комментарии отсутствуют
Информация о видео
Другие видео канала
 GIMP Tutorial: Transform Face into Galaxy Silhouette
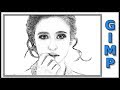 Gimp: How to change a photo into a pencil drawing.
 Kodak Black How To Cartoon Yourself With Mouse Tutorial! - Step By Step ( ADOBE ILLUSTRATOR )
 Inkscape Tutorial: Vector Image Trace
 Transforme ta photo en dessin avec GIMP / A la souris - sans tablette
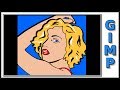 Gimp: Pop Art Portrait
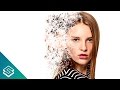 GIMP Tutorial: Disintegration Effect
 GIMP Tutorial: Slice Effect
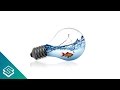 GIMP for Beginners: Light Bulb Fish Bowl Tutorial
 Cartoon Effect in Gimp
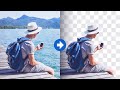 5 Ways To Remove A Background with GIMP
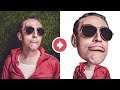 Create Caricatures with GIMP | Tutorial
 How to use Gimp like an Artist (How to draw in Gimp)
 GIMP Tutorial: Put Someone's Face on an Object
 GIMP 2.10 Basics: Using the Foreground Select Tool
 GIMP 2.10 Tutorial: Repair and Restore Old Photos with Severe Damage
 Gimp: Pop Out Effect
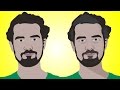 GIMP: Creating Shadows and Highlights for Cartoon | Photoshop Alternative | #45
 Top 5 Text Effects in GIMP