Motorola Droid Turbo 2 Screen Repair, Teardown and Reassemble - Fixez.com
https://www.fixez.com presents the official Motorola Droid Turbo 2 Screen Repair, Teardown and Reassemble Guide. This step-by-step repair video will show you how to replace a broken or damaged Droid Turbo 2 display assembly, and also how to completely teardown and reassemble your Motorola phone. Visit Fixez.com for all of the DIY Motorola Droid Turbo 2 replacement screens, parts and tools you need to quickly, and affordably, fix your device! https://www.fixez.com/store/motorola/motorola-droid-turbo-2
If you need your Droid Turbo 2 repaired ASAP instead- we have you covered there too. Contact one of our skilled technicians at 866-233-6460 or support@fixez.com and they will fix your Motorola phone for you. They are available Monday to Friday, 9am to 5pm PST.
Subscribe to our YouTube Channel for additional DIY smartphone and tablet teardown and repair videos! https://www.youtube.com/channel/UCDJrZCUtdJQaJq0akRCt3Ng
Like us on Facebook: https://www.facebook.com/fixez.com
Follow us on Twitter: https://twitter.com/fixezdotcom
Motorola Droid Turbo 2 Screen Repair, Teardown and Reassemble Guide Video Transcription:
Warning:
You are performing this repair at your own risk
We claim no responsibility for any damages that might occur
The DIY Motorola Droid Turbo 2 repair tools used in this video can be found here: https://www.fixez.com/categories/repair-tools
Step 1
Power down your Droid Turbo 2 smartphone.
Step 2 (Motorola Droid Turbo 2 SIM Card and microSD Card Tray)
Remove the SIM card and microSD card tray.
Step 3 (Motorola Droid Turbo 2 Back Cover)
Use the heat gun to warm up the adhesive securing the Droid Turbo 2 rear cover to the midframe.
With the precision knife, carefully create separation and insert a plastic triangle opening tool to start slicing through the adhesive.
Take your time and apply additional heat as needed. The adhesive securing the cover is relatively mild, once the pick sneaks into the seam, the cover can be peeled up.
Step 4 (Motorola Droid Turbo 2 Midframe)
Remove the following 17 T4 Torx screws.
Use the tweezers to remove the 2 plastic covers and then detach the connectors underneath.
You can now easily separate the Droid Turbo 2 midframe.
Step 5 (Motorola Droid Turbo Power & Volume Buttons, Headphone Jack, Vibrator, and LED Flash Cable and Microphone)
Remove the physical power and volume buttons from the side of the midframe.
Pry the headphone jack up and out of the chassis.
Remove the Droid Turbo 2 vibrator.
Peel up the piece of Kapton tape, and then release the ZIF connector.
Carefully peel up the Droid Turbo 2 dual-LED flash cable and microphone.
Step 6 (Motorola Droid Turbo 2 Loudspeaker, Inductive Charging Coil, Rear Camera Lens and Flash Bezel, and LED Flash)
Use the spudger to pry the Droid Turbo 2 loudspeaker up from the plastic midframe.
Remove the inductive charging coil.
Turn the midframe over and remove the Motorola Droid Turbo 2 rear camera lens and flash bezel.
Utilizing the tweezers, remove the dual-LED flash.
Step 7 (Motorola Droid Turbo 2 Front-Facing Camera and Earpiece Speaker)
Peel up the black tape.
Remove the following 2 T4 Torx screws, and then the bracket.
Disconnect the Droid Turbo 2 battery from the motherboard.
Use the spudger to detach and remove the 5 MP Droid Turbo 2 front-facing selfie camera.
Utilizing the tweezers, pry up the earpiece speaker.
Step 8 (Motorola Droid Turbo 2 Motherboard)
Disconnect the bevy of cables from the motherboard.
With the cables detached, carefully free the Motorola Droid Turbo 2 motherboard from the display assembly.
Step 9 (Motorola Droid Turbo 2 IR Sensor Cable and Rear-Facing Camera)
Release the ZIF connector and remove the IR sensor cable.
Peel up the Kapton tape and release the ZIF connector.
Easily pluck out the 21 MP Motorola Droid Turbo 2 rear-facing camera.
Step 10 (Motorola Droid Turbo 2 Battery)
With a little spudgering the 3760 milliampere-hour (mAh) Droid Turbo 2 lithium-ion battery can be removed.
Step 11 (Motorola Droid Turbo 2 Power and Volume Buttons Flex Cable)
Carefully peel up and remove the Droid Turbo 2 power and volume buttons flex cable.
Step 12 (Motorola Droid Turbo 2 LCD Screen and Digitizer Assembly)
Peel up the display assembly cable, it is secured to the frame with relatively mild adhesive.
Separate the plastic bezel from the frame.
Use the heat gun to warm up the adhesive securing the Motorola Droid Turbo 2 LCD screen and digitizer assembly to the front frame.
With a triangle opening tool, work around the Droid Turbo 2 display slicing through the adhesive.
Take your time and apply additional heat as needed.
Once you have sliced through the adhesive, be mindful of the ribbon cable when decoupling the Droid Turbo 2 display assembly from the frame.
* To reassemble your device, follow the steps in reverse order.
Видео Motorola Droid Turbo 2 Screen Repair, Teardown and Reassemble - Fixez.com канала Fixez.com
Показать
Комментарии отсутствуют
Информация о видео
Другие видео канала
 Droid Turbo 2 Teardown - Screen Repair, Battery Replacement COMPLETE
 Motorola Droid Turbo 2 Take Apart Repair Guide - RepairsUniverse
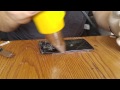 Droid Turbo XT1254 Disassembly & LCD Replacement
 Motorola Droid Turbo 2 Data Recovery With No Screen
 how to change charging port on android mobile1
 Motorola turbo 2 disassembly , power on problem
 How to replace LCD Screen for Motorola Droid Turbo 2 XT1585
 Motorola Droid Turbo Screen Fix, Battery Replacement Video
 Samsung Galaxy Note 5 Screen Repair, Charging port fix, Battery Replacement video
 Droid Maxx Screen Replacement From Start To Finish.
 Motorola Droid Turbo 2 Battery Repair Guide - Fixez.com
 8 Awesome Smartphone Life Hacks
 Motorola Droid Turbo 2 Battery Repair & Replacement Guide - RepairsUniverse
 Samsung Galaxy J7 (2016) Screen Repair, Teardown and Reassemble - Fixez.com
 iPhone X Battery Repair Guide - Fixez.com
 iPhone 7 Charging Port Lightning Replacement Repair How To Change
 Samsung A11 Glass, Screen, LCD, Digitizer Replacement Repair | SM-A115 SM-A115F, SM-A115M, SM-A115U
 Motorola Moto Z Battery replacement
 Droid Turbo 2 Diagnostic and Fix Won't Charge