Resin Tip of the Day - Applying Resin to a Curved Surface
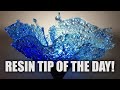
Today's Resin Tip of the Day is on how to apply the resin to a curved surface.
As you know resin starts life in liquid form and so is great for pouring over art and creating fluid art. When it comes to coating a curved or uneven surface, its self-levelling properties makes it a challenge.
So how do you apply the resin to a curved surface?
If you are applying the resin to a tumbler, that is fine because you can buy turning devices to continually turn the cup until the resin cures. If like me, you want to apply the resin to a curved lampshade, it is not as easy.
To combat the resin running straight off, you have to wait until the resin has cured/thick enough before pouring. So in this video, I will show you how I prepare the resin for pouring and what I do to not only prevent it from running off but how I create texture in the process.
✅ Full-length video tutorial: https://bit.ly/resinrippleeffect
For more in-depth video tutorials, join my members’ only club, Sue’s Creative Circle (https;//courses.suefindlaydesigns.com.au). By joining Sue’s Creative Circle, you get access to not only my exclusive videos, but you will also be able to download printable resources to help you on your resin journey.
Products used in this video:
• IKEA NOT lamp: https://amzn.to/2UBiJWc
• Le Rez Transparent Liquid Pigment - True Blue: https://bit.ly/lerezliquid
• Cling Wrap or Plastic
📚 Books
The Essential Beginner’s Guide to Resin Art Techniques.
eBook: http://bit.ly/resinguide
Paperback: https://amzn.to/2XEmqxn (US) | https://amzn.to/2NMKAkY (UK)
My Goal Setting and Action Planner for Artists.
eBook: http://bit.ly/suesgoalplanner
Paperback: https://amzn.to/3bb8gXN (US) | https://amzn.to/31vg3vg (UK)
*Sales from my books go towards funding my YouTube resin tutorials.
Thank you for your support.
If you would like to find out what is going on before everyone else, then please sign up to my newsletter: http://bit.ly/SueFindlayNews
Other Handy Links:
✅ Sue's Creative Circle: https://courses.suefindlaydesigns.com.au
✅ Website: https://suefindlaydesigns.com.au
✅ Resin Blog: https://suefindlaydesigns.com.au/blog-2/
✅ Facebook: https://www.facebook.com/suefindlaydesigns/
✅ Facebook Group: https://www.facebook.com/groups/382098942273408/
✅ Instagram: https://www.instagram.com/suefinart/
✅ Pinterest: https://www.pinterest.com.au/Suefinart/
✅ My other YouTube Channel: https://www.youtube.com/channel/UCvaXBNVp_TrW6HqeARV1nbw
I hope you enjoyed this video.
Видео Resin Tip of the Day - Applying Resin to a Curved Surface канала Sue Findlay
Показать
Комментарии отсутствуют
Информация о видео
Другие видео канала
 Resin Tip of the Day - Manipulating Resin into Shape
 DIY Fire Glass Geode Coasters - teaching all the information needed to create your own resin geodes
 #1104 OMG It Worked! I Poured Resin Into A Silver Placemat To Make A Gorgeous Huge Bowl
 Create Great Resin Effects using Aluminium Foil
 #478 My SECRET RECIPES REVEALED - Cell Activator, Pouring Medium and Base
 How to bend curing resin into a wave shape.
 28 COLORFUL CRAFTS FROM EPOXY RESIN
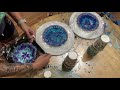 How to shape resin into objects
 #1096 Beautiful Effects In These Resin 3D Flowers With Gold Details
 How to bend curing resin into a curve shape
 Make a Beautiful Resin Lamp Tutorial
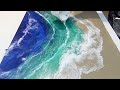 Easy Resin Beach Art - How to Create Cells.
 A Burning CANDLE in Epoxy Resin. DIY a Simple Way / RESIN ART
 ORANGE BLOOM Flower RESIN Coasters *3 in 1* (3 different techniques)~ HOW TO~
 Ocean Inspired Freeform Epoxy Resin Bowls
 How to Make a RESIN COASTER - GREETINGS CARD!
 Epoxy Resin Art with 2 Techniques! | Swipe and Silicone oil! | ProMarine | Stone Coat Quick Coat
 Upcycling an IKEA lamp by giving it a new crushed glass and resin shade.
 Finding the right time to move resin