How to film a KNIFE THROW effect! (After Effects Tutorial)
►► Watch my FREE WEBINAR here: My Top 10 Tips for making your passion project on a budget https://www.diymoviemaking.com/pl/2147593183
►► Check out my courses and learn how to make your best film on a budget at https://www.diymoviemaking.com/
🔥 Instagram: @diy_moviemaking
🔥 Facebook: @diymoviemaking
Steve Ramsden here with DIY Moviemaking and this week we are making a dangerous-looking knife throw - like in an action movie - using visual effects!
So in our scene, a character throws a knife and very narrowly misses someone else and it hits the wall. Obviously this would be very dangerous and difficult to do for real, so instead I’m going to show you how to create it using visual effects - ne shot with the bad guy throwing the knife, the camera does a fast whip pan, and then we see it narrowly missing the good guy and hitting the wall near his hand.
So my plan was to shoot the shot without the knife and work out a way of adding it in later. Using VFX for this shot is not only far safer - because you should never use real weapons in your film without a professional armourer - but the best thing is you can decide exactly where the knife will land on the wall in advance, and you can make it look like a real knife comes as close to your actors as you want.
We picked a mark on the wall for the point where the knife hits, which is basically where my hand is until is moves out of the way just in time.
So to get this shot, basically all you’ve got to do is time a ‘whip pan’ so that when the first character pretends to throw the knife, the camera moves quickly to the other character, who moves out of the way just in time. The camera move took a few tries of course, and we simply kept doing it until it got better and better.
Once we got one that we thought looked pretty good, the only other thing we needed to film was the knife. Now some filmmakers would create a CGI knife for this, but if you’re on a low budget there’s actually no need to do that, we can film the real knife in all the positions we want it to move in, and then chop it out and combine it with the other shot. So, for this I taped the knife to a piece of cardboard and then basically got a reference shot, where I slowly walked through the positions of where I wanted the knife to move, and rotated the cardboard as I went. The best thing about this is the perspective and all the reflections are correct and match the real location. You’re not going to have to work hard to make the knife look like it was there on the day - because it was, it just wasn’t being thrown.
Finally we filmed a couple of extra shots to set up the scene, showing the bad guy cornering the good guy. And most importantly, we got one shot of the bad guy raising the real knife, as if preparing to throw it. This will make the viewer’s brain think a real knife has been thrown, because we’ve just seen one.
So if we head into After Effects, first we’re going to import our shot with no knife, and our shot with the knife, and put the shot with the knife on top. Now we need to speed up this knife movement, so for this we can right click and select Enable Time Remapping. Now we can drop a keyframe at the start and one at the end, and then move the one at the end closer to the start. This will speed up the shot and you can find a speed that works by turning the opacity down halfway so you can see the other shot underneath. I actually exported this speeded-up version of the knife shot at this point to use instead of the original, just to make things simpler.
Now we need to cut out the knife from its background. For this you can use the Pen tool to draw a mask around the first frame of the knife shot. If you change the mask setting to ‘None’ this will make it easier. Then by adding keyframes, you can adjust this mask for the other frames. Then change the mask back to ‘Add’, and you can see the result - the knife is completely cut out from the speeded-up shot.
Another way of cutting out the knife would be to use the Roto brush, where the program tries to cut out a moving shape automatically, but I didn’t trust it to get the knife shape right, so I used the masking method. And another method would have been to use a green or blue screen behind the knife and try removing this using Keylight, but I didn’t want the hassle of a load of green or blue reflections all over the shiny knife, so again this is why I chose the masking method.
Now we can change the position of the knife - and line it up to start in the hand of the bad guy character, and end in the correct place which is our mark on the wall. Tick ‘Motion Blur’ on the knife level or add the ‘Radial Blur’ effect - if you set the centre to the middle of the knife and change the type to ‘Rotate’, this will blur the knife as if it is spinning. So if you follow all these steps you should end up with a fun result like I did here, for your next action film project…
Видео How to film a KNIFE THROW effect! (After Effects Tutorial) канала Steve Ramsden
Показать
Комментарии отсутствуют
Информация о видео
Другие видео канала
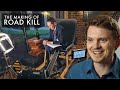 How I made a short film in one night | Making of ROAD KILL starring Guy Henry
 Mission Impossible mask effect! 😎 #shorts #missionimpossible #missionimpossible7
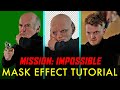 Mission Impossible MASK EFFECT Tutorial! | Adobe After Effects
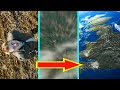 Satellite zoom out to SPACE effect - After Effects Tutorial
 I added myself to movies 😂#shorts #vfx #bts
 Throwing a KNIFE into a wall (using After Effects!)
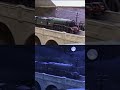 Digital set extension for a miniature #shorts #vfx #bts
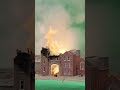 Factory explosion effect! 🔥 #shorts #vfx #bts
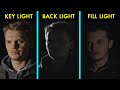 3 point lighting explained in 1 minute | DIY Moviemaking
 Doctor Strange portal effect! 🔥 #shorts #vfx #bts
 300k... thank you 🙏
 Mission Impossible Mask Effect! 🥸 #shorts #vfx #bts
 Indiana Jones invisible bridge effect! 🤠 #shorts #vfx #bts
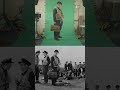 I added myself to old movies #shorts #vfx #bts
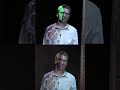 Missing face effect! #shorts #vfx #bts
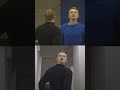 Backwards head effect! 😱 #shorts #vfx #bts
 Halloween animal transformation! 🎃 #shorts #halloween #vfx
 Doctor Who Regeneration! 😲 #shorts #doctorwho #filmmaking
 How to fake a LONG TAKE with hidden cuts! | 4 editing tricks
 Guy Henry interview on film acting, Star Wars Tarkin, Harry Potter, Holby City | DIY Moviemaking