Connect MFCL3770CDW to a wireless computer - Macintosh
Learn how to connect your Brother MFC-L3710CW, MFC-L3750CDW, MFC-L3770CDW color laser printer to a wireless computer using Macintosh OS X in this video tutorial.
Models covered:
Brother MFCL3710CW
Brother MFCL3750CDW
Brother MFCL3770CDW
This video is for Macintosh users, for Windows the version click:
https://www.youtube.com/watch?v=shOWtJNRnPw
For more videos, tutorials, and FAQs visit our support site at: http://www.brother-usa.com/support
Chapters:
Intro: 00:00
Models Covered 00:10
Download the software 00:20
Running the Installer software 00:.30
Alternate connection methods 00:58
Enable Wireless window 01:20
Failed to Connect window 01:42
Locate SSID and Network Key 01:59
Machine touchscreen 02:09
Continue setup with the Installer 3:20
Enter password 03:48
CUPS driver 04:02
iPrint&Scan install 4:18
Transcript:
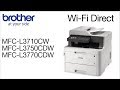
Welcome. Today we're going to connect your brother MFC-L3770CDW laser printer to a wireless computer using the setup wizard
This video will cover multiple models and operating systems even though your machine may not match the model on the screen the overall process will be the same. (Video covers MFC-L3710CW and MFC-L3750CDW wifi setup as well.)
Download the full driver and software package from www.brother-usa.com. Navigate to your installation file and double click to begin installation.
Double click on the Driver Download or Start Here icon
Click on “Open”
Click “Next”.
Select Wireless Network Connection and then click “Next”
When the “Detecting existing wireless network settings” window appears verify your Network Name and click “Next”
In most cases the setup wizard will be able to automatically apply your wireless settings and connect your machine to the network.
If for some reason the setup wizard was unable to automatically connect your machine, you will be prompted to try alternate methods of connection. The next section of this video will cover those alternate methods.
If the Enable Wireless window opens you will need to go to the touchscreen of your Brother machine
Press the WiFi icon, then select WLAN Assistant
When prompted to switch the interface to wireless Press “Yes”
Now press “OK”
Your Brother machine will now retrieve the network settings from your computer
If you receive a Failed to Connect message click “Next.”
When prompted for a USB cable select “No”…and then click next
Click on “Checked and confirmed and then click “Next”
Locate your SSID or Network name and your Network Key. These can typically be found on the bottom of your router.
Now go to the touchscreen of your Brother machine
Select “Setup Wizard” from the option list. When “WLAN Enable” appears on the LCD window press “Yes.”
Select your SSID or Network Name from the list. Please note that if your network is set to hide the network name you will have to manually add your network name.
And press “OK”
Enter your Network Key using the touchscreen. Confirm that your Network Key is correct and press “OK”
Once the wireless connection is made, press “OK”
On your computer click “Next”
Now click “Checked and confirmed” and then Click “Next”
Once your machine is connected to your wireless network, you can continue with the setup process
Select your Brother machine from the list and click “Next”
When the driver installer window opens, click “Continue”
Familiarize yourself with the environmental impacts of your Brother machine and click “Continue”
Click “Continue”
Click “Agree” to accept the license agreement
Click “Install”
If prompted, enter your password and click “Install Software”
Click on “Close”
Click “Add Printer.”
Choose your machine from the list. From the "Use" dropdown, choose the Brother CUPS driver for full printing capabilities.
Click “Add.”
Click “Next.”
When prompted, download the iPrint&Scan application from the App Store. You will need this app for advanced printing, scanning, and workflow functions.
Once installation ends click “Next”
Click “Next.”
Now click “Close”
Your installation is now complete
For more Tutorials, FAQ's and Videos, visit us at brother-usa.com/support
Thank you for choosing Brother
Customers also searched:
Brother MFC L3710CW Macintosh wireless
Brother MFC L3710CW Macintosh setup wizard
Brother MFC L3750CDW Macintosh wireless
Brother MFC L3750CDW Macintosh setup wizard
Brother MFC L2750DW XL Macintosh wireless
Brother MFC L3770CDW Macintosh setup wizard
An official Brother printer support resource
Видео Connect MFCL3770CDW to a wireless computer - Macintosh канала Brother Office USA
Models covered:
Brother MFCL3710CW
Brother MFCL3750CDW
Brother MFCL3770CDW
This video is for Macintosh users, for Windows the version click:
https://www.youtube.com/watch?v=shOWtJNRnPw
For more videos, tutorials, and FAQs visit our support site at: http://www.brother-usa.com/support
Chapters:
Intro: 00:00
Models Covered 00:10
Download the software 00:20
Running the Installer software 00:.30
Alternate connection methods 00:58
Enable Wireless window 01:20
Failed to Connect window 01:42
Locate SSID and Network Key 01:59
Machine touchscreen 02:09
Continue setup with the Installer 3:20
Enter password 03:48
CUPS driver 04:02
iPrint&Scan install 4:18
Transcript:
Welcome. Today we're going to connect your brother MFC-L3770CDW laser printer to a wireless computer using the setup wizard
This video will cover multiple models and operating systems even though your machine may not match the model on the screen the overall process will be the same. (Video covers MFC-L3710CW and MFC-L3750CDW wifi setup as well.)
Download the full driver and software package from www.brother-usa.com. Navigate to your installation file and double click to begin installation.
Double click on the Driver Download or Start Here icon
Click on “Open”
Click “Next”.
Select Wireless Network Connection and then click “Next”
When the “Detecting existing wireless network settings” window appears verify your Network Name and click “Next”
In most cases the setup wizard will be able to automatically apply your wireless settings and connect your machine to the network.
If for some reason the setup wizard was unable to automatically connect your machine, you will be prompted to try alternate methods of connection. The next section of this video will cover those alternate methods.
If the Enable Wireless window opens you will need to go to the touchscreen of your Brother machine
Press the WiFi icon, then select WLAN Assistant
When prompted to switch the interface to wireless Press “Yes”
Now press “OK”
Your Brother machine will now retrieve the network settings from your computer
If you receive a Failed to Connect message click “Next.”
When prompted for a USB cable select “No”…and then click next
Click on “Checked and confirmed and then click “Next”
Locate your SSID or Network name and your Network Key. These can typically be found on the bottom of your router.
Now go to the touchscreen of your Brother machine
Select “Setup Wizard” from the option list. When “WLAN Enable” appears on the LCD window press “Yes.”
Select your SSID or Network Name from the list. Please note that if your network is set to hide the network name you will have to manually add your network name.
And press “OK”
Enter your Network Key using the touchscreen. Confirm that your Network Key is correct and press “OK”
Once the wireless connection is made, press “OK”
On your computer click “Next”
Now click “Checked and confirmed” and then Click “Next”
Once your machine is connected to your wireless network, you can continue with the setup process
Select your Brother machine from the list and click “Next”
When the driver installer window opens, click “Continue”
Familiarize yourself with the environmental impacts of your Brother machine and click “Continue”
Click “Continue”
Click “Agree” to accept the license agreement
Click “Install”
If prompted, enter your password and click “Install Software”
Click on “Close”
Click “Add Printer.”
Choose your machine from the list. From the "Use" dropdown, choose the Brother CUPS driver for full printing capabilities.
Click “Add.”
Click “Next.”
When prompted, download the iPrint&Scan application from the App Store. You will need this app for advanced printing, scanning, and workflow functions.
Once installation ends click “Next”
Click “Next.”
Now click “Close”
Your installation is now complete
For more Tutorials, FAQ's and Videos, visit us at brother-usa.com/support
Thank you for choosing Brother
Customers also searched:
Brother MFC L3710CW Macintosh wireless
Brother MFC L3710CW Macintosh setup wizard
Brother MFC L3750CDW Macintosh wireless
Brother MFC L3750CDW Macintosh setup wizard
Brother MFC L2750DW XL Macintosh wireless
Brother MFC L3770CDW Macintosh setup wizard
An official Brother printer support resource
Видео Connect MFCL3770CDW to a wireless computer - Macintosh канала Brother Office USA
Показать
Комментарии отсутствуют
Информация о видео
Другие видео канала
 Connect to MFCL3770CDW with Wi-Fi Direct
 Connect MFCL2710DW to a wireless computer - Windows
 How To Scan Multiple Pages To Computer - Brother Printer To Mac
 The Best Printers That Won’t Cost You a Fortune in Ink Cartridges | WSJ
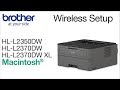 Connect HLL2370DW to a wireless computer - Macintosh
 Connect MFCL3770CDW to a wireless computer - Windows
 How to Install a Printer on Mac (detailed) 3 Ways to Connect Wireless, Ethernet, and USB
 Connect HLL3270CDW to a wireless computer - Windows
 Brother ADS-1700W
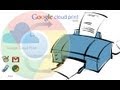 Print from anywhere to your printer using Google Cloud Print
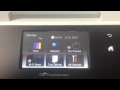 Brother MFC - Enable Wireless Network
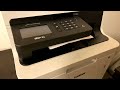 Brother LED Printer MFC-L3750CDW - Unboxing & Setup
 Installing HLL5200DW on a wireless network - Windows® Version
 Brother Printer Ink Not Detected Fix Save Money Hack
 Unboxing and Viewing this Brother MFC-L8900CDW All-In-One Multifuction Laser Printer
 Wireless Setup without using a USB cable DCPL2520DW DCPL2540DW
 Connect HLL3230CDW to a wireless computer - Windows
![Fix Brother printer offline [3 methods]](https://i.ytimg.com/vi/ondCIzYRprY/default.jpg) Fix Brother printer offline [3 methods]
Fix Brother printer offline [3 methods] Lawsuit Says Epson Printers Disable Themselves If You Use Non-Epson Ink