Waterslide Decal Paper Tutorial (BONUS Tips Included)
🔥 FOR THE ULTIMATE WATERSLIDE DECAL PAPER GUIDE VISIT: https://www.royalelements.com/detailed-instructions-for-inkjet-waterslide-decal-paper/
🛍️Shop Waterslide Decal Paper: https://amazon.com/royalelements
👉Claim your FREE Vinyl Craft E-book: https://royalelements.com
This tutorial goes over how to use Royal Elements waterslide decal paper for inkjet printers.
JOIN OUR FACEBOOK COMMUNITY: https://www.facebook.com/groups/471896893229004/
We offer clear and white waterslide paper for both inkjet and laser printers on Amazon!
--------------------------------------------------------------------------------------------------------------
Instructions:
1. Before you begin, it is important to note that clear decal paper is best applied on light colored surfaces. White decal paper is best used when applying decals to dark surfaces. You can use more contrast and brightness in your printer settings to make your image stand out more.
2. Print a test copy of the desired image on a normal sheet of paper. If the image is not satisfactory, simply adjust your printing options until the image comes out as you like. To increase the quality of the print, select Photo Glossy Paper and select “Best” under Media & Quality.
3. The waterslide paper is A4 size, used around the world though uncommon in the United States, where U.S. Letter size is used. You will need to switch your printer page size from U.S. Letter to A4 size (8.27 x 11.69 inch). To do this: 1) have your image file open on your computer 2) press Ctrl + P 3) Go into Printer Settings/Setup 4) switch page size from Letter to A4.
4. Gather the following materials for the transfer: 1. Item for the image to be printed on (should be hard and smooth, i.e. a coffee mug) 2. Inkjet printer 3. clear aerosol acrylic decal fixative spray 4. hair dryer 5. scissors 6. bowl of warm water.
5. Print the image on the white decal paper then apply your clear aerosol acrylic decal fixative spray to the image. It is highly recommended to spray AT LEAST 3 coats waiting around 1 hour between each coat. The fixative spray locks the water-soluble ink to the decal film, making your designs waterproof so that the ink is not dissolved when placing your decals into warm water to apply.
6. Let the fixative spray air dry for an hour or use a hair dryer for 45-60 seconds to speed the process of drying.
7. Cut the image out with scissors. Rounding the edges will ensure the image does not peal off as easily as sharp corners.
8. Soak your decal in a bowl of warm water for 15-30 seconds. If the decal curls up, bend it the opposite way to straighten it. The decal is ready to be transferred when you see the edges peeling from the backing sheet.
9. Remove the paper backing by sliding it off from the white decal with your image printed on it and apply it to your desired surface. Smooth out the surface gently with a clean cloth or sponge to remove water and trapped air bubbles.
10. Carefully use a hair dryer to help the decal adhere to the surface fully. If the item is small and oven-safe, bake the item with the decal on it in an oven at 200°F – 250°F for 10-15 minutes depending on the item. Other items may be left to dry using a fan if neither of the other two methods are available.
11. Stand back, take a deep breath, and enjoy your new masterpiece!
#WaterslideDecals #WaterslideDecalInstructions #WaterslideDecalTutorial
Видео Waterslide Decal Paper Tutorial (BONUS Tips Included) канала Royal Elements
Показать
Комментарии отсутствуют
Информация о видео
Другие видео канала
 Make Amazing Waterslide Decals for Tumblers, Mugs, and Glasses!
 Clear Waterslide on Dark Cup HACK !!
![Decal Water Slide Printing [Magic Decal]](https://i.ytimg.com/vi/OGWGirF3Uxo/default.jpg) Decal Water Slide Printing [Magic Decal]
Decal Water Slide Printing [Magic Decal] Waterslides 101 - How To Make + Cut White and Clear | Morgan Capps
 Blinggasm Inkjet clear waterslide decal paper application
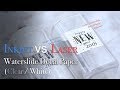 Difference between Inkjet & Laser Watersilde Decal Paper
![[How To Use] Film-Free Waterslide Decal Paper | 무필름 물전사지](https://i.ytimg.com/vi/4gP9ChoGSTY/default.jpg) [How To Use] Film-Free Waterslide Decal Paper | 무필름 물전사지
[How To Use] Film-Free Waterslide Decal Paper | 무필름 물전사지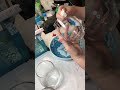 Waterslide decal tutorial
 'HOW TO' make water-slide decals for die-cast and model cars
 How to make Customized Mugs | DIY MUGS (easy)
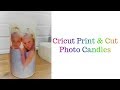 Cricut Photo Candle with water slide decal paper
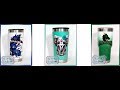 Waterslide Print and Cut
 Print and Cut with Cricut Explore
 CL Water Slide Transfer Decal Paper - A Real Demo
 Easy beginners Tumbler with acrylic paint
 Waterslide applied with standard method and reverse, Easiest Way to apply a Clear Waterslide decal
 HOW TO ETCH STAINLESS STEEL TUMBLER WITH CRICUT | HOW TO ETCH METAL AT HOME
 How to apply waterslide decals to tumblers
 Waterslide paper tutorial how to use water slide paper
 SUBLIMATING SKINNY TUMBLERS WITH A $20 DOLLAR OVEN