#5 Tutorial: FreeCAD To KiCad - Detailed
Adding to previous Tutorial Videos, this one goes into More Detail on Making the Parts in FreeCAD.
Play SPEED Control: Click the Cog and select desired speed
Note: Use the Play-Settings Wheel in display to adjust playback speed and Resolution. Can get good resolution at 720.
Video shows Making 'Graphic Representations' of a PCB Mounted Female Connector and the Mating Male Connector. Both are used to make KiCad Footprints.
Shows ways to Dimension, Make Contacts, Color, Export.
Includes adding Text to a part.
Enough is left out for the Curious to Investigate but, enough is included to make Success not-difficult.
Try making an Edge-Card connector with 90 deg pins (a Sweept section along 'L' shape lines with corner radius).
KiCad uses only 3D Graphic representations of parts thus, they are not functional parts but can Look, Smell and Taste like the Real Thing.
If you make a Real part, you can Export as .STL/(other) and 3D-Print it.
Done with FreeCAD v17 (v18 and v19-pre Crash like cars in a Destruction Derby!).
#1 Tutorial: Shows the process of ‘Making’ the FreeCad model (A Ribbon Cable) and Exporting it without using StepUp plugin.https://www.youtube.com/watch?v=oxPRG...
#2 Tutorial: Shows a completed Jumper Wire and it’s implementation into KiCad. (same process as for making the Ribbon Cable. This time, the model contains Two Bodies).https://www.youtube.com/watch?v=zMlu-...
#3 Tutorial: Shows a more complex model - a Coffee Cup with two contact pins (on cup bottom). Shows it’s implementation in KiCad.https://www.youtube.com/watch?v=88NsR...
#4 Tutorial: Start To Finish - Making A Cable Assembly & Footprinthttps://www.youtube.com/watch?v=szj5x...
Видео #5 Tutorial: FreeCAD To KiCad - Detailed канала Bruce T
Показать
Комментарии отсутствуют
Информация о видео
Другие видео канала
 FreeCAD Texture Mapping
 HomeMade Tinning-Solution For PCB's
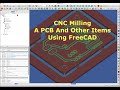 CNC Milling A PCB
 3D-STEP File Coloring
 DSC Digital Setting Circle For Telescope
 Continuation - Making a Hole in the Box...
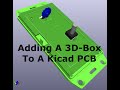 PCB Box For Kicad-PCB's
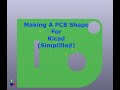 FreeCad To Kicad PCBShape - Simplified
 Kicad Trace Length Plugin
 Tube - Hollowing The Tube
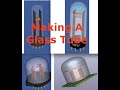 Making Electronic Tubes, Bulbs, LED's... etc
 Making A KiCad Edge Card Footprint
 FreeCAD For Kicad PCB Shapes And Cutouts
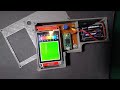 Thermal Camera Using Teensy Arduino
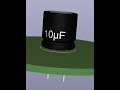 FreeCad - Kicad Capacitor Modeling
 3018 Pro Mill CNC Testing & Info
 #1: Tutorial - Making a PCB With Cutouts, For Fritzing
 Making A Cable Assembly & KiCad Footprint - Start to Finish
 #2 Tutorial: Making a Jumper Wire for use in KiCad
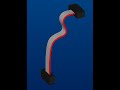 #1 Tutorial: Making A Ribbon Cable