- Популярные видео
- Авто
- Видео-блоги
- ДТП, аварии
- Для маленьких
- Еда, напитки
- Животные
- Закон и право
- Знаменитости
- Игры
- Искусство
- Комедии
- Красота, мода
- Кулинария, рецепты
- Люди
- Мото
- Музыка
- Мультфильмы
- Наука, технологии
- Новости
- Образование
- Политика
- Праздники
- Приколы
- Природа
- Происшествия
- Путешествия
- Развлечения
- Ржач
- Семья
- Сериалы
- Спорт
- Стиль жизни
- ТВ передачи
- Танцы
- Технологии
- Товары
- Ужасы
- Фильмы
- Шоу-бизнес
- Юмор
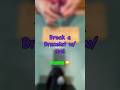
Gradient 🌈 Keychain Tut! #kumihimo #tutorial #keychain #diy #shortsfeed
The deets⬇️
Supplies:
- 1 mm satin nylon cord. I used 4 white this time.
- 1 mm nylon trim cord. I used 8 gradient rainbow cord.
- Kumihimo disk
- Weight- I used stress ball, it works great!
- Scissors
- Needle & thread
- 2 pairs pliers
- 6 mm brass end cap
- Stainless steel jump rings
- Keychain/keycharm
- Alene’s jewelry glue
- Paper towel or rag (to clean your glue cap/excess glue
- Lighter or torch
How to:
-Measure & cut your cord. I went with 26 1/2 inches this time so I could get a full range of colors on the braid.
-Tie one end in a knot, thread through your disk and secure to your weight.
Layout your pattern (you can find cool patterns at friendship-bracelets.net)
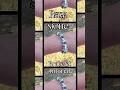
-Braid your butt off!
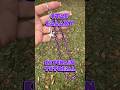
Once you’re done braiding, remove from disk and knot the end. Give it a good stretch.
Sew the ends of the braid with a needle and thread, this keeps the cords in place for finishing.
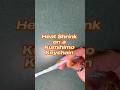
This is where I set mine on fire. I find it helps to keep the cords together and helps it fit better in the endcap. (But make sure your materials are meant to melt and not just ignite). Melt the 2 separate ends together and squish with the pliers.
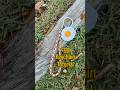
Finishing:
- fit your end cap onto the braid to make sure it’s the right size.
- Add some glue to the end cap and apply it to your braid. Let it set so the glue holds.
- Add your jump ring to your end cap.
- Add to your keychain!
I hope you enjoyed watching this as much as I enjoyed making it! Like what you see! I sell these! Come check them out ⬇️
https://www.michaels.com/makerplace/storefront/kumihimo-jo
#newyoutuber
Видео Gradient 🌈 Keychain Tut! #kumihimo #tutorial #keychain #diy #shortsfeed канала Kumihimo Jo
Supplies:
- 1 mm satin nylon cord. I used 4 white this time.
- 1 mm nylon trim cord. I used 8 gradient rainbow cord.
- Kumihimo disk
- Weight- I used stress ball, it works great!
- Scissors
- Needle & thread
- 2 pairs pliers
- 6 mm brass end cap
- Stainless steel jump rings
- Keychain/keycharm
- Alene’s jewelry glue
- Paper towel or rag (to clean your glue cap/excess glue
- Lighter or torch
How to:
-Measure & cut your cord. I went with 26 1/2 inches this time so I could get a full range of colors on the braid.
-Tie one end in a knot, thread through your disk and secure to your weight.
Layout your pattern (you can find cool patterns at friendship-bracelets.net)
-Braid your butt off!
Once you’re done braiding, remove from disk and knot the end. Give it a good stretch.
Sew the ends of the braid with a needle and thread, this keeps the cords in place for finishing.
This is where I set mine on fire. I find it helps to keep the cords together and helps it fit better in the endcap. (But make sure your materials are meant to melt and not just ignite). Melt the 2 separate ends together and squish with the pliers.
Finishing:
- fit your end cap onto the braid to make sure it’s the right size.
- Add some glue to the end cap and apply it to your braid. Let it set so the glue holds.
- Add your jump ring to your end cap.
- Add to your keychain!
I hope you enjoyed watching this as much as I enjoyed making it! Like what you see! I sell these! Come check them out ⬇️
https://www.michaels.com/makerplace/storefront/kumihimo-jo
#newyoutuber
Видео Gradient 🌈 Keychain Tut! #kumihimo #tutorial #keychain #diy #shortsfeed канала Kumihimo Jo
Комментарии отсутствуют
Информация о видео
5 апреля 2026 г. 3:36:39
00:02:53
Другие видео канала