DIY Advent Calendar | Roxie Roo Crafts Tutorial.
Angel Button shows you how to make this beautiful Advent Calendar.
We have resized everything for you to make this slightly bigger.
Enjoy and please pop mention if you do make one, would love to see your creation on these.
Don't forget to hit that Subscribe button.
Thank you xx
Sizes and Materials needed.
You need 24 boxes.
Cardstock 12 x 12 = x6
Cut at = 5, 3/4 x 4, 3/4
Scored at = 5/8 and 1, 3/8 on all four sides
Wrap, you will need 24.
12 x 12 card stock x 4
Cut at = 5, 7/8 x 3,1/8
Scored at = 3/4, 2 ,3/4, 3,1/2, 5 ,1/2. {refer to video on how to move along that 16th of an inch if you have not got 16ths on your score board}
DSP for inside box drawer. x 24
2, 7/8 x 1 ,7/8
DSP on front of drawer x 24
1, 3/4 x 5/8
Side of 3 box when joined = x8 of each.
Cardstock = 3, 1/8 x 2, 1/4
DSP = 3 x 2
Top, middle and bottom boards.
Cardstock = 5, 1/4 x 5, 1/4 = x3
DSP = 5 x 5 = X1 just for the top one.
Box on the top for number 25.
Cardstock = 5 x 5 = x2
First one scored at = 1" all four sides
Second = scored at 1" on all four sides, but with a double layer of card along the edge like explained.
DSP = 2, 3/4 x 2, 3/4
DSP x4 for sides = 2, 3/4 x 7/8
LINK to our Lazer Business.
SIMPLY PERSONALIZED
https://www.facebook.com/simplypersonalizedcraft/
Видео DIY Advent Calendar | Roxie Roo Crafts Tutorial. канала UK Decoupage Blanks / Simply Personalized
Показать
Комментарии отсутствуют
Информация о видео
3 августа 2018 г. 14:51:29
00:56:38
Другие видео канала
 Matchbox Advent Calendar Tutorial // 25 Days Of Craftsmas
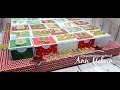 12 X12" Shadow Box Advent Calendar! NO DIES REQUIRED!
 Foil without a laminator - CAS cardmaking #aliexpress || April 2019
 12 Day Advent Calendar Book Tutorial
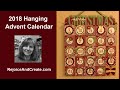 2018 Hanging Advent Calendar
 24 box advent calendar tutorial #adventcalender #christmascrafting #papercrafting
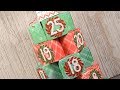 How to make an Christmas Advent calendar
 How to Make Beautiful Boxes Using a Score Board with Leann Chivers | New To You
 Stampin' Up Flower Shop Card In A Box Tutorial
 DIY Advent Calendar - Anthropologie Dupe - Christmas DIY's Day 1
 DIY Book Advent Calendar
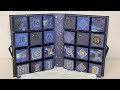 Advent Calendar Book | Tutorial
 DIY * Adventskalender * Advent Calendar * Enzyklopädie * Bücher * Papier aus Action Haul * Tutorial
 DIY- Mini Drawers
 Creating a Matchbox using the Envelope Punch Board Tutorial!
 Harry Potter Cube Advent Calendar 2020
 Christmas Advent Calendar Tree
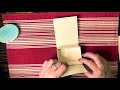 DIY Soap Box tutorial
 Matchbox Style | Halloween Treat Box | Tutorial | Coco and Reno
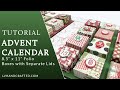 Tutorial - Christmas Advent Calendar Folio - Boxes with Separate Lids