Ep. 2 - LASER ROTARY ATTACHMENTS - Chuck Rotary Axis - Configuration, Settings - CNC Rotary Axis
In This Video I focus on the CHUCK ROTARY AXIS for Co2 Laser, software config, settings and Circle Pulse Calculation.
In order to use the rotary attachment you will need to change some values in the Vendor and User Settings for your controller.
I acquired this Rotary axis from Cloudraylaser.com
(Also available on Amazon Links Below)
Roller/Wheel Rotary Axis - https://amzn.to/2RJuyGW
Chuck Rotary Axis - https://amzn.to/2ZRhT7w
Looking for some projects to engrave with your rotary axis?
Check out these products
Insulated Tumbler with Splash-Proof Lid - https://amzn.to/31WSdbB
Stainless Steel Leak Proof Sports Water Bottle Powder Coated - https://amzn.to/31XXjUG
Kmizera Beta Inkless Pen Made of Anodized Aluminium - https://amzn.to/31RYAwR
Aluminium Anodized Compact Perfume Aftershave Atomiser - https://amzn.to/31XyqbN
Checkout Matt's Workshop Community Page - https://www.youtube.com/mattsworkshop/community
Follow instructions in the video to backup your Vendor and User Settings before you make any changes.
Let’s look at some of the values you will need
1st you will need to know the GEAR RATIO of the chuck attachment that you are using. Cloudray Chuck Rotary Axis has a gear Ratio of 2:1
If you do not have a Cloudray rotary axis, then to calculate the Gear Ratio of your attachment Either count the number of teeth on a Wheel Gear and the Stepper motor Gear, then Divide by the Number of Teeth on The Wheel Gear by the number of teeth on the stepper motor gear.
Or divide the diameter of each gear and make the same division
Next you will need to find the DIAMETER RATIO
The Diameter Ratio for Chuck Rotary Axis is 1:1
The final piece of data we need to calculate the Steps Per Rotation is the PULSE/REVOLUTION value from your Stepper Driver.
In this example the Stepper Driver is a DM542
Look at SW5 to SW8 and note how they are set on the driver. In this case
SW5 - OFF
SW6-OFF
SW7-ON
SW8-OFF
Refer to the Driver Pulse/Rev Table (in my example this =5000)
Now to work out the Steps Per Rotation (aka Circle Pulse)
Use this formula
Gear Ratio x Diameter Ratio x Pulse/Rev = Circle Pulse
2 x 1 x 5000 = 7400
10000 Steps/Revolution
-----
The Settings in your software (RD Works or LightBurn) need to be adjusted for each different sized material you are processing. The Constant is the Steps/Revolution aka Circle Pulse.
If your workpiece has diameter of 127mm enter this in the Diameter field of the rotary settings.
Hope you enjoy the video.
I acquired this Rotary axis from Cloudray Laser @ https://www.cloudraylaser.com/search?q=rotary+axis
https://mwlaser.com.au/product-category/laser-plans-guides/
Thanks for Visiting.
Until next time, take care
Cheers Matthew
(MW Laser)
Visit Matt's Workshop at MW Laser : https://mwlaser.com.au/
Instagram https://www.instagram.com/mattsworkshop/
Facebook https://www.facebook.com/mattsworkshopau
== If you'd like to support my channel financially so I can continue to produce content you can do via PayPal here --- https://www.paypal.me/mattsworkshop --- Thank You ====
Any questions please feel free to email me matt@mwlaser.com.au or leave a comment below.
NOTE: This is not a paid production or advertisement. The featured product was provided by Cloudray to allow me to provide viewers with an installation / how-to video.
Laser Cutting Resources - https://amzn.to/2RNNCUj
Видео Ep. 2 - LASER ROTARY ATTACHMENTS - Chuck Rotary Axis - Configuration, Settings - CNC Rotary Axis канала MW Laser
Показать
Комментарии отсутствуют
Информация о видео
Другие видео канала
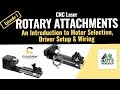 Ep.1 - LASER ROTARY ATTACHMENTS - Intro, Motors, Drivers Setup & Wiring. - CNC Rotary Axis
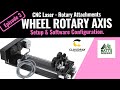 Ep. 3 - LASER ROTARY ATTACHMENTS - Wheel Rotary Axis - Software Config - CNC Rotary Axis
 Rotary roller vs. Rotary Chuck - which is better?
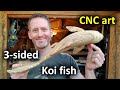 3-sided rotary CNC routing with the Shapeoko - Carving a Koi fish
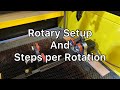 Laser Rotary Setup and Calibrating Steps per Rotation Using Lightburn
 How to Laser Engrave Tumblers with a 60W Chinese Laser from Ebay!
 Setting Up A Chinese Laser Rotary
 DIY Mini CNC Engraving Machine | Arduino based CNC Router machine
 30 Minutes Of Amazing Continous Production Machinery & Most Admirable Worker Ever Before #73
 DIY Rotary Attachment for my DIY Laser Cutter
 Setting Up Chuck & Roller Rotary on AEON LASER (RDworks and Lightburn | Step by Step)
 Add a Threaded Lid to Your Urn | Is It Time to Learn To Cut Threads?
 Co2 Laser Troubleshooting Guide - Troubleshooting Poor Cut Quality
 Reduce your engraving time by 50% in LightBurn. Speed and LPI tips and tricks
 How to Pay Off Your Laser (engraving tumblers with the xTool D1)
 Steps per rotation for laser rotary setup
 Rotary Attachment Set Up for Your CO2 Laser Engraver - Training Video - OMTech Laser
 How To Make Leather Patch Hats - Co2 Laser - OMTech - Chinese Laser
 Laser Rotary Showdown & Comparison - Which is right for you?