A 3D Printed Object - Part 1
How to make a silicone blanket mold for 3D printed objects. Using Rapidset hardener to speed up the cure process when brushing on layers of rubber. Also, using cast pieces of rubber to build out the blanket mold. Finally, how thick should a blanket mold be?
SKIP AHEAD TO THE GOOD PARTS:
00:00 Project sent in by Randal from the Fay Jones School of Architecture + Design.
01:00 Rotational molding doesn’t like sharp edges and corners. Lot’s of potential bubbles!
02:24 Cleaning up the printing flaws with Magic Sculpt.
05:08 Testing Bondo for compatibility with the silicone rubber and printing plastic.
08:34 Smoothing surfaces with the Bondo body filler.
09:45 Planning out the cut lines in the blanket mold.
10:56 Why I’m not using a two-part clayed up mold.
12:10 Making the form for the rubber parting lines using a paper pattern.
14:05 Building a form using oil clay.
16:33 Using a BACOENG 3-gallon vacuum system.
18:11 Pouring the rubber in the clay form and removing the cured rubber.
19:34 Using Rapidset hardener to accelerate the curing time of the rubber.
21:25 Brushing the print coat of rubber in the model.
22:37 Casting the pour spout in urethane resin.
23:10 Attaching the pour spout to the model using wax.
24:20 Finishing the print coat and attaching the parting line rubber pieces.
29:22 Why I wouldn’t use this method on a client job. Time vs materials.
30:09 How thick should the blanket mold be?
32:03 Next week we’ll make the shell in fiberglass.
32:22 Send in your projects, comments and questions! Thanks for watching!
Видео A 3D Printed Object - Part 1 канала Robert Tolone
Показать
Комментарии отсутствуют
Информация о видео
Другие видео канала
 A 3D Printed Object - Part 2
 Silicone Rubber Cut Molds: Faster, Cheaper and SO MUCH BETTER.
 Lion El'Jonson Part 1: Prepping a Resin Model
 Setting Up A Small Shop!
 Tips And Tricks For Making Miniatures
 150 Urethane Resin Castings - How To Make A LOT of copies fast!
 Save Money By Recycling Used Rubber
 Making A Candle With A Silicone Rubber Mold
 Silicone Mold Making - Three Different Ways
 Crazy Cuts Create Clean Castings!
 12 Steps to Operate a Concrete 3D Printer
 Making Flower Pots and Planters using 3D Printing
 Casting Fiberglass In A Silicone Rubber Mold!
 Pouring A Rubber Blanket 1-Piece Cut Mold.
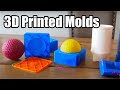 Making 3D Printed Molds
 Casting a Complex Shape In A One Piece Silicone Rubber Mold
 Cheat for molding 3d printed parts.
 Casting A VERY Complex Object - Is It Even Possible? Part 2.
 Silicone Mold Making: When To Use A Two-Piece Mold. Part 1