How to use Dynabeads® for immunoprecipitation
Learn more: http://www.lifetechnologies.com/immunoprecipitation
This video shows the 3 simple protocol steps + some tips & tricks:
- Bead preparations & protocol scaling
- Ab choice (type &concentration)
- How to use the magnet
- Pipetting & mixing
- Crosslinking (optional)
- Direct vs. indirect binding
- Elution
You can jump between chapters by clicking the top bar.
Sepharose® is a trademark of GE Healthcare companies, Dynabeads® is a registered trademark of Invitrogen Dynal AS, part of Life Technologies.
Transcript:
In this video, you will see how Dynabeads coupled w/ Protein A or Protein G allow for immunoprecipitation in just 3 simple steps. By using the beads & a magnet, you can pull the proteins or protein complexes gently out of your sample, and this simplifies the separation, washing, and elution steps. Bind the antibody to the magnetic beads, incubate w/ your sample, and after a couple of washes, elute your target protein. The manual that comes with the product describes the protocol in detail. This video offers a couple of additional tips & tricks.
You need to decide if Protein A or Protein G are best suited for your assay. This will depend on the type of antibody. You’ll find an overview of binding strengths in the product manual, and on our web pages. No columns or centrifuge is required. The transparent top rack of the DynaMag-2 can be used as a sample rack.
Make sure the Dynabeads are fully resuspended. For a standard isolation you’ll need 50 microliters, but you can easily scale the protocol to match your experimental set-up. You can work w/ concentrated samples throughout the procedure, and you won’t need to pre-treat or dilute the sample.
You only need 1-10 micrograms of antibody. The exact amount will depend on your specific antibody, and you might want to titrate for minimal cost & maximum performance. During a short incubation, the antibody binds to the bead-surface via their Fc-region. To avoid co-elution along w/ your target protein later on, you can crosslink the antibody to the beads before you add the sample. You’ll find a detailed protocol on the web.
The beads are pulled to the side of the tube. Make sure you don’t lose any liquid hiding in the cap. Add sample, and pipette gently to resuspend. The rapid kinetics allow for a short incubation. This is especially important when you’re working w/ protein complexes that might otherwise dissociate or be damaged by proteases during a longer incubation.
All binding takes place on the outer surface of the beads. And - in contrast to sepharose – these polystyrene beads have no pores or inner surface of to trap contaminants, and hence background binding is very low. In most cases you won’t even need to pre-clear your sample.
The functionality of your antibody is critical for a successful result. If you know that your antibody has a low affinity, you might want to incubate for 20 minutes, or even up to two hours, as this can help increase the yield. This might also lead to higher background binding. Good mixing is important, and we recommend using a sample mixer that allows for tilting and rotation, such as the HulaMixer.
An alternative approach for low affinity antibodies or difficult targets is to incubate antibody & sample before you add the beads. This could improve the binding kinetics and keep nonspecific binding at a minimum. This indirect approach is also a good alternative when you’re working w/ low abundance proteins, as well as for protein and nucleic acid complexes, e.g in a ChIP assay. Do not exceed the antibody binding capacity of the beads, as any excess free antibody will bind to the beads much faster than your protein complex will.
Remove all buffer without the risk of losing any of your sample. Magnetic separation allows for very easy washing. When you resuspend the beads, you should not introduce air. You don’t want to risk losing any protein bound to the few beads trapped in that foam. Transfer the beads to a clean tube for the final washing step, to avoid any carryover of contaminants bound to the tube wall or the cap.
You can either resuspend your target protein while still attached to the solid-phase and use this in your downstream experiments. You can elute the protein directly in your buffer for gel analysis or western blotting. When you elute in a small volume, you can keep your protein concentrated. If you want to keep full protein integrity, you can elute under milder non-denaturing conditions. This is typically done by a 2-minute incubation at room temp using low pH or high salt. Bring your eluate back to physiological pH after elution.
The Dynabeads Protein A or Protein G are available both as a stand-alone reagent, or as a part of ready-to-use kits w/ buffers included. The beads are used for standard immunoprecipitation, and to pull down larger complexes in co-immunoprecipitation. They're also well suited for ChIP and more recently for RNA-immunoprecipitation.
Видео How to use Dynabeads® for immunoprecipitation канала Thermo Fisher Scientific
Показать
Комментарии отсутствуют
Информация о видео
Другие видео канала
 Chromatin Immunoprecipitation Visual Protocol
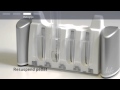 How to use the DynaMag™-5 Magnet.
 Automated Immunoprecipitation in 40 min using Dynabeads and KingFisher Flex
 Immunoprecipitation
 Immunoprecipitation with Antibody-Magnetic Bead Conjugate
 Unique Time-lapse Video of Dynabeads Activating T-Cells
 How to coat your own plate and run an Invitrogen ELISA kit
 Immunoprecipitation (IP) principles and troubleshooting
 His-tagged Protein Purification
 Western Blot Visual Protocol: Phase 1: Sample Preparation
 Covalent Coupling of Antibodies to Magnetic Beads - Fast and Efficient
 Magnetic Separation using Dynabeads®
 GST pulldown
 Immunoprecipitation On Bench Paper - A Surprising Shift
 Immunoprecipitation
 GST-tagged Protein Purification
 How to Wash Magnetic Beads
 How to isolate total RNA using magnetic bead–based technology
 Magnetic bead based DNA/RNA isolation with chemagen Technology
 Separate proteins by SDS-PAGE for Western blot