How to use the Dr. ColorChip System to fix rock chips on your car!
Dan McCool and Mike Phillips show you step by step how to use the Dr. Color Chip Repair System to quickly do rock chip repair work to any car.
Step 1
Inspect the car for rock chips by walking around the car and looking for areas of missing paint in all the normal areas like the front bumper, the front of the hood, door edges, the edges of the trunk lid, edges of a hatchback door or around the gas tank filler lid.
Step 2
Wipe the areas with rock chips clean using a waterless wash. This will help you to identify actual rock chips and dirt specs or bug splatter.
Step 3
Pick and match the best color of Dr. ColorChip touch-up paint to match the paint on the car to be repaired.
Step 4
Use the correct technique to apply the touch up paint.
The dab and smear Technique
Dab a tiny amount of paint in front of a rock chip to be repaired. Then using your thumb or finger smear the paint into the rock chip.
The squirt and squeegee technique
For this technique you use paint that's in the squirt bottle. Squirt a little paint in front of the rock chip and then use the squeegee blade to spread the touch-up paint into the chipped area.
You can also apply a drop or two of paint onto the squeegee and then use the squeegee to spread the paint into the chipped area.
Step 5
Shake the Sealact Blending Solution well so that it's fully mixed. Then apply a liberal amount to the lint free wiping cloth with a flat surface. Gently rub the wiping cloth over the touch-up paint to remove any excess off the factory paint and level the touch-up paint.
For more information visit,
http://www.drcolorchip.com/
Or call
561-845-6122
:)
Видео How to use the Dr. ColorChip System to fix rock chips on your car! канала Autogeek
Показать
Комментарии отсутствуют
Информация о видео
Другие видео канала
 Best Car Paint Touch up Tools Tips Tricks with Needle and Syringe Subaru Outback
 Mail Call!!! Paint Chip Repair!! Dr. Color Chip VERSUS OEM Touch Up!! And Much More!!
 Dr Colorchip Paint Repair Yay or Nay
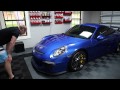 My Thoughts on Clear Film & Dr Colorchip Application
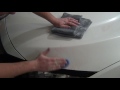 Tips & Tricks | Using Touch-Up Paint
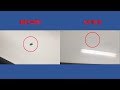 How to fix rock chips in your paint using Dupli-Color Scratch Fix All-in-1 applicator
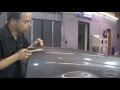 Paint Chip Repair - Painting How To on Kevins Korner with Kevin Tetz - Eastwood
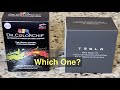 Tesla Paint Kit Vs. Dr. ColorChip
 Dr. ColorChip Road Rash Complete Paint Chip Repair Kit!!
 Correcting a paint chip on the BMW i8 with Dr. Colorchip
 Best Paint Touch-up Tricks: Mercedes G55
 Does Dr. ColorChip Work? Testing On My Model 3!
 How to Touch up Car Paint Key Scratch
 How to Fix: Rust Bubble Under Paint from a Rock Chip Around WIndshield
 USED CAR Detailing Part 5: Paint Chip Repair | DETAILS WITH LEVI
 How I FIXED my RUINED FERRARI PAINT for $45.
 Best Car Paint Scratch Remover? Let's find out! Turtle Wax, Meguiar's, 3M, Nu Finish, Carfidant
 Dr. Colorchip paint scratch repair system Review - Toyota Tundra
 Paint Chip Repair with Dr. Colorchip!!! - C7 Corvette Laguna Blue
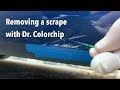 Repairing a Scrape with Dr. Colorchip