etrailer | Yakima RailBar Crossbars Review
Click for more info and reviews of this Yakima Roof Rack:
https://www.etrailer.com/Roof-Rack/Yakima/Y00431-0432.html
https://www.etrailer.com
Don’t forget to subscribe!
https://www.youtube.com/user/etrailertv
Full transcript: https://www.etrailer.com/tv-review-yakima-railbar-crossbars-y00431-2.aspx
Speaker 1: Today, we'll be taking a look at and showing you how to install the Yakima Railbar Crossbars. These are going to come in silver and black and many different sizes ranging from 28-3/4 inches all the way to 40-1/2 inches. You can use our fit guide through etrailer.com to find out the best fit for your vehicle. The Yakima Railbars are a great solution for carrying your vehicle accessories on your roof whether those are bike racks, ski and snowboard carriers, or cargo baskets. This is going to be an aerodynamic low profile design, which is going to help to reduce wind noise and drag, and the weather strip on the inside can easily be pushed down, and we can use channel mounted accessories. The railbars are going to work with most Yakima roof rack accessories whether those are clamp on or channel mounted.Our towers are going to be made out of a glass-filled plastic, which will grip around our raised rails using a rubber gasket on top and the metal rubber coated clamp on bottom.
On each of our towers, we're going to have a plastic lock core here. That can be removed and replaced with a metal same key system lock core, part number Y07204, and that's going to allow you to secure your crossbars to your roof. The crossbars themselves are going to be made out of a lightweight aluminum, so they're corrosion resistant. They're either going to come in a satin chrome finish or a black powder coat finish. The Yakima railbars are going to come with a limited lifetime warranty and have a 165 pound weight capacity.
You do want to double check your vehicle's owner's manual to make sure your roof can withstand that much weight. Now that we've gone over some features, we're going to show you how to get this installed.Now to begin our install, we've gone ahead and removed our covers on our bars. We're going to have to extend out this end of our bar, and we can take off our tool. When we place this onto our vehicle, we want to make sure that the thicker end of our bar is facing towards the front. We need to loosen up our clamp just a bit more by using our included tool and loosening up our bolt here.
Then, we'll pull on the end, so that our clamp sits underneath our raised rail and the rubber portion is flesh against the rail on top. We can start to tighten everything down. Want to tighten this down just enough so that our bar stays in place, but we're still able to move it back and forth and adjust our crossbar spread.Now, we'll measure out our crossbar spread. I'm going to measure from center to center. I want this just to be even on each side.
Now, we'll go back taking our tool and tightening down our bolt, so that our crossbar is completely secure on our raised rails.Now, we'll take our cover. We want to line up this tab here with our weather channel. We'll push our end cap in until it locks into place, and now we're ready to load up our accessories.That's going to be our completed look at the Yakima Railbar Crossbars.
Видео etrailer | Yakima RailBar Crossbars Review канала etrailer.com
Показать
Комментарии отсутствуют
Информация о видео
Другие видео канала
 etrailer | Stealth Hitches Hidden Towing Kit Trailer Hitch Installation - 2022 Hyundai Palisade
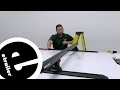 etrailer | Rhino-Rack Camper Shell Heavy-Duty Bar Roof Rack Review
 etrailer | Thule T2 Pro XTR Bike Rack Review
 etrailer Radius End 4-Leaf Slipper Spring Installation
 etrailer | Thule Epos 2 Bike Rack Review
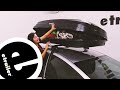 etrailer | Yakima SkyBox NX 18 Rooftop Cargo Box Review
 Air Lift LoadLifter 5000 Ultimate Rear Air Helper Springs Installation - 2021 Chevrolet Silverado 35
 etrailer | B and W Companion OEM 5th Wheel Trailer Hitch Installation - 2020 Ford F-250 Super Duty
 etrailer | Titan Chain Diamond Alloy Snow Tire Chains Installation - 2019 Subaru Outback Wagon
 etrailer | Inno Shadow 16 Rooftop Cargo Box Review - 2022 Subaru Outback Wagon
 etrailer | Gen-Y Phantom X Hitch Ball Mount Review
 etrailer RV Bumper Cargo Carrier Review e96ZR
 etrailer | Yakima SkyBox NX 16 Rooftop Cargo Box Review - 2021 Mazda CX-5
 etrailer Trailer Hitch Installation - 2020 Acura MDX
 etrailer | Curt Class III Trailer Hitch Installation - 2022 Kia Carnival
 etrailer | Viking Solutions Truck Bed Adjustable Fishing Rod Carrier Review
 etrailer | Rhino-Rack Ski and Snowboard Carrier Review RR574
 etrailer | Thule T2 Pro X Bike Rack Review
 etrailer | Roadmaster Direct-Connect Base Plate Kit Installation - 2022 Ford Maverick
 etrailer Trailer Hitch Installation - 2018 Jeep Grand Cherokee
 etrailer | Yakima Hitch Cargo Carrier Review - 2021 Jeep Grand Cherokee