BIG NEWS + Easy DIY Coffee Mug with Your Cricut Machine and Vinyl | Beginner Friendly Gift
The Craft Scraps Social Media:
**Follow me on Instagram - @thecraft_scraps
**Subscribe to my Youtube Channel for more tutorials - https://www.youtube.com/channel/UCLQmXfG9McbtLO7k6A2_nvA
**Like me on Facebook - https://www.facebook.com/thecraftscraps
*******************************************
Materials:
-Coffee mug
-PERMANENT vinyl (Oracle 651 is what I used, but Cricut also has a permanent option - Auntie Tay also has permanent vinyl -don’t forget to use my code “thecraftscraps” for 10% off! https://shopauntietay.com/collections/adhesive-vinyl/products )
-Transfer tape (using my Auntie Tay transfer masking tape that I am OBSESSED WITH Transfer Tape - this was also in Auntie Tay’s Winter box and you can also get it here - and don’t forget to use my code “thecraftscraps” for 10% off! https://shopauntietay.com/collections/transfer-tape/products/paper-transfer-tape-12in-x30-ft )
**Note: I do receive a small commission if you use my Auntie Tay code or Amazon link to support the channel! Thank you!*
Step by Step Directions:
1) Open Design Space (**Design Space portion not recorded – click here for how to design a text box**)
2) Create a new projects/canvas
3) Create a text box
4) Write out your text
5) Click font up a the top and choose a font you like *if you use a cursive font, you will want to ungroup your font and move all the letters so they are touching then WELD it together)
6) Size your image to fit your mug
7) Once all the text is ready to go, click MAKE IT
8) Select your cut settings – for the VINYL, I used Vinyl
9) Put your VINYL onto the mat vinyl side up – I used the light grip blue mat
10) Once the vinyl is on your mat, load the mat into your Cricut using the flashing arrow buttons
11) Once loaded, press the flashing Cricut button to cut!
12) Once your vinyl is cut, use your weeding tool to “weed out” or remove the excess vinyl and middle of the letters
13) Once weeded, apply your transfer tape – stick the tape onto your text
14) Once the transfer tape is on your text, peel the transfer tape up – your text should come with it – you may need to get it started and help it out
15) Using the transfer tape as the carrier sheet, stick your vinyl text onto your mug
16) Using your scraper, press and smooth out the text (the tape is still on the stencil at this point)
17) Peel off the transfer tape – your text will be left on the mug
18) You’re done! I don’t seal my cups but you can if you want. As long as you are gentle with the mug (i.e. no dishwasher, no microwave, no soaking) you should be ok!
Видео BIG NEWS + Easy DIY Coffee Mug with Your Cricut Machine and Vinyl | Beginner Friendly Gift канала LAUREN LASKI
Показать
Комментарии отсутствуют
Информация о видео
Другие видео канала
 HOW TO MAKE A T-SHIRT WITH CRICUT | Start to Finish Easy DIY T-Shirt!
 The Hinge Method: The EASIEST way to apply vinyl to mugs... and everything else!
 25 Best Cricut Tips, Tricks, Shortcuts, Hacks, & Hidden Features
 How to make Customized Mugs | DIY MUGS (easy)
 How to Sublimate a Mug - Sublimation for Beginners
 Everything You Need to Know About Cricut Infusible Ink on a Sublimation Mug Using a Mug Press
 How to Put Vinyl on Mugs + Vinyl Test & Cute Designs!
 DIY COFFEE MUG W/YOUR CRICUT | SIMPLE & EASY BEGINNER FRIENDLY GIFT IDEA!
 How To: Easy Coffee Mug With Your Cricut
 Glitter Tumbler Tutorial - Epoxy + Loctite Method - Full Process Start to Finish!
 How to Make EASY DIY Wine Glasses with Your Cricut & Vinyl! Beginner friendly!
 STEP BY STEP HOW TO MAKE A SWEATSHIRT WITH YOUR CRICUT | DIY Sweatshirt with HTV and Cricut!
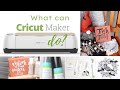 What You Can Do With Cricut Maker!
 HOW TO MAKE A FRONT DOOR MAT WITH CRICUT FOR BEGINNERS | DIY Welcome Mat Outdoor | FlexSeal Tutorial
 Cricut Maker vs. Cricut Explore Air 2: Which machine should I buy and why?!
 DIY Painted Wood Sign Using a Vinyl Stencil and Your Cricut!
 12 INCREDIBLE Dollar Tree CRICUT Hacks You NEED To Know RIGHT NOW!!
 How to Use Cricut Infusible Ink on a Mug
 HOW TO MAKE AN EASY T-SHIRT WITH YOUR CRICUT | EASY + QUICK DIY T-SHIRT IDEA W/SPARKLE HTV!
 How To Seal Vinyl on a Mug