Glitter Tumbler Tutorial - Epoxy + Loctite Method - Full Process Start to Finish!
Learn how to make glitter tumblers with both epoxy and Loctite. Get the free vinyl decal SVG (Design #134) at https://jennifermaker.com/glitter-tumbler-tutorial
Watch my video all about Epoxy safety here:
https://youtu.be/QTAEFJfl1v4
PLEASE READ FIRST: Epoxy resin is toxic while it is curing, and safety precautions must be taken. Wear proper protective equipment (nitrile gloves, long sleeves, full-face respirator, and apron) and work outside or in a well-ventilated area. Do not allow epoxy resin to touch your skin or be inhaled through fumes or dust. If you get some on your skin, wash it twice well with soap and water. Always read the safety information!
This video teaches you the complete process of making DIY glitter tumblers, from selecting the right tumblers and adhesive to applying the glitter and epoxy resin to create a tumbling/curing rack to prevent drips! I break it down step by step to make it EASIER for you to have success!
Materials List (contains my affiliate links):
* Stainless steel tumblers, cups, and/or mugs
- Mossy Oak 30 oz. tumblers https://amzn.to/2BNugXH
- Stemless wine tumbler https://amzn.to/2BNjctI
- Powder coated pink water bottle https://amzn.to/2BNtutL
* Glitter, extra fine or chunky -- I used these exact glitters:
Teal - https://amzn.to/2SsRZna
- Copper - https://amzn.to/2SpYvuV
- Pink - https://amzn.to/2SmWPSR
- Purple - https://amzn.to/2Rg4cP1
- Black - https://amzn.to/2LDvPMt
- Red - https://amzn.to/2SsSei4
- Pink- https://amzn.to/2VhAxnD
- White - https://amzn.to/2GOzPLl
* Epoxy resin -- I recommend this EXACT brand which I used and loved: https://amzn.to/2VgQnyG
* Spray adhesive -- I recommend this EXACT brand which worked like a charm: https://amzn.to/2GIJHGs
* Spray sealer -- I recommend this EXACT brand: https://amzn.to/2U69N8o
* Painter's tape and/or electrical tape
* 91% isopropyl alcohol
* Disposable nitrile gloves (I used four pair)
* Extra plastic cups (for mixing)
* Extra popsicle sticks (for mixing)
* Copy or freezer paper (used to capture your glitter and drips)
* Adhesive vinyl and transfer tape
* A way to keep your glitter tumblers rotated (we used both a cardboard box with PVC pipes and a homemade tumbler turner) https://jennifermaker.com/diy-tumbler-turners/
* A way to cut your vinyl (I used the amazing Cricut)
* My free SVG/DXF/PDF cut files/patterns (Design #134) ( available in my free resource library at https://jennifermaker.com/resource-library )
UPDATES/CHANGES: Check for any updates, changes, or additional videos for this project at https://jennifermaker.com/updates
Glitter tumblers are stainless steel insulated mugs and cups that you glitter, seal, and decorate! They are VERY popular because you can personalize them and they look FABULOUS when they are all done. Also, the sealing process completely protects the vinyl decal so you never need to worry about it coming off.
The process to make a glitter tumbler may seem complicated, but I’m going to take you through it step-by-step.
There are 11 steps to the perfect glitter tumbler:
Step 1: Prepare and tape your tumblers for the glitter.
Step 2: (Optional) Spray paint your tumblers.
Step 3: Put adhesive on your tumblers and glitter them.
Step 4: Seal the glitter on your tumblers with a clear coat.
Step 5: Prepare a way to rotate your tumblers while they cure.
Step 6: Mix and apply high gloss resin to your glitter tumblers using proper safety precautions.
Step 7: Remove your tape after 30 minutes (and before 45 minutes)
Step 8: After five hours, tape your tumblers and sand them. Wear protection!
Step 9: (Optional) Apply your vinyl decal.
Step 10: Apply your second cost of resin.
Step 11: Remove your tape after 30 minutes (and before 45 minutes) and allow your tumbler to cure for 24-48 hours.
The difference between the extra fine glitter and chunk glitter really comes down to personal preference. The extra fine glitter is definitely more sleep and smooth, but not as sparkly.
#cricut #cricutmade #designspace
Watch the Ombre Glitter Tumbler Video at https://youtu.be/_XXOCIaEl54
I appreciate every subscriber. It's free and easy to subscribe -- just click: http://bit.ly/sub2jennifer
=============
Follow me at:
Blog: https://jennifermaker.com
Facebook Page: https://www.facebook.com/jennifermakercrafts
Facebook Group: https://www.facebook.com/groups/cricutcraftersandmakers/
Instagram: https://www.instagram.com/jennifer.maker
Pinterest: https://www.pinterest.com/jenuinemom
Please subscribe to my channel at https://www.youtube.com/c/jennifermaker for more video tutorials to craft a life you love!
Credits:
Introduction: PixelBytes (my child!)
Music: Cute by Bensound (licensed, royalty and copyright free)
Videography: Jennifer Marx on a Panasonic Lumix FZ-1000 DSLR 4K
Design: A Jennifer Maker original!
Видео Glitter Tumbler Tutorial - Epoxy + Loctite Method - Full Process Start to Finish! канала Jennifer Maker
Показать
Комментарии отсутствуют
Информация о видео
Другие видео канала
 How to Glitter a Dollar Store Tumbler Water Bottle with $1 Supplies
 EASY BASIC GLITTER TUMBLER TUTORIAL | EPOXY METHOD
 OPEN ZIPPER TUMBLER TUTORIAL
 25 Best Cricut Tips, Tricks, Shortcuts, Hacks, & Hidden Features
 Cricut Infusible Ink Layered T-Shirt Tutorial - Full Process!
 How to Put Vinyl on Mugs + Vinyl Test & Cute Designs!
 How to Etch Glass the Easy Way (Armour Etch & Vinyl Decals!)
 Milky Way Tumbler. Start to finish
 20 CRICUT HACKS I LEARNED ON TIKTOK
 Cricut Iron-On T-Shirt Tutorial - Beginner Friendly!
 What You Can Do With Cricut Maker!
 Super Easy Alcohol Ink Epoxy Tumbler Tutorial
 Ombre Glitter Tumbler Tutorial (Rainbows, Too!)
 Honey Bee Tumbler
 How to Make Vinyl Decals + Designs for Instant Pot, KitchenAid Mixer, & Keurig!
 Make a Large Vinyl Wall Decal - How to Cut Larger Than Mat on a Cricut!
 Making tumblers start to finish
 Make Print Then Cut T-Shirts with Your Cricut the RIGHT Way!
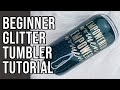 Beginner Tumbler Tutorial | Start to Finish
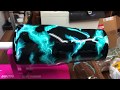 Alcohol Ink Tumbler for beginners #2