Honda Trail CT125 Is Doing the TAT - Found Great Prices on Accessories
TAT VIDS COMING SOON. Ride Report and other links:
https://linktr.ee/teamct125
After seeing how well they performed on our Hurricane Creek run, my buddy John and I have tentatively decided to take our CT125s on the TAT. So I've gone ahead and installed some accessories.
If you want to skip the bear and get right to the accessories:
Accessory Stuff 1:
https://youtu.be/BUGB7gGXHU8?t=144
Accessory Stuff 2:
https://youtu.be/BUGB7gGXHU8?t=1003
Our next mission will be the Smokey Mountain 500 for a shakedown to see if we have all the gear we need and to see how they perform fully loaded up. That'll be the final test. If it's miserable - we still might switch the Himalayans.
USB INSTALLATION:
I got it from WeBike. At the time I thought the US bikes would come with the quick connect. I recommend finding something in the US.
https://japan.webike.net/products/24090485.html
Open up the headlight case, you’ll see a black plastic connector - take that apart. There are three wires. Shove the ‘hot’ wire from the usb unit into the connector where the yellow and black wire goes and force the connector back together. Not elegant but it works.
RACKS:
All of the racks are from "CT125 Accessories Parts”. I found them on Facebook. I was pretty surprised by the cost of CT125 accessories I was seeing on Ebay or WeBikes or the other usual places - (plus the crazy international shipping). This place is located in Chang Mai, Thailand and is legit. High quality. Solid. And everything lined up and fit correctly. They don’t have a website and they only take wire transfer - so there was definitely a bit of a leap of faith involved. But their prices are good. They shipped via Thai Post - which I recommend... It was relatively cheap and came quickly. I’m pretty sure 2 week shipping was $200 or 2-3 months was $60. But it comes quicker than that. It was all very well packed. No instructions - but I emailed them a question and they got back to me with photos and an explanation right away.
Here’s a link. Talk to Jednipit and tell him Angelo sent you.
https://www.facebook.com/CT125-Accessories-Parts-112960670561450/
Here’s what I paid.
Baht USD
Cash Bar (Fall) Equipment 2,900 $93.45
Rack on Headlights 1,150 $37.06
Headlight Card 800 $25.78
Center Rack 1640 $52.85
rear light card 1,250 $40.28
Rack bag for LEFT SIDE 1,800 $58.00
Fender Lifter Brackets 650 $20.94
FRONT RACK AND HEADLIGHT COVER INSTALLATION
Pretty straightforward but awkward to get the spacers in and balance it all until you can get a bolt in.
TAIL LIGHT GUARD INSTALLATION
The only thing I needed to take apart was the three bolts on the inside of the fender that holds the license plate holder. Then you take off the reflector (and I guess toss it because I don’t see how to put it back) and the rest is pretty self-explanatory.
CRASH GUARD INSTALLATION
Don’t put the center rack on first (like I did). You have to completely take the black plastic triangle piece off the bike. First, remove the existing crash bar bolts from the smash plate, then take out all the bolts from the plastic triangle piece. Then just lower it off the bike. Be careful with the silver bracket thing - it will bend and cause all sorts of trouble putting things back together. Attach the new crash guards with it out like that. Then put it all back. There’s also a black plastic cover under there - there are four of the plastic pop pin things that come off to remove it.
POWER PIGTAIL INSTALLATION
https://www.youtube.com/watch?v=g3vRNriAYP8&feature=youtu.be
This was more of a pain in the ass than it should have been. Just note that the nuts inside the battery terminals move - and you have to find a way to keep them up toward the side where the bolt goes in to have any chance of catching the thread. When you add the o-ring from the pigtail - it adds just enough space to keep the bolt from reaching the nut. I used a piece of wire to keep the nut toward the bolt until I got it started. It was a pain.
And be careful with all the plastic. See the video - there's a little tab that loves to snap off.
APACHE CHARGING CASE:
I emailed Sterling Noren from Motorcycle Travel Channel for some advice on how he keeps his drone and laptop charged when traveling and tent camping. He was nice enough to give me some tips.
https://www.youtube.com/channel/UCtHv1zzGSawcksbm7Vj3w6w
And I totally ripped off ideas from Tim Collins too. Here's that video:
https://www.youtube.com/watch?v=N7RP3PJNGik
BRP - BENT CREEK ROUTE
https://www.gaiagps.com/map/?loc=14.1/-82.5562/35.5674&pubLink=hRBBjhwNMNuxZvPws2RiXqCw&trackId=c90b9b7b-12a1-4f06-8f6a-0112cb215801
Affiliate Links
https://tinyurl.com/hm32rmmt
Видео Honda Trail CT125 Is Doing the TAT - Found Great Prices on Accessories канала Some Guy Rides
Показать
Комментарии отсутствуют
Информация о видео
Другие видео канала
 EP 3 Lafayette, GA to Iron City, TN: Attempting the Trans America Trail / TAT on a Honda Trail CT125
 Day 1: Two Honda Trail CT125's take on the Smokey Mountain 500 prepping for the Trans America Trail
 Honda CT125 Hunter Cub Trail - Best 3 Accessories Will Save You $$$$!
 Can we unlock horsepower from a stock 2021 Honda Trail 125 by removing the spark arrestor?
 2020 Honda ADV 150 vs Honda Trail 125
 2021 Honda Trail 125 Moto Skill Center Rack Install
 The New (Old) 2021 Honda Trail CT-125!
 The Trail 125 (Hunter Cub, CT125) Joins Honda's Mini Moto Lineup! Grom, Monkey Super Cub, Hunter Cub
 Honda Trail 125 CT125 Roto-Pax follow up
 2021 Yamaha TW200 Review // Ride & Review
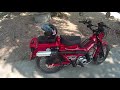 Honda CT 125 with new Moriwaki Monster Black exhaust
 A proper Honda CT125 review!
 2021 Honda Trail 125 First Ride Review
 Ep.2: Reliance, TN to Lafayette, GA: Attempting the Trans America Trail / TAT on a Honda Trail CT125
 This 2021 Honda Trail 125 Turns More Heads Than A Superbike, And Here's Why!
 Ep 1: Asheville, NC to Reliance, TN: Attempting the Trans America Trail / TAT on a Honda Trail CT125
 2020 Honda CT125 Hunter Cub Trail- Top 10 Fitted Accessories Plus What's Next!!
 2 Honda Trail CT125's on Hurricane Creek Rd in Western North Carolina
 Honda Trail CT125 - Another Run Prepping for the Smokey Mountain 500 & TAT / Trans America Trail
 Honda CT125 Locked & Loaded Big Bore 142cc