How To Make A Boho Wrap Bracelet: Easy Jewelry Making Tutorial
Thanks for watching our video. If you like it, be sure to subscribe! Click more to see more about this project.
Our blog is www.RunningWithSisters.com. It is loaded with DIY crafts, jewelry tutorials, and all kinds of gift crafts to make.
Let’s connect!
Twitter: https://twitter.com/ONeilSisters
Facebook: https://www.facebook.com/TheONeilSisters
Instagram: https://www.instagram.com/ONeilSisters/
Pinterest: https://www.pinterest.com/ONeilSisters/
How To Make A Leather Wrap Bracelet
by Jennifer and Kitty O'Neil
The O'Neil Sisters
Running With Sisters
Here’s the complete how to on our blog:
https://runningwithsisters.com/boho-wrap-bracelet-video-and-kit/
This leather wrap bracelet is our most popular by far! The sueded cord gives it a casually elegant look, while the Thai-style silver beads add just the right amount of Boho chic. It goes with everything and works well on any size wrist. The best part of this bracelet is that it’s so easy to make, you won’t believe it! We can’t wait to teach you how to magically turn two leather cords and two types of beads into a Boho wrap bracelet with effortless style. And it’s easy to adjust for any size wrist. We’ll show you how!
If you love the beads we used and want to make a bracelet just like ours, we have created kits for you! (We’re so excited!) Just click here https://runningwithsisters.com/shop/ to shop for the kits in our store. Once you have your kit, you can follow along with us in the video while you make your own Boho Wrap Bracelet. It’ll be like we’re making jewelry right there with you! Fun!
HOW TO MAKE THE BOHO WRAP BRACELET
MATERIALS
2 Sueded leather cords, 35″ and 70″
7 Large silver round beads (large hole)
7 Small silver cylinder beads
1 Silver S-hook clasp
Scissors
Ruler
STEPS
1. To get started, fold the longer cord in half. Then align the folded end of that cord with the end of shorter cord.
2. Now you’re going to tie a knot and make a loop for the clasp. To do this, take all three cords in your hand and tie a knot about ¾” from the folded-over end, like the template below.
It’s really just a simple, overhand knot. Move your knot up to make the loop smaller if needed before tightening the knot.
3. Feed two of the cords through a large silver bead. (This is why you need the large bead to have a large hole! Make sure the hole is big enough for two cords.) Slide the large bead up toward the knotted loop end.
4. Now take the single cord that is left and tie a knot about 2″ from the knotted loop end.
5. Slide a small silver bead onto that cord and slide it up toward the knot. Then tie a knot on the other side of the small bead. We think it helps to make a loop in the cord right next to the bead and feed the end of the cord up through the loop while holding the loop in place. Keep holding on to the loop while you tighten the knot. That way the knot will be right where you want it!
6. Next, take one of the cords from large bead and pair it with the single cord coming out of the small bead.
7. Feed those two cords through a large bead, as in step 3. (A little tip: if you have any trouble getting both cords through the hole in the large bead, mis-align the ends of the cords before feeding them through. Works like a charm!)
8. Repeat steps 5 and 6 to add a knot, a small silver bead, and a knot to the single leftover cord. Make the first knot about 2″ from the last knot you made. (Keep in mind that the spacing of the knots and beads does not need to be precise!) Continue this same pattern until all of the beads are used.
9. To finish the end, slide the S-hook clasp onto the longest cord and fold that cord back on itself.
10. Then take all four strands in your hand and tie a knot, like the knot in step 2 (just a simple, overhand knot!).
Now check the size of your bracelet. Wrap it around your wrist 3 times while holding the clasp in place. If you need to adjust the size, undo the knot and slide the clasp out to make it longer or in to make it shorter. Then retie the knot.
11. Trim the cord ends by the clasp and loop to about ½”. We think the tails adds a little Boho flair! To wear your bracelet, wrap it around your wrist three times and connect the S-hook clasp to the loop. Gorgeous!
If you like the beads we used in our Boho Wrap Bracelet, be sure to check out the new kits we created for you in our Shop. https://runningwithsisters.com/shop/ We have bracelet kits with all the materials in both Black and Cocoa! Definitely let us know how your bracelets turn out. We’d love to hear from you!
Happy Crafting,
Jennifer & Kitty
We have all kinds of other jewelry making videos and lessons. If you enjoy this one, you might also like these jewelry making lessons:
Crystal Wrapped Earrings https://youtu.be/uNUVJJ0S7WU
Pandora Ribbon Choker https://youtu.be/KOLY0cP8PoU
Beaded Drop Earrings https://youtu.be/w_P4nqyWBj8
Handmade Beaded Earrings https://youtu.be/6ReuKIP1mFo
Beaded Lariat Necklace https://youtu.be/z7Ywk2DHUH4
Видео How To Make A Boho Wrap Bracelet: Easy Jewelry Making Tutorial канала The O'Neil Sisters
Показать
Комментарии отсутствуют
Информация о видео
Другие видео канала
 DIY JEWELRY TUTORIAL - Learn how to make the gorgeous Gaelic Circles Leather Bracelet
 Tila Leather Wrap Bracelet (DIY Tutorial)
 How to Make a Boho Leather Tube Bangle Wrap Bracelet - Step by Step DIY Tutorial - # 769
 Adjustable Leather Friendship Bracelet: Easy Jewelry Tutorial
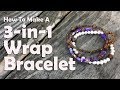 How To Make A Three-In-One Wrap Bracelet: Jewelry Making Tutorial
 How to Make a Beaded Wrap Bracelet
 How To Make Easy Barrel Knotted Cord Earrings With TierraCast Swarovski Crystal Charms
 DIY - Wrap Bracelet
 Boho Fancy! Daily Wear 10 DIY Jewelry Making At Home
 DIY - Jewelry Basics. Learn how to make an easy pair of leather earrings
 Simple Beaded Slip Knot Bracelet- DIY Jewelry Making Tutorial by PotomacBeads
 Boho Infinity Circle Charm Triple Wrap Bracelet - Step by Step DIY Tutorial How to Size - # 332
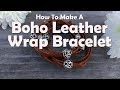 Simple Leather Wrap Bracelet: Easy Jewelry Tutorial
 DIY Leather Wrap Bracelet - Learn how to make a beaded tube and barrel knot leather bracelet.
 DIY Ear Wires – Earrings - Jewelry Making – Wire Wrapping - Potpourri Earrings
 Leather Knotted Wrap Bracelet Tutorial! Simple and Easy! 💕 (It Doubles as a Necklace!)
 10 Boho Jewelry Design to Mix and Match & Make in Minutes!
 Crystal Herringbone Wrap Bracelet - DIY Jewelry Making Tutorial by PotomacBeads
 How to Make a Boho Triple Wrap Bracelet - Step by Step DIY Tutorial Bohemian Faux Suede Wrap