R-DRUMS / RTS drum trigger system installation (acoustic into e drum conversion)
R-DRUMS Onlineshop: http://www.r-drums.com/english-1/
Facebook:https://www.facebook.com/pages/R-DRUMS/384574711572899?fref=ts
In this video we’ll show you how to install the r-drums RTS trigger system into a 13-inch acoustic tom.
You’ll need the following tools:
A tuning wrench
2 cross recess screwdrivers, one short and one long
7mm combination wrench (included in delivery)
10mm socket wrench
a ruler with diameter of your drum with a paper scale applied (included in delivery)
We recommend using a big table with a covering blanked as your workspace.
Begin by removing both the tuning hoops and the heads.
The upper lugs will be removed. Their screws are not needed anymore, however we recommend that you store them in case the drum gets rebuilt later on.
Only remove the bottom lugs if the shell is too flat. This may be the case for most snare drums.
Turn the shell aside to make the installation process easier.
The trigger system is pre-mounted in its smallest diameter.
The cushion should point to the outwards or upper side of the drum. It is important to make sure that the trigger cone does not get pushed or damaged.
Loosen one of the central screws with the 7mm socket wrench. The holding arms can be mounted from both sides to the central plate.
Now it is time to attach the first holding arm to the shell and to one of the lugs. Use the screws and washers included in delivery to attach and connect those parts. Do not tighten them yet.
Repeat the last step for every mounting bar of the system. If the M4 screw is too long for the specific lugs, then just use a second washer to solve the problem.
If every mounting arm is screwed onto the shell and lugs, you can tighten the lug screws. Push the trigger system down before doing that, to ensure the mounting arms are attached at the same height.
Tighten all the screws on the central plate of the trigger system using a 7mm socket wrench. Follow the order shown in this video.
After installation, you have to set the height of the trigger cone with the help of the 3 elevating screws.
Unlock their counter nuts before twisting them.
Unlock these nuts on both sides with a 10mm combination wrench by turning them to the left side.
Now move the elevating screws with a 10mm socket wrench. Turn them to the right to move the trigger cone up.
Turn these screws only half a turn at a time and all of them in rotation to ensure that the cone plate does not get jammed.
One full turn of the screw will increase the height of the trigger plate about 1 mm.
The top of the trigger cone has to overlap the bearing edge by 1.5 mm.
Put the ruler or a similar straight device including the paper scale on the bearing edge of the drum to adjust the height of the trigger cone.
Tighten the counter nuts of all 3 elevator screws as soon as the cone adjustment is made.
Check the height of the trigger cone again and correct it if necessary.
The next step is the cable. We‘ve decided to use a Neutrik NJ3 jack plug. These jacks require an air hole extension of 24mm.
If you don’t want to drill a hole that big, we recommend our optional Air hole Jack adapter:
This cable fits easily through the air hole of conventional drums and its jack can even be mounted into the air hole.
All cables can easily be mounted at the bottom side of the trigger system through a solderless lug. This elimantes the need to solder.
The cable shouldn’t be slagging inside of the drum.
There is a stain relief next to the solderless lug to fix the applied jack cable.
Use an 8mm socket wrench including screw driver. Additional cable can be applied with cable ties.
We used another stain relief to fix the cable.
Now mount both mesh heads and be sure to tighten the tuning screws in the correct order.
We recommend using a mesh head on the bottom side too, to reduce unwanted resonance sounds.
Finally mount the rim noise eliminator and you are done.
The RTS-triggersystem is availeable in all sizes from 8-16 inch and for all lug
constallations and numbers.
Thanks for watching.
Video editing: Marcel Preiss
Видео R-DRUMS / RTS drum trigger system installation (acoustic into e drum conversion) канала R-DRUMS
Показать
Комментарии отсутствуют
Информация о видео
Другие видео канала
 R-Drums RTB Review (acoustic to electronic snare conversion)
 E-drum Conversion Part 6 (Flextrigger 2.0)
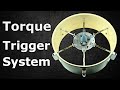 Dual Trigger System (E-drums)
 6 USEFUL Electronic Drum Tools - My Favourite eDrum Related Products and Gear | The eDrum Workshop
 Low Budget Trigger Pad DIY (E-drums)
 Acoustic To E-Drum Conversion Build | Part 1
 BlackBird custom electronic drum set
 R-DRUMS / RTS-Triggersystem / akustik zu e-drum Umbau (German)
 The Who - Amazing Journey / Sparks - Zak Starkey
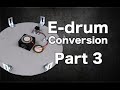 E-drum Conversion Part 3 (Tom triggers)
 Prism Reflective Response 2Ply Mesh Head Review
 drum-tec mesh heads for electronic drums: See & hear the differences!
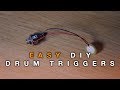 Make YOUR OWN DIY Drum Triggers - EASY | Free Drum Lesson - Rohan Bumbra
 My Converted Tama E-Drum Snare (R-Drums RTS Trigger Review)
 All The Electronic Drum Settings Explained (How Scan time, retrig-cancel, and more work)
 How Superbowl Drummers Use Electronic Drums (2000-2020)
 E-drum conversion… Pearl Export / R-Drums triggers / Roland TD-27 / Cymbales ATV
 A Conversation With Erik The Owner Of Edrumcenter
 5 Reasons To Play Electronic Drums In 2021 | The eDrum Workshop