Beginners Guide on How to Polish Brass to a Mirror Finish
Welcome to my channel, Matt's Metalworking. Please don't forget to hit that LIKE button and SUBSCRIBE for future videos. My name is Matt and I produce metalworking relating videos which can include fabrication, machining, milling, turning, welding, tool tutorials, etc.
In this video I will be showing you a beginner’s guide on how to polish brass with a mirror finish by hand. I’m just using a piece of raw brass, so you can see it’s quite rough and it’ll definitely be more work intensive than compared to a machined piece or something that is already finished just needing to be refinished.
Amazon links for various products used in the video for both USA and Canada:
USA
Scotch Brite maroon scuffing pad (400 grit): https://amzn.to/2O62hwd
Scotch Brite green scuffing pad (600 grit): https://amzn.to/2MGpgxJ
Scotch Brite white scuffing pad (1200-1500 grit): https://amzn.to/2YM0cI9
600 grit sandpaper: https://amzn.to/3t020uP
1000 grit sandpaper: https://amzn.to/2YkJzmq
1500 grit sandpaper: https://amzn.to/3qTem61
2000 grit sandpaper: https://amzn.to/3iWGzWX
Metal polish: https://amzn.to/3tytqIH
Canada
Scotch Brite maroon scuffing pad (400 grit): https://amzn.to/3pW1ZGl
Scotch Brite green scuffing pad (600 grit): https://amzn.to/2MEQowT
Scotch Brite white scuffing pad (1200-1500 grit): https://amzn.to/3tvlAPL
600 grit sandpaper: https://amzn.to/2YhR9OJ
1000 grit sandpaper: https://amzn.to/36e2fZs
1500 grit sandpaper: https://amzn.to/3cfSJZx
2000 grit sandpaper: https://amzn.to/3pot4BF
Metal polish: https://amzn.to/3aACPGZ
Wash the piece to remove any contaminants which may cause damage during the contamination process.
Depending on the surface, this will depend on what grit of sandpaper is required. I am starting with 600 grit sandpaper, this needs to be a wet/dry compatible paper. The sandpaper needs to be pre-soaked. I have a bucket of water beside me, if you wish you can mix in soap to help with lubrication.
For heavier surface damage, a lower the grit is required. However when you go to a lower grit, this also means more material will be removed, and as you increase to a higher grit, slightly more work is required to remove those heavier grit scratches. When starting out with that first grit of sandpaper, most of those surface imperfections should be removed. Rinse off the surface to remove any access sanding material and always keep the sand paper well lubricated.
Moving up to 1000 grit wet/dry sandpaper. The reason I am wet sanding is so that the dust is kept down and we can achieve a finer finish. The black backing pad I have keeps even pressure on the surface with minimal distortion as what you may find when only using your fingers.
After a couple minutes of sanding, you’ll noticed the sanding marks are much finer and we can now move onto 1500 grit. Rinse excessive material build up and make sure the sandpaper is well lubricated. Compared to other metals I have polished in the past, I do find brass tends to be a little sticky when moving up to finer grits.
Now 2000 grit sandpaper. After this you can take it to another step using 3000 grit, but for this I am finishing with 2000 grit. The finer grits allows you to achieve a higher shine with more clarity.
For an addition example using an abrasive pad. Just like sandpaper, these too are available in various grits and is typically distinguishable by the color of pad. The maroon pad is listed at about 320 to 400 grit. These can be used with water as well which I am doing here. These pads are great for irregular shaped objects, but they don’t necessarily remove surface imperfections. Instead they smoothen or round off those imperfections. Sandpaper with a backer on the other hand can promote more of a smooth surface.
Moving up to a finer grit, this pad is green and rated at about 600 grit. Always keep the area well lubricated and rinse away excessive material. I’ll be stopping here to demonstrate what happens when you don’t use a fine enough grit before moving onto a polishing compound.
Now moving onto the polishing stage. You can use a polishing compound such as what is used on automative paint or a metal or alloy specific polish. Here I am using an aluminum wheel polish. Work the polish into the surface, apply more polish when needed, and wipe away if the old polish gets too excessive. The polish will turn black which is perfectly normal as it’s removing a very light amount of material.
Once the surface is almost finished, finish up with a light amount of polish and a soft cloth.
This concludes the rest of my video, be sure to hit that thumbs up button, it’s a huge help to me and leave a comment below if you found this tutorial helpful or would like to share your brass polishing tips. And if you’re not a subscriber, be sure to hit that subscribe button. Thank you for watching.
Видео Beginners Guide on How to Polish Brass to a Mirror Finish канала Matt's Metalworking
Показать
Комментарии отсутствуют
Информация о видео
Другие видео канала
 How to Polish ANYTHING with the Dremel Rotary Tool
 How To Easily Clean All Brass Silver Copper Metal- Furniture Hardware Polishing
 How To Sand And Polish Brass To Mirror Finish
 The best trick to CLEAN BRONZE
 Easy Mirror Polish On Steel!
 Antique Brass Lantern Restoration
 How to Clean Brass Vessels at Home || Very Easy || The best trick to CLEAN BRONZE
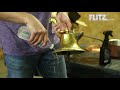 Flitz! World's Greatest Tarnish Remover! Copper! Brass! Bronze! Clean and polish! Here's how!
 How to Clean Brass with Homemade Bronze and Brass Cleaner Hack - Bonus on Polishing!
 Quick Brass Polishing Trick!
 How To Clean Brass Under 1 Minute
 Customer review: How to use Dialux Polishing Compounds for all metals and plastics
 How-to & Buffing Basics Demonstration with Eastwood
 How to Buff and Polish Brass
![How to Wet Sand and Polish Paint [Beginner's Guide]](https://i.ytimg.com/vi/x0HZrQgvzdk/default.jpg) How to Wet Sand and Polish Paint [Beginner's Guide]
How to Wet Sand and Polish Paint [Beginner's Guide] Polishing & Buffing Wheels Guide
 How To Use Brasso | How To Polish Brass With Brasso Polish
 How to clean brass. Cheap and quick.
 Cleaning brass that's over 100 years old with salt and vinegar
 Restoring and Preserving Marine Brass