1964-66 Thunderbird Reproduction Door Panel Installation and Fit
Look here for all video times for each specific door panel task.
This video shows how to install the reproduction door panels and how to overcome poorly made reproductions that fight you every inch of the way.
00:00 Start of video, view of the new reproduction door panels.
1:10 Cat whiskers, familiarization of reproduction cat whiskers.
1:59 Curtesy light assembly, door open actuator and vent window actuator shaft hole locations.
3:07 Cat whiskers, placement and fit.
4:35 Remote mirror control hole and fit of mirror control unit in hole.
7:24 Pull cup hole familiarization in door panel.
9:40 Door panel side molding mounting holes identification.
10:50 Door panel too short.
11:43 Remote mirror control hole trimming and installation of mirror control unit into door panel.
14:51 Cat whisker alternatives.
16:25 Cat whisker metal backing familiarization.
17:41 Cat whisker installation on drivers door panel.
22:32 Cat whisker installation on passenger door panel.
24:04 Felt strip familiarization.
25:07 Cutie the fat Panda.
25.22 Felt strip chrome bead removal.
26:19 Felt strip – removal of the fuzzy material from the felt strips.
27:48 Felt strip – fitting the fuzzy material onto the cat whiskers.
28:58 Felt strip – gluing the fuzzy material onto the cat whiskers.
32:54 Curtesy light assembly placement onto door panel.
37:38 Curtesy light – measuring and cutting hole for curtesy light assembly.
38:22 Curtesy light - more location and measuring info.
40:16 Lock knob hole and bezel familiarization and sizing of the lock knob hole.
41:32 Lock knob hole bezel installation explained.
42:45 Lock knobs – trying to find the correct lock knob.
43:44 Lock knobs – Making them fit.
46:04 Drivers door panel - test fitting and had issues with front upper corner. Also locating both vent window crank and door open actuator shaft holes.
49:25 Vent window crank shaft hole template and measurements.
50:43 Drivers door panel – continue test fitting for both vent window crank and door open actuator shaft holes.
51:52 Passenger door panel – test fitting and locating both vent window crank and door open actuator shaft holes.
53:32 Door open actuator passenger side – modifications made for it to line up with hole in door panel.
56:33 Passenger door panel – continue test fitting and locating vent window crank shaft hole.
57:20 Passenger door panel – continue test fitting and sizing both vent window crank and door open actuator shaft holes.
59:40 Drivers door pull cup attaching plate install and discussion.
1:01:07 Drivers door pull cup attaching plate modification.
1:02:06 Drivers door pull cup and pull cup hole in door panel measurements.
1:03:39 Drivers door pull cup hole vinyl cut and pull cup installation and fit.
1:06:14 Drivers door pull cup installed and final fit.
1:07:42 Drivers door panel chrome trim install.
1:09:22 Passenger door panel installed before side moldings and handles.
1:09:28 Drivers door panel – view after trimming front upper corner of panel to fit onto door.
1:11:02 Passenger door panel – starting the trimming process on the upper corner of panel and pulling away vinyl from plastic panel.
1:14:19 Passenger door panel – gluing the vinyl to the back of the panel.
1:15:26 Door panel insulation installation.
1:16:58 Door insulation sheets.
1:17:08 Door panel finished view.
1:17:09 Fat Panda and credits.
Видео 1964-66 Thunderbird Reproduction Door Panel Installation and Fit канала Vintage Thunderbird Repair
Показать
Комментарии отсутствуют
Информация о видео
Другие видео канала
 1964 66 Thunderbird dash familiarization and installation
 1964 66 Thunderbird shift lever repair and why they fall/slip out of park and into reverse.
 1966 Thunderbird Dash Lights LED Upgrade
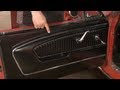 Mustang TMI Pony Door Panel 1965-1966 Installation
 1964 66 Thunderbird dashboard assembly
 1965-66 Thunderbird Brake Master Cylinder Installation and Brake Booster Push Rod Adjustment
 How to Repair a Windshield Chip or Crack
 1958 66 Thunderbird Cigarette Lighter Conversion to a Power Plug
 1964 66 Thunderbird Reproduction Window Switch Parts
 Removing Window Crank Handles, 1960's & 1970's cars
 1964 66 Thunderbird steering column and slide mechanism PT 1 Familiarization
 Enola Rae the 65 T-bird Fastback
 Tearing Down The Ford 390!
 1955 1968 Thunderbird Shop, Body, and Electrical Manuals
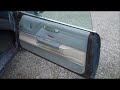 How To Door Panel Removal Classic G-Body Garage
 1959 Ford Thunderbird idling, exhaust sound and driveby
 1964 66 Thunderbird ebrake pedal assembly repair
 1966 Ford Thunderbird repair and refurbishment (Part 100). Ins and outs of sequential tail lights.
 Window Regulator Replacement - 1967-68 Cougar / Mustang
 1965-66 Thunderbird Sequential Motor Repair and Familiarization