Create your own Escape Room control software using Node RED
This is the first of a series of tutorial videos demonstrating how to use Node-RED (https://nodered.org/) to control devices in an escape room.
Node RED is a general-purpose framework that can be used to connect all sorts of hardware and software device - including DMX lighting, MIDI/OSC sound devices, and Arduino, Raspberry Pi, or other microprocessors connected via serial cable, ethernet, or Wi-Fi, which makes it absolutely ideal for use to connect the various puzzle controllers and tech props found in an escape room. It runs on Windows, Linux, and even a Raspberry Pi, and the editor is accessed via a node-based graphical interface in your browser. And, best of all, it's completely free and open-source :)
In this video, I'll cover how to download and install Node-RED itself, and then create a general ER "game flow" workflow, which can update a timer displayed on both a GM dashboard and a HTML/CSS-styled in-room player display. I'll also show how that same timer flow can send a message via an HTTP GET request to a WeMos D1 mini device which sets the time on a clock using a dual-shaft stepper motor. I'll also create link nodes for other types of triggered events - such as events that occur when the timer reaches a certain value, or an event with a random chance of occurring based on a set probability. I'll demonstrate how these events can trigger different sorts of hardware in later videos in this series.
This video was created with the generosity of my Patreon supporters - if you'd like to see more of my escape room tech projects, please check out https://www.patreon.com/playfultech
And, if you have any comments, suggestions, or requests for hardware/software which you'd like to see how to integrate into an escape room running Node RED, please let me know in the comments below!
00:00 - 02:05 Intro and Demonstration
02:06 - 05:48 Installation of Node.JS and Node-RED
05:49 - 07:21 The Node-RED interface
07:22 - 13:19 Creating a Game Flow - declaring global variables
13:20 - 21:04 Creating a Game Flow - maintaining a game timer
21:05 - 31:00 Adding a simple GM dashboard timer with buttons and text node
31:01 - 36:50 Adding a fancy in-room timer display with HTML and CSS in a template node
36:51 - 46:52 Exposing link nodes to allow actions to be triggered by common game events
46:53 - 50:30 Controlling a clock prop running on WeMos D1 mini using HTTP GET request
50:31 - 52:50 Importing and exporting Node RED flows
52:51 - 53:30 Wrap-up
Видео Create your own Escape Room control software using Node RED канала Playful Technology
Показать
Комментарии отсутствуют
Информация о видео
Другие видео канала
 Using Arduino with Node-RED to create a Simple Web Dashboard
 Arduino-Controlled Rotary Telephone (DIY Escape Room Prop Tutorial)
 Lesson 1- Understanding Node-RED
 Node Red MQTT on the Raspberry Pi
 Making an Escape Room Game - #2 Puzzle Design
 Top 5 Node-RED Core Nodes
 Programmable Wildlife / Security / Timelapse Camera Projects with an ESP-32 CAM
 Hand Laser Maze DIY Escape Room Puzzle Tutorial
 Node-RED Lesson 9- Function nodes
 Mastering Node-RED: Custom Alexa Commands + Node-RED Dashboard
 Escape Room Security Terminal Puzzle Tutorial
 Tutorial: Basic Node-RED Dashboard UI
 Behind-the-scenes at a World Class Escape Room
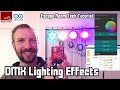 DMX Lighting Control with Arduino and Node-RED
 Plasma Balls + Arduino Escape Room Puzzle
 Node-red and Data Scraping
 Call Me! Rotary Telephone + Arduino Escape Room Puzzle
 #03 Control an LED from your phone the easy way with Node red on your Raspberry Pi
 Node Red -Using The HTTP Request Node