How I carpeted my van build #shorts
Carpeting a van conversion is a great way to create a comfortable, cosy space within the van. By carpeting I can cover up the insulation, making it look a lot nicer, but it also helps reduce condensation and makes the van just that little bit warmer. What do you think of my efforts?
🔔 Please SUBSCRIBE to my channel, thanks! 🔔
➡️ Watch the full van carpeting videos:
Carpeting the van: https://youtu.be/0DuEBg1Gsro
Carpeting the doors: https://youtu.be/Lr9SedThqTc
🔥 Entire van conversion playlist: https://bit.ly/2ZewxLt
📸 Instagram: https://www.instagram.com/yogi.the.van
🚐 Check out my van blog: https://thetinycampervan.com
☕ Support the channel: https://www.buymeacoffee.com/LensOfJames 🙏🏻
🎶 Music via Uppbeat, sign-up through my affiliate link here: https://uppbeat.io/?as=lensofjames
🔗 Affiliate links that help support this channel:
👉 Smoke grey 4 way stretch automotive van lining carpet: https://amzn.to/3ncNHEP
👉 Recycled plastic loft insulation: https://amzn.to/40vbqhM
👉 Trim Fix high temperature contact adhesive: https://amzn.to/42CPLGj
👉 Thermawrap bubble wrap insulation: https://amzn.to/408FYGB
👉 Van panel and trim removal tool kit: https://amzn.to/40rXogR
👉 Rubber U-channel edge trim seal: https://amzn.to/3Zbr1Ci
👉 Masking tape: https://amzn.to/40tpBEd
Now THIS was a daunting task, so I took an easy area to begin with - the ceiling. The carpet I chose was smoke grey coloured 4 way stretch automotive carpet and it was really easy to work with.
After the ceiling beams were carpeted, I moved on to the walls and each wall took about a day as there were so many contours, I wanted to do a neat job…and it was my first time doing it.
By spraying high temperature contact adhesive to the van and the carpet, waiting for the solvent to evaporate and sticking the carpet in place, it forms a permanent bond which will withstand the temperature fluctuations that vehicles are exposed to.
And don’t forget to wear a face mask, this stuff’s nasty!
After carpeting above the back doors, the last step was to carpet them. I wanted to create a really neat edge so stuck down some rubber u-channel (I bought 15 metres for all four doors) with a silicone adhesive first which I could tuck the edges of the carpet into. I did the same for the side doors too. It was a lot of work, but 100% worth it for the neat finish.
With some leftover carpet I made pockets in the door cards which have proved super useful for extra storage and that was the van carpeted!
Next up will be covering the floor.
🔔 Thanks for watching and if you’ve enjoyed this video, please LIKE and SUBSCRIBE! 🔔
#Vanlife #NissanNV200 #LensOfJames
DISCLAIMER: In this video, I am in no way stating that this is the proper way to undertake the conversion of a van, however after research and experience using the van, I believe this to be the way that is best suited to my van and the way I intend to use it.
Видео How I carpeted my van build #shorts канала Lens Of James
Показать
Комментарии отсутствуют
Информация о видео
Другие видео канала
 Canon 70-200mm f/2.8 L USM Lens
 How To: Focus Stacking In Photoshop CC 2014 Tutorial
 Snorkelling at Polurrian Cove on the Lizard in Cornwall
 SURFING Cornwall : Super Fun Waves At SENNEN COVE
 Is A REMOVEABLE Van Conversion A Good Idea? #Shorts
 Installing and covering my van floor #shorts
 Snorkelling at Rinsey, South Coast of Cornwall
 The Day The Fog Rolled In
 Michron Interval Ramp Timelapse Tutorial
 KAYAKING Falmouth | CAVES, JELLYFISH & WHITEBAIT
 Springtime: The Season of Change
 HOW TO Create A REMOVABLE Van Conversion
 Making Changes To The New Van Floor | Ep 9 | Nissan NV200 Camper Van Build
 Installing WINDOWS In My Tiny Camper Van...(And What To Do When It Goes WRONG!)
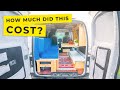 HOW MUCH Did My Van Build COST? | Tiny Camper Van Conversion COST BREAKDOWN
 HOW TO Stop Van Doors SLAMMING In The Wind | DIY Door Bar | Ep 25 | Nissan NV200 Camper Van Build
 10 ESSENTIAL Extras For A Campervan Conversion | Ep 16 | Nissan NV200 Camper Van Build
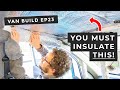 INSULATING The Cab CEILING And Cleaning The Van HEADLINER | Ep 23 | Nissan NV200 Camper Van Build
 Installing A Blackout Curtain In A Van | Ep 12 | Nissan NV200 Camper Van Build
 Installing A Vinyl Van Floor | Ep 7 | Nissan NV200 Camper Van Build
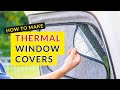 How To Make EASY Thermal Van WINDOW COVERS From Insulation And Carpet ♻️