Land Rover Series 3 Restoration - Safari Roof Revival Pt.3 - Part 45
Hi Guys and welcome back to the channel.
Having finished the roof sides I am now back on the safari roof. It is a bit of a tedious task cleaning this thing up, the glue is stubborn as hell as is the seemingly innocent sealant along the gutters, and they are taking ages to remove. BUT, we are making progress and I promise to take you through every step of the way on this project so I am not suffering alone :) I also hope it is useful for those of you considering the same work.
In the meantime I have received the new seals for the Alpine windows from Dunsfold Land Rovers in the UK (thanks Tim) along with the brand new two way instrument panel switch to illuminate the ceiling light and the dash. I can't wait to get those installed. Oh, and I also got the interior light too, very cool. More on those on the next video when I actually get to the reassembly point.
I hope you are all well at this crazy time, keep well and as always, thanks for your support and continued interest in the project. I really enjoy all of your input, feedback and useful tips. Thanks for watching and I hope you enjoy the video.
PS. For those of you who told me about the incorrectly installed rear flap catches, I have switched them round 180 and clearly that is how they were designed to work (Doh), they even rattle less now. Thanks a lot!
Видео Land Rover Series 3 Restoration - Safari Roof Revival Pt.3 - Part 45 канала My911
Показать
Комментарии отсутствуют
Информация о видео
Другие видео канала
 Land Rover Series 3 Restoration - Replacing the Rear Floor Pt.1 - Part 35
 Land Rover Series 3 Restoration - Bad Vibrations - Part 49
 Land Rover Series 3 Rebuild -Steering Wheel Refurb, No-Sew Seat Upgrade, New Boots.
 Land Rover Safaris
 Land Rover Series 3 Restoration - Wing Repairs & Installing Hazard Lights Pt. 34
 Land Rover Series 3 - Expedition vehicle walk around
 1977 Series 3 Land Rover 88
 1973 Jaguar E-Type (Series 3) - 5.3L V12
 Land Rover Series 3 Restoration - Refurbishing the New Hard-Top Sides Pt.1 - Part 38
 Land Rover Restoration Part 1 - Introduction
 Land Rover Series 2A First Drive After Complete Engine Rebuild
 Repairing Rusty Bulkhead Vents on my Defender
 Landrover Discovery 2 TD5 Hard Offroad
 Tanzanian series 1 Land Rover Safari
 Land Rover Series 3 Restoration - Safari Roof Revival Pt 1 - Part 42
 1978 Land Rover 88 Series III Soft Top Up
 Taking The Truck Cab Off - Land Rovers Series 2a - Removing The Roof For The Open Air
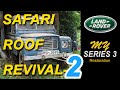 Land Rover Series 3 Restoration - Safari Roof Revival Pt 2 - Part 43
 The Offender, Land Rover Series 3, The build so far
 Land Rover Series 3 Restoration - Finishing the Axles & RMS Update Pt. 15