DIY Speed Controller for DC Loads || Control upto 100 Watts! || With under voltage protection
In this video I made a compact but powerful speed controller for DC load(specially motors) capable of handling upto 100 watts of power. The main component of the controller is the 555 timer that uses PWM and a potentiometer to vary the duty cycle at the output,thus effectively controlling the speed of a motor. The highlight of this module is the under voltage protection feature that is very useful in case we are using a battery to power the load for which the voltage should not fall beyond a certain value depending upon the battery chemistry.
I hope this project was helpful to you. Consider subscribing to my channel for more such useful content on electronics!
Do leave your feedback and doubts in the comments section below.
I would love to know on what other topics would you like a video on.
Link for circuit diagram and build process:
https://www.instructables.com/id/DIY-Motor-Speed-Controller-With-Low-Voltage-Cut-of/
Follow me on Instructables: https://www.instructables.com/member/Utsav_25/
LIKE || SHARE || SUBSCRIBE
#NE555 #Speedcontrol #DIY
Видео DIY Speed Controller for DC Loads || Control upto 100 Watts! || With under voltage protection канала Utsav Shah
Показать
Комментарии отсутствуют
Информация о видео
Другие видео канала
 Analog Input on the Raspberry Pi || Analog sensor value plot using MCP3204
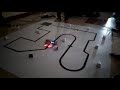 PID controlled Line Follower Robot based on Arduino
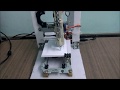 Arduino Based 2 Dimensional Plotter
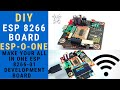 A new ESP board you have never heard of ! ESP-O-One
 MPPT based solar charge controller system with IoT for remote monitoring.
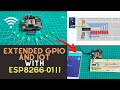 ESP8266-01 with IoT Integration! || Exploring ESP8266:Part 3
 Make your own breakout boards!
 Generate 50Hz and 1Khz with a crystal || Stable signal generator without microcontroller
 Fun with OLED Displays! - Part1 || An Introduction to my YouTube Channel.
 Stereo Bluetooth Module under 50 Rupees
 WAVGAT Pro Mini || Are they better than Arduino boards?
 EV3 Tricycle-Building Instructions
 Fun with OLED Displays! - Part 2 || Arduino's tribute to PUBG!
 IoT Power Measurement Module || Adding IoT feature to my solar charge controller.
 Modified Square Wave Inverter || Perfect 50Hz with XTAL control || 200Watts
 EDGE'19 Logo Using my CNC
 DIY H Bridge Circuit for Inverters || Convert DC to AC using this module
 The Best Current Sensor for Arduino!
 ESP8266-01 with multiple I2C devices?! || Exploring ESP8266:Part 2
 DIY Power/Wattmeter Module for Arduino || How to measure power using Arduino