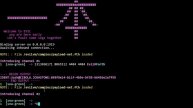
Flashing TASMOTA on a Sonoff OVER-the-AIR !!!
UPDATE!!!!!
Looks like the latest Sonoff firmware is allowing OtA flashing again. Here's what's known:
https://github.com/mirko/SonOTA/wiki#known-working-configurations
And here's a video about how to do it the "new" way with an exe on Win10:
https://youtu.be/Z7SlNtkmYyE
UPDATE:
With version 1.6 of the stock Sonoff firmware, something has changed and OTA flashing has stopped working. If you have sonoffs with older firmware, they can still be flashed with this method.
The FTDI usb/serial adapter method for flashing will still work on the newer sonoffs.
www.DrZzs.com
www.instagram.com/drzzs
twitter: @Dr_Zzs
Buy Sonoffs:
iTead direct has the lowest price, but you have to wait a few weeks to get them:
https://www.itead.cc/sonoff-wifi-wireless-switch-1.html
If you can’t wait, Amazon has them for a couple dollars more: http://amzn.to/2BkTviF
Flashing Tasmota onto a Sonoff board with a USB/Serial connector is pretty easy (unless you have an original Dual). But there’s another way to get your Sonoff Tasmotatized; SonOtA. Sonota.py is a python script that uses the default update pathway in the Sonoff firmware to install Tasmota. That’s crazy smart stuff.
You can read about how to do it on the wiki page for SonOtA on github:
https://github.com/arendst/Sonoff-Tasmota/wiki/SonOTA
Steps:
Download and install Python3 (and Mac developer tools)
Or update Python3: ‘python3 -m pip install --upgrade pip’ (for mac)
Download SonOtA: https://github.com/mirko/SonOTA
Win10 install C++ tools - http://landinghub.visualstudio.com/visual-cpp-build-tools
The 2015 version and Community 2017 version
Mac install xcode tools - run: ‘xcode-select --install’
Navigate to SonOtA directory and get all the requirements
Run: ‘pip3 install --user -r requirements.txt’
Disable any firewalls
Press and hold the onboard button until the green light flashes rapidly.
Run SonOtA: Mac =‘./sonota.py’ Win10 = ‘python.exe sonota.py’
Choose the IP address for the computer you’re running Sonota.py on
Input your Wifi name and password when asked
Watch for iTead Wifi SSID and select it when it’s available.
Reconnect to your home wifi when the iTead SSID disappears.
Select Final Stage Wifi SSID when it appears.
Connect to ‘sonoff-###” Wifi SSID
Configure Tasmota with your Wifi name and PW
Reconnect to your home Wifi SSID
Find the IP address for your new sonoff from your router, or something like Fing
Finish configuring Tasmota
Configure MQTT with Topic, IP address, Name and PW
Configure switches, if you plan to use GPIO pins for extra switches
Go tell someone what you just did and laugh when they look at you like you’re insane.
All done!
Видео Flashing TASMOTA on a Sonoff OVER-the-AIR !!! автора Python практикум
Видео Flashing TASMOTA on a Sonoff OVER-the-AIR !!! автора Python практикум
Информация
2 декабря 2023 г. 14:25:57
00:09:16
Похожие видео
 Franck Pachot: YugabyteDB: A postgres-compatible DB on Oracle Cloud OKE (Kubernetes)
 ШВЕЙНАЯ ИГОЛКА ПОТЕРЯЛАСЬ на ПОЛУ, как её НАЙТИ?!!!
 AniCon 2023 - DAY1 - Block3 - FanOriginal Дефиле — Ran Hime — Прекрасный воин Сейлор Мун
 Connect to your Odoo.sh Postgres Database Using an SSH Tunnel
 Keycloak failing to start with "failed to resolve interface private" (3 Solutions!!)
 Akka and Kubernetes, the beginning of a beautiful relationship (Hugh McKee, USA)
 Dapr und Grafana Tempo
 Заработок на Hamster Kombat #hamsterkombat #хомяк #крипта #какзаработать #доход #приколы #юмор
 Cloud Native Computing Foundation with Chris Aniszczyk and Dan Kohn
 Install and configure EvilVM malicious compiler
 PortaiNerd - Series 3 Episode 1 - The Art of Possible with Portainer
 Янтарный томми
 #онкология #ракпростаты #mimax #blumax #greenmax #кордимакс
 TrueNAS SCALE安装openldap
 HashiCorp Vault KV SecretEngine v1 - Video 9
 Re host IBM traditional WebSphere on OpenShift on Azure
 Using CoreOS-Installer from Ubuntu #DevOps
 Порядок в доме начинается с маленьких привычек СМЕКАЛКА👍
 Милый чехол для airpods с мультяшным космическим планетом астротетя bluetooth наушников 12 черный
 Как ускорить получение SSL-сертификата?
