How to fix over saturation in Photoshop
Download the Action: https://f64.co/upside-down
How to use the Inverted adjustment Layer to fix over-saturation
Have you ever seen Stranger Things on Netflix? It is one of my wife and I's favorite shows to watch when the kids go to bed. We have far surpassed all the episodes and are longing for the next season. We are babies of the '80s after all.
One thing I noticed in that highly addictive Netflix show is how much it can teach us about photo post-production. There is this alternate universe in the show, a very ugly place, that routinely finds itself seeping into the ordinary world. That got me thinking about the Invert Adjustment Layer in Photoshop.
When you first use it, it can be an ugly place, and quite frankly it does nothing fantastic to portraits, babies, or beautiful landscapes. However, there is important data in that upside-down world and if we can learn to harness it, we can unlock some incredible knowledge about our photos.
The Inverted Adjustment Layer flips the colors to their complement. That’s all it does when we see it on the Color Wheel, it is evident, but when we see it on our image, it just looks like a mess! However, that data can be used to our advantage!
In this tutorial, I am going to show you how to use the Inverted Adjustment layer set to the Color Blend Mode with an Opacity of 50% to assess whether or not our image is oversaturated! It is a pretty powerful technique to evaluate your colors, but don’t let that keep you from making artistic color decisions either!
Видео How to fix over saturation in Photoshop канала f64 Academy
Показать
Комментарии отсутствуют
Информация о видео
Другие видео канала
 Relighting a photo with Hard Mix Blend Mode
 The X-Ray of Retouching: Check Layers in Photoshop
 6 Ways to Sharpen In Photoshop Without Plugins
 Fix an Underexposed Photo in Photoshop
 Adobe Camera Raw vs ACR as a Filter
 True 16 Bit Saturation Masks
 The Most Natural Saturation Boost in Photoshop
 MAGICALLY Remove Shadows in Photoshop!
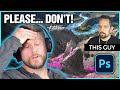 I Challenge This Photoshop Expert To Fix My Images! Photoshop Tutorial
 Master Photoshop with these 4 strategies!
 Fix Highlight Blowouts in Seconds in Photoshop!
 The Power of "Horizontal Curve" in Photoshop!
 You are Dodging and Burning all Wrong! TRY THIS!
 Color Toning in Photoshop with Gradient Maps and Soft Light Blend Mode
 4 Color tools you SHOULD be using in Adobe Camera Raw or Lightroom
 Luminosity Masks Are Child's Play Compared to This!
 5 Ways Blend If in Photoshop Will Blow Your Mind!
 Completely TRANSFORM any photo with the Diamond Gradient in Photoshop
 Exposure Blending in Photoshop with Sean Bagshaw
 Selective Color For Better Tones