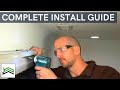
How to Install Inside Mount Vertical Blinds
Most people think installing their own blinds is hard. Following the simple, step-by-step instructions in this video though makes hanging your custom vertical blinds easy to do yourself!
Here’s how you do it:
1. Make a mark between 1” - 2” in from each end of the underside of the valance.
2. Hold the valance inside the top of the window, and set it back until it is flush with the wall. Then use your drill to pre-drill holes at each of your marks.
3. Insert two installation screws in the holes through the valance into the top of the window.
4. Measure 2” - 4” in from each end of the valance, and make a mark 1” from the back of the valance.
If you have more than 2 brackets, make evenly spaced marks between your outer marks.
5. Pre-drill holes at each of these marks using a 5/64” drill bit. Then, attach each bracket with one screw at each of your pre-drilled holes.
6. Place the front of the headrail into the front groove of the brackets. Then tilt the headrail up to snap it into the back of the brackets.
7. Attach the vanes by pushing the hole-puched end of the vanes onto each clip. Gently tug them onto the hook of each clip securely, and repeat until all your vanes are installed and facing the same direction.
8. Congratulations! You just installed your own vertical blinds! Wasn’t that easy?
If you have any questions or need any help with installing your verticals or any of our other shades or blinds, see your product’s installation guide on our website or give your Customer Care team at call at 888-257-1840. We’re here to help!
Видео How to Install Inside Mount Vertical Blinds канала SelectBlinds
Показать
Комментарии отсутствуют
Информация о видео
Другие видео канала
 How To Install Vertical Blinds | Sliding Glass Door
 How to Install Inside Mount Vertical Blinds
 How to Install Blinds | Faux Wood Blinds | Inside Mount Window Blind Installation | MOORE APPROVED
 KVL31 Premium Wand Vertical Blind
 How to Install LEVOLOR Trim+Go™ Vertical Blinds
 How to measure and fit a vertical window blinds
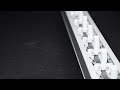 How to Replace a Vertical Blind Carrier Clip Stem and Gear
 How to Mount a Vertical Blind Headrail - Outside Mount
 How to Install Outside Mount Vertical Blinds
 Select Blinds bracket installation tip
 Installing to header clips
 How to Install Bali® Vertical Blinds with Wand Control - Outside Mount
 How to install a cordless vertical blind in 3 minutes - Apartment Vertical Blind Installation
 How to fit Vertical Blinds
 Let’s Install Some Vertical Blinds For The Sliding Door Today
 Five Most Common Problems With Vertical Blinds
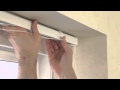 How to Fit a Vertical Blind | Vertical Blinds Direct
 Installing 2” faux wood Venetian window blinds - How to install cordless blinds
 How To Install Vertical Blinds - DIY At Bunnings
 How to Install Hampton Bay Vertical Blind Kit - DIY