DIY Reusable Pad Sewing Tutorial~ Low Waste
DIY Reusable Cloth Pad Sewing Tutorial, Low Waste Period
MATERIALS/TOOLS:
-Fabric
Exterior Pieces:
1) Cotton flannel fabric
2) Cotton Fabric
Interior Pieces:
3) Cotton Terry cloth
*Go for Organic Cotton Fabric if possible- it will help you avoid pesticides that would otherwise be found in inorganic cotton fabrics*
You can also get creative and up-cycle some fabric you have around the house (Clean, lightly used fabric of course! Do not use up-cycled fabric that has been used for reasons that would be unsanitary and/or harmful to your body’s exposure.):
Old t-shirt (exterior fabric)
Old sheets (exterior fabric)
Old Towel- which are made of Terry cloth (interior fabric)
-Your favorite pad
-Paper
-Ruler
-Scissors
-Pinning needles
-Fabric marker/Pen/Pencil
-Sewing machine
-Thread
-Needle
-snap fastener’s or velcro closure
STEPS:
Pattern Piece: (this tutorial uses winged pad as a pattern piece)
Exterior Piece:
1) Stick your favorite pad onto a piece of paper. You can pin it onto the paper for extra security.
2) Trace the outline of the pad onto the paper.
3. Dot 1 cm around the entire perimeter of the pad outline. Connect the dots.
4. Trace 2 cm away from the wings, making a straight line. Create a diagonal line from the corner of the pad wing to the line you just drew. Repeat on the other side.
5. Cut out your exterior pattern piece.
Interior Piece:
1. Measure the length and width of your pad.
2. Draw a rectangle of those measurements.
3. Cut out your interior pattern piece.
*OR, you can skip the above steps by looking online for free cloth pad pattern pieces.*
1. Take your exterior pattern piece and trace over cotton flannel fabric (1 piece). Cut around.
2. Take your exterior pattern piece and trace over cotton fabric (1 piece). Cut around.
3. Take your interior pattern piece and trace over cotton Terry cloth (4 pieces). Cut around.
For a Guideline:
*use 3 layers of Terry cloth for a light to medium flow pad
*Use 4 layers of Terry cloth for a medium to heavy flow pad
*Use 5 layers for an extra heavy flow pad
Cutting: (this tutorial shows a medium to heavy flow pad)
Sewing:
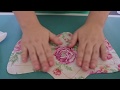
1. Take both exterior fabric pieces and place wrong sides together. Pin around leaving an opening on the side of a wing.
2. Sew both pieces together, leaving that side of the wing open.
3. Turn this piece inside out, using a tool to poke the inside and create crisp corners.
4. Take your interior pieces and stack them on top of each other neatly.
5. Fold and insert the interior piece inside the exterior carefully, trying to keep all the pieces neatly stacked.
6. Pin the top and bottom of interior piece in place.
7. Sew around the perimeter of the interior piece.
8. Sew over the top and bottom of the interior piece with an “X” shape.
9. Fold the opening edge of the wing inward. Pin into place.
10. Sew around the perimeter of the pad, sealing the open edge as well.
11. Sew all around the perimeter of the pad gain with a zig zag stitch for extra durability.
12. With the flannel side of the pad facing you, sew the bottom part of the snap fastener on the left side of the wing. Once on the top of the wing, and another on the bottom.
13. Flip the pad to the cotton fabric side and sew the top part of the snap fastener on the left side of the wing. Once on the top of the wing, and another on the bottom.
Done! Reusable, zero waste, cloth pad’s! To clean, hand wash with warm water by first rinsing and squeezing all blood out. Then, scrub both sides of pad with soap, and rinse soap out thoroughly. I use Dr. Bronners liquid castille soap. Finally, squeeze all water out of pad and hang to dry on a clothing line or lay to dry on top of a towel and flip sides occasionally to even out drying of both sides. After your cloth pad has completely dried, (which typically takes a day) put it in the washing machine after use, with hot water to kill bacteria. Be sure to wash all fabric used for this project before using it as a pad (for hygienic and health reason’s). For this tutorial, I used some old sheets one side of the exterior of the pad, and an old towel for the interior of the pad. This project is awesome. For starters, feminine pad’s that once filled our landfills will be gone from your daily routine as you implement this innovative, sustainable product into your daily lives. Additionally, you won’t have to buy pad’s again after making a set (I created a set of 5) and will be saving money in the long run! Not to mention, you’ll be doing your body a favor by avoiding toxic chemicals such as chlorine bleach and pesticides Reusable cloth pad’s are an amazing alternative to pad’s on the market. Give this project a go-as you take closer steps down your zero waste, environmentally conscious journey. Thank you for watching. Please like, comment, ask question’s, and subscribe for more video’s like this on conscious creating. See you next time :)
Видео DIY Reusable Pad Sewing Tutorial~ Low Waste канала ConsciousCreating
MATERIALS/TOOLS:
-Fabric
Exterior Pieces:
1) Cotton flannel fabric
2) Cotton Fabric
Interior Pieces:
3) Cotton Terry cloth
*Go for Organic Cotton Fabric if possible- it will help you avoid pesticides that would otherwise be found in inorganic cotton fabrics*
You can also get creative and up-cycle some fabric you have around the house (Clean, lightly used fabric of course! Do not use up-cycled fabric that has been used for reasons that would be unsanitary and/or harmful to your body’s exposure.):
Old t-shirt (exterior fabric)
Old sheets (exterior fabric)
Old Towel- which are made of Terry cloth (interior fabric)
-Your favorite pad
-Paper
-Ruler
-Scissors
-Pinning needles
-Fabric marker/Pen/Pencil
-Sewing machine
-Thread
-Needle
-snap fastener’s or velcro closure
STEPS:
Pattern Piece: (this tutorial uses winged pad as a pattern piece)
Exterior Piece:
1) Stick your favorite pad onto a piece of paper. You can pin it onto the paper for extra security.
2) Trace the outline of the pad onto the paper.
3. Dot 1 cm around the entire perimeter of the pad outline. Connect the dots.
4. Trace 2 cm away from the wings, making a straight line. Create a diagonal line from the corner of the pad wing to the line you just drew. Repeat on the other side.
5. Cut out your exterior pattern piece.
Interior Piece:
1. Measure the length and width of your pad.
2. Draw a rectangle of those measurements.
3. Cut out your interior pattern piece.
*OR, you can skip the above steps by looking online for free cloth pad pattern pieces.*
1. Take your exterior pattern piece and trace over cotton flannel fabric (1 piece). Cut around.
2. Take your exterior pattern piece and trace over cotton fabric (1 piece). Cut around.
3. Take your interior pattern piece and trace over cotton Terry cloth (4 pieces). Cut around.
For a Guideline:
*use 3 layers of Terry cloth for a light to medium flow pad
*Use 4 layers of Terry cloth for a medium to heavy flow pad
*Use 5 layers for an extra heavy flow pad
Cutting: (this tutorial shows a medium to heavy flow pad)
Sewing:
1. Take both exterior fabric pieces and place wrong sides together. Pin around leaving an opening on the side of a wing.
2. Sew both pieces together, leaving that side of the wing open.
3. Turn this piece inside out, using a tool to poke the inside and create crisp corners.
4. Take your interior pieces and stack them on top of each other neatly.
5. Fold and insert the interior piece inside the exterior carefully, trying to keep all the pieces neatly stacked.
6. Pin the top and bottom of interior piece in place.
7. Sew around the perimeter of the interior piece.
8. Sew over the top and bottom of the interior piece with an “X” shape.
9. Fold the opening edge of the wing inward. Pin into place.
10. Sew around the perimeter of the pad, sealing the open edge as well.
11. Sew all around the perimeter of the pad gain with a zig zag stitch for extra durability.
12. With the flannel side of the pad facing you, sew the bottom part of the snap fastener on the left side of the wing. Once on the top of the wing, and another on the bottom.
13. Flip the pad to the cotton fabric side and sew the top part of the snap fastener on the left side of the wing. Once on the top of the wing, and another on the bottom.
Done! Reusable, zero waste, cloth pad’s! To clean, hand wash with warm water by first rinsing and squeezing all blood out. Then, scrub both sides of pad with soap, and rinse soap out thoroughly. I use Dr. Bronners liquid castille soap. Finally, squeeze all water out of pad and hang to dry on a clothing line or lay to dry on top of a towel and flip sides occasionally to even out drying of both sides. After your cloth pad has completely dried, (which typically takes a day) put it in the washing machine after use, with hot water to kill bacteria. Be sure to wash all fabric used for this project before using it as a pad (for hygienic and health reason’s). For this tutorial, I used some old sheets one side of the exterior of the pad, and an old towel for the interior of the pad. This project is awesome. For starters, feminine pad’s that once filled our landfills will be gone from your daily routine as you implement this innovative, sustainable product into your daily lives. Additionally, you won’t have to buy pad’s again after making a set (I created a set of 5) and will be saving money in the long run! Not to mention, you’ll be doing your body a favor by avoiding toxic chemicals such as chlorine bleach and pesticides Reusable cloth pad’s are an amazing alternative to pad’s on the market. Give this project a go-as you take closer steps down your zero waste, environmentally conscious journey. Thank you for watching. Please like, comment, ask question’s, and subscribe for more video’s like this on conscious creating. See you next time :)
Видео DIY Reusable Pad Sewing Tutorial~ Low Waste канала ConsciousCreating
Показать
Комментарии отсутствуют
Информация о видео
Другие видео канала
 Sewing a Heavy Cloth Pad with 2 Layers of Zorb
 DIY Zero Waste Reusable Menstrual Pad - Upcycled | Zero Waste Indonesia
 How to Wash Cloth Pads | Quick and Easy Method | No Stains
 Saukhyam Reusable 3 Fold Day Pad
 21 Old Jeans Reuse Craft Idea !!! Old Clothes Room Decor || Wall Hanging, Doormat, Organizer
 How to Sew Cloth Pads | Easy and Affordable | Sewing DIY | Whitney Sews
 Sew Your Own Cloth Menstural Pads
 How to sew a Cloth Pad stash for $25
 HOW TO - MAKE A MACRAME NET BAG
 How to wash reusable menstrual pads (Warning: REAL Soiled Pads) | Zero Waste Indonesia
 Understanding cloth pad materials (Cont. From "What's with the price?"
 Sew your own pads. Tutorial: Pant liners, make your own washable liners.
 How to sew a reusable face mask - Quick and easy tutorial with Billette's Crafts
 How To Make Washable Sanitary Pad At Home | Easy Tutorial
 Sewing Cloth Pads 101 - How to Include a PUL Layer
 {Step-by-Step Sewing} Reusable Fabric Panty Liners
 Making a net bag for a Roman Legionary
 Rounded Cloth Pad Sewing Pattern Tutorial by Versodile
 HighOh - HowTo use our Charcoal Fiber Reusable Sanitary Napkin
 Sewing a reusable heavy pad with a hidden layer of PUL.