Realistic Cat Painting / Acrylic Painting Workshop
Learn how to paint a realistic cat that captures the personality of these beloved animals. Enjoy the full workshop that includes color mixing help, reference photo, traceable, written instruction, and an art lesson to help you paint along, right here - https://createfulart.com/b/realistic-cat-painting-workshop
Materials Needed:
(Amazon affiliate links below)
1. Paint Brushes - https://amzn.to/2Tf6yv9 and wash brushes https://amzn.to/2V67P8r
2. Acrylic Paints - https://amzn.to/2Efqaua
The paint colors I use include: (just 5 colors!) Quinacridone Magenta, Pthalocyan Blue, Cadmium Yellow, Titanium White, and Ivory Black.
3. Watercolor Paper https://amzn.to/3laNxb5 or Panels 8x8" - https://amzn.to/3wAbj5Q recommended for easy framing.
4. My PALETTE (Colors don't dry out!) - https://amzn.to/2sOVd9p
5. Water
6. Paper Towels
The workshop and full tutorial teach you how you can change the fur color and length to resemble your cat if you are painting a pet portrait. It also gives you everything you need to paint this particular cat so that you are successful!
Step-by-Step Guide:
Step 1: Background
Decide on a background color or pattern that complements the cat's colors and enhances the overall composition. Apply the background paint using broad, even strokes or other techniques that suit the atmosphere you want to create.
Step 2: Reference and Sketching
Begin by selecting a clear reference photo of a cat that inspires you. Study the cat's features, fur patterns, and colors.
Sketch a rough outline of the cat's form on your canvas. Focus on the basic proportions and main shapes.
Step 3: Blocking in Colors
Start by blocking in the base colors of the cat's fur using broader brushstrokes. Use a mid-tone color that represents the overall color of the fur. Always paint in the direction of the fur growth and apply the brushstrokes accordingly.
Step 4: Building Texture
As you move forward, add layers of paint to create depth and texture in the fur. Use smaller, controlled brushstrokes to mimic the appearance of individual hairs. Gradually add darker and lighter shades to indicate shadows and highlights on the fur.
Step 5: Eyes and Facial Features
Focus on painting the eyes and facial features. Eyes are especially important as they convey the cat's personality and emotion.
Use fine-detail brushes to add intricate details to the eyes, nose, and mouth.
Step 6: Refining Details
Continue refining the fur textures, paying attention to areas where the fur is more pronounced or where there are highlights. Use a combination of dry brush techniques and glazing to achieve a realistic fur effect.
Step 7: Final Touches
Step back and assess your painting. Add final details, highlights, and shadows to enhance realism. Make sure the eyes are vibrant and lifelike, capturing the essence of the cat's gaze.
Painting a realistic cat with acrylics requires patience and attention to detail. By following these steps and observing your reference closely, you can create a stunning portrait that captures the essence of a feline friend. Remember, practice is key, and with each painting, you'll refine your technique and develop skills as you paint.
Sign Up for Five Free Art Lessons: https://www.createfulart.com/subscribe.html
Thank you for watching.
Please hit the share button to spread the joy of art!
This painting and design are protected from being used without written permission for commercial purposes. © Ashley Krieger | Createfulart.com
Видео Realistic Cat Painting / Acrylic Painting Workshop канала Createful Art with Ashley Krieger
Показать
Комментарии отсутствуют
Информация о видео
27 августа 2023 г. 17:00:55
00:09:26
Другие видео канала
 Simple Moon Painting is so Easy to paint!
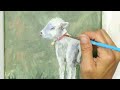 This Christmas Lamb Painting is so Adorable! Acrylic painting
 Birch Tree Painting with Pebeo Paints -- Speed Painting
 I'm Starting a New Painting Series...What will I paint? / New Acrylic Painting Tutorials!
 Acrylic Painting Tutorial | How to Paint a Sunset Over the Ocean
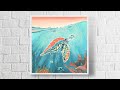 Turtle Painting / Acrylic Painting / Step-by-Step Tutorial
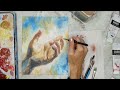 Learn how to paint a hand like Michelangelo!
 How to paint a dog / Acrylic Painting
 Find the Courage to Create / Art Journal Painting Day 2
 Easy Peaceful Forest Painting / Acrylic Painting
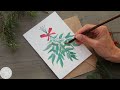 Mistletoe Painting / Acrylic Painting on Christmas Card Tutorial
 Llama Painting / Acrylic Painting / Step-by-Step Tutorial
 Changing season bringing a little piece of heaven on Earth.... #autumbeauty
 African Sunset Painting / Acrylic Step-by-Step Tutorial
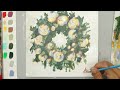 Simple Christmas Wreath Painting
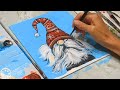 Christmas Gnome Painting
 Relaxing Painting on the Beach / Acrylic Painting Techniques / Acrylic Painting for Beginners
 Christmas Tree Painting
 5 EASY Steps to Paint a Succulent - Anyone Can Learn to Paint This!
 Beach Painting with Sailboat / Acrylic Painting Tutorial