Leggari Dirty Pour Technique Done On A Wooden Surface | Step By Step Process | Countertop Ideas
This video will show you Leggari's dirty pour technique using a Leggari Stone Kit. We coated a wooden board to show you how easy it is to do this technique and how beautiful the result is!
If you want to order a Leggari Stone (dirty pour) countertop kit check them out on our website here: https://leggari.com/counters/order-leggari-stone-epoxy-countertop-kit/?utm_source=youtube&utm_medium=video&utm_campaign=yoY1acntyyk&utm_term=Leggari%20Dirty%20Pour%20Technique%20Done%20On%20A%20Wooden%20Surface%20-%20Step%20By%20Step%20Process%20-%20Countertop%20Ideas&utm_content=description1
The process! 👇👇
THE SUBSTRATE
Prepping the surface of the countertops is easy. Most surfaces just need sanded (80-100 Grit) then wiped clean. Granite and Marble will need the sealer removed. Tile will need the grout lines filled with Bondo and sanded smooth before applying our Countertop Kits.
EPOXY PRIMER COAT
Priming the Countertops is simple and fast. Mix your pre-measured primer then dip and roll the pigmented primer across the surface until the countertop surface is completely covered. Wait 1 hr. (or until tacky and not coming off to the touch) and start applying the Base Coat.
METALLIC EPOXY COAT
Applying the Base Coat and Highlights is the funnest part. Mix your pre-measured Base Coat and pour it out over the countertop surfaces and begin to spread out the epoxy with your roller getting it as even as you can. Our Epoxy self-levels so don’t worry about getting it perfectly even. Now mix your pre-measured highlight color and apply it to the Base Color, then blend it to your desired look.
HIGH WEAR TOP COAT
We offer 2 different Performance Engineered Top Coats. Glaze Coat is our High Build Top Coat that lays out like glass and adds depth to the Countertop. The Urethane Top Coat comes with the option to have a High Gloss or Satin finish. It needs to be rolled out super thin and leaves a minor texture on the countertop. You apply it within 24 hrs. of installing your Countertop Kit.
Leggari Countertop Kits were designed to transform your countertop, tabletop, or desktop into something new and beautiful by coating your existing countertop or pre-built wood countertop. They can be installed in 3 to 5 hrs. including the prep work, and will last for decades. If you can paint your countertops, you’re more than qualified to install a Leggari Countertop Kit. Our Countertop system is leading the resin industry for thickness, durability, and scratch resistance with our High Wear Top Coats.
Our Countertop Epoxy is specifically designed for counters and can be applied to any hard surface. It’s 100% Pure Solids using the finest raw materials that include proprietary additives for working time, thickness, flow and marbleization that are vital when achieving our Dynamic Effects. Our Countertop Epoxy is also a decorative, durable and chemically resistant coating, available with a High Gloss or Matte finish.
[ Leggari Products - Simplifying the Industry ]
Having the best epoxy and the easiest installations makes Leggari the perfect choice no matter your level of expertise! If you want to buy the best from the best you’ve found the right product!
Subscribe to this YouTube channel to get all the latest installation techniques.
Check out our brochure for more details: https://coatings.leggari.com/view/364043/
Purchase a Standard Epoxy Sample Kit here: https://leggari.com/product/sample-kit-metallic-epoxy/?utm_source=youtube&utm_medium=video&utm_campaign=yoY1acntyyk&utm_term=Leggari%20Dirty%20Pour%20Technique%20Done%20On%20A%20Wooden%20Surface%20-%20Step%20By%20Step%20Process%20-%20Countertop%20Ideas&utm_content=description3
Purchase a Leggari Stone Sample Kit here: https://leggari.com/product/sample-kit-leggari-stone/?utm_source=youtube&utm_medium=video&utm_campaign=yoY1acntyyk&utm_term=Leggari%20Dirty%20Pour%20Technique%20Done%20On%20A%20Wooden%20Surface%20-%20Step%20By%20Step%20Process%20-%20Countertop%20Ideas&utm_content=description4
Purchase a Concrete Overlay Sample Kit here: https://leggari.com/product/sample-kit-concrete-overlay/?utm_source=youtube&utm_medium=video&utm_campaign=yoY1acntyyk&utm_term=Leggari%20Dirty%20Pour%20Technique%20Done%20On%20A%20Wooden%20Surface%20-%20Step%20By%20Step%20Process%20-%20Countertop%20Ideas&utm_content=description5
Видео Leggari Dirty Pour Technique Done On A Wooden Surface | Step By Step Process | Countertop Ideas канала Leggari Products
Показать
Комментарии отсутствуют
Информация о видео
Другие видео канала
 Step By Step Epoxy Dirty Pour Technique Installation Done Over Wood Surface |DIY Project You Can Try
 Epoxy Dirty Pour Technique On Kitchen Countertops Full Tutorial | DIY Countertop Remodel Ideas
 3 Different Techniques Done On This Kitchen | Metallic Epoxy Countertop |Simple DIY For Your Counter
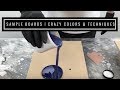 Metallic Epoxy Sample Kits / Order Today and See the Difference
 Faux White Marble Dinning Table Done Using Epoxy Resin (From Wood) | Step By Step Easy DIY Tutorial
 Use Epoxy To Coat Existing Countertops To Make Them Look Like Real Stone Step By Step Explained
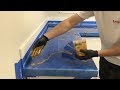 Installing Metallic Epoxy Countertop Kit with my Hands
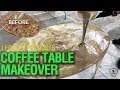 Dirty Pour Technique On Coffee Table | Epoxy Resin
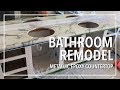 Bathroom Remodel | Epoxy Countertop | Game Changer!
 MASSIVE Custom Epoxy Wall | Coated Using Dirty Pour Technique From Wood To Epoxy | Step By Step
 Epoxy Dirty Pour Technique On Custom Countertops Tutorial | DIY Countertop Remodel Ideas
 Creating A Natural Stone Look With Epoxy Using My Hands |Easy DIY Technique You Can Do With No Tools
 How To Install Epoxy Over Old Countertops Ultimate Guide | Stone Coat Countertops
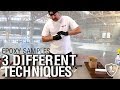 Simple Epoxy Techniques | Leggari Products
 Renew Old Countertops And Make Them Look Like Marble!
 DIY Epoxy Counter Tops | Turn MDF Into Amazing Counters with Leggari Epoxy!
 Create stunning Epoxy Countertops, using this easy Dirty Pour method!
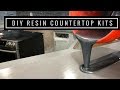 Countertop Resurfacing Kits with Metallic Epoxy in Silver, Pearl White and Black
 What You Can Do With Epoxy Resin | Tables, Floors, Counters, Art Pieces & More | Leggari Products
 Amazing DIY Idea For Epoxy Resin Project | Easy And Simple Epoxy Flag Tutorial | Step By Step