Pla Cross #002 | Gunpla Custom Tutorial | How to Pla Plate
Pla Cross #002 | Gunpla Custom Tutorial | How to Pla Plate
In this episode I will share with you how to work with pla plates.
You can use this for your custom gunpla or any model kits. In general flat surface is easier to work with so you should probably start there before trying on a curved surface.
Since this is a huge topic I will work on a project and show you how to use pla plates in general.
I personally use tamiya regular and thin cement to melt the plastic together. Then diamond files to clean up the excess. Further clean up is done with sanding sticks and sponge.
Regular cement will melt the pla plates together so they will have a strong bond. While thin cement is to quickly set the pla plate in place. I also use thin cement to fill any gaps between these pla plates
I have 3 different sets of diamond file with different grits so I can get a smooth finish. For a start you might want to buy a set of diamond files and I suggest buy tamiya brand.
To fill gaps you can either use thin cement with pla plate scraps or you can use dissolved putty. Most of the time there will be gaps that aren't visible on bare plastic so the best way to see these gaps is to prime the piece first.
You can also use pla plates to create a template for making custom panel lines. This is one of the ways of making symmetrical panel lines. You can simply flip the template and you've got yourself a symmetrical panel line.
Let me know down the comment any questions you have about customizing your gunpla in general.
I hope you learn a few tricks form this episode that you can use on your current or new project.
For those who wants to jump right into specific section:
00:00 Intro
00:08 Sprue letters
02:56 Base preparation
21:58 Prime + clean up
25:53 Painting
[Affiliate links]
Tools I use
- Tamiya Basic File Set https://amzn.to/2YEKLSx
- Mineshima Nipper https://amzn.to/3g6LqSR
- Olfa Art knife https://amzn.to/2YCYzNE
- Tamiya Tweezer https://amzn.to/388T1NM (not my exact tweezer)
- A3 Tamiya Cutting Mat https://amzn.to/2YD1tSp
- Tamiya Handsaw https://amzn.to/3ibIbvi (couldn't find olfa handsaw)
- Scribing tool https://amzn.to/2YIiIlv (couldn't find my exact model)
Supplies I use
- Tamiya Cement https://amzn.to/2NE6nse
- Tamiya Thin Cement https://amzn.to/31pToCk (thin one won't break the pla plate)
- Tamiya Masking Tape https://amzn.to/3gikyj1
- Tamiya Pla Plate 0.3 mm https://amzn.to/3ieqifs
Airbrush setup
- Dual Action Gravity Feed DH-103 https://amzn.to/2VqEs3k
- Sparmax Mini Compressor https://amzn.to/2CJyweZ (couldn't find my exact same model)
- Sparmax Cleaning Pot https://amzn.to/3fYkzIC
Camera setup;
- Canon M50 https://amzn.to/2YCzQsK
- Smallrig Magic Arm https://amzn.to/3dFlDzz
- Boya Lavalier Mic https://amzn.to/388ZMiF
Видео Pla Cross #002 | Gunpla Custom Tutorial | How to Pla Plate канала Pla Cross
Показать
Комментарии отсутствуют
Информация о видео
Другие видео канала
 Pla Cross #003 | Gunpla Custom Tutorial | Symmetrical Panel Line
 Basic Pla Plate Detailing
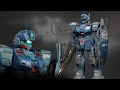 RGM-79SP GM Sniper II - 1/144 Bandai - Gundam Model
 Product Review / Tutorial : Tamiya Extra Thin Cement & Mr.Cement S
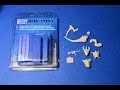 Blue Stuff/Oyumaru - How to cheaply cast miniatures or plastic models - new version
 How to bend curves in styrene or plastic for scale models
![[GUNPLA] MG BARBATOS 발바토스 ★GUNDAM CUSTOM FULL BUILD](https://i.ytimg.com/vi/kZMlqIGgjaU/default.jpg) [GUNPLA] MG BARBATOS 발바토스 ★GUNDAM CUSTOM FULL BUILD
[GUNPLA] MG BARBATOS 발바토스 ★GUNDAM CUSTOM FULL BUILD Pla Cross #001 | Gunpla Custom Build Barbatos | Barbatos Type-X
 Pla Cross #004 | Gunpla Custom Build Barbatos | Side Armor Bash
 건프라.GUNPLA ▶ MG Deep Striker - Custom build ep.3 건담 딥 스트라이커 커스텀빌드 3편
 TZ TUTORIALS - Basics of Pla Plates and Pla Rods
 Easy Gunpla Tutorial - Fix Stress Marks, Damages and Blemishes!
![[GUNPLA TUTORIAL] Easy scratch build sword for 1/144 Gunpla (BONUS CONTENT INSIDE)](https://i.ytimg.com/vi/NdmeRba_ZlY/default.jpg) [GUNPLA TUTORIAL] Easy scratch build sword for 1/144 Gunpla (BONUS CONTENT INSIDE)
[GUNPLA TUTORIAL] Easy scratch build sword for 1/144 Gunpla (BONUS CONTENT INSIDE) Tutorial: How to make Joint plates (accurate modification joint)
 TZ TUTORIALS - HOW TO USE: Epoxy Putty
 Gunpla Tutorial: Basic Pla Plating
 Recycle Your Runners! | How I Cast Gunpla Parts from Melted Plastic in Silicone Molds
 The Ultimate Gunpla Beginner's Guide
 Scratchbuild skills - chamfer / bevel edges
 Gunpla / Tools for detailing