BlueROV 2 build guide - most advanced amateur submersible!
photos of wiring can be found here: https://workshopscience.com/rov-photos/
Thanks for watching!
-------------------------------------------------EDIT-----------------------------------------------------
BlueRobotics have contacted me and have explained and corrected some of the points made in this video. Here is what they have told me:
You are correct that we do not have any current documentation regarding the installation of the Pixhawk if it is customer supplied. We did previously have these instructions up in our older documentation (linked as prior to March 2017 on the kit assembly page). However, in the move to shipping a fully assembled electronics tray we overlooked the still present need for these more detailed instructions in cases such as yours. We will be adding a link back to these steps in the current instructions.
Labeling the ESC wires is definitely needed. I often take apart and reassemble electronics trays during development work on our own ROVs, and this is my greatest headache as well. Adding sticker labels to the end of each of the ESC wires is a great idea, and we will be doing this in the future. A little flag at the end will save much time, for our customers and ourselves.
The thruster containers should have been labelled "CW" or "CCW" for each of the propeller directions, was this not the case for your kit? [Yes, BlueRobotics are absolutely correct, I forgot to mention the container which easily identify the motors]There also should have been an included #1 Phillips head driver for the fairing screws. Philips head screws can be easy to strip if not used with the correct driver size. Due to these screws being self tapping, leaving the heads as Phillips rather than hex to prevent over-tightening is necessary.
It is possible that your buoyancy foam may have been cut too large. We spec the foam to be cut such that when pushed all the way into the fairing, the bottom sits inside the bottom of the fairing such that it just clears the screw heads and zip ties. We have been checking that the foam is cut to the correct size, but it looks like a few got away from us. The foam can easily be cut or sanded a bit for proper clearance if necessary.
The foam we use in the BlueROV2 is not actually "syntactic" foam, which is a hard foam comprised of tiny hollow ceramic spheres. Rather, it is a high density closed cell urethane foam. The analog camera option in the standard electronics package is an analog camera, thus it does not display a digital 720p resolution. Rather, the display signal is analog 700TVL with 700 vertical lines. Just wanted to clear up those couple points! You also don't need to worry about using a Flathead screwdriver to help in opening the enclosures, the acrylic won't be dented, but if it is metal the aluminum may get a few scratches.
Видео BlueROV 2 build guide - most advanced amateur submersible! канала Vosentech
Показать
Комментарии отсутствуют
Информация о видео
Другие видео канала
 Introducing the BlueROV2 Heavy Configuration!
 New Product: The Newton Subsea Gripper!
 DEEP Underwater Camera Build and Test in Lake Tahoe
 This Under Water Drone Conquers the Ocean... in 4K!
 Introducing the Outland Technology Power Supply for the BlueROV2!
 BlueROV2 testflight Ølen - Norway
 Extreme SeaPerch ROV - DIY Submarine Modified Hull
 ATC (ArduSub Tow Camera) from Spot X Underwater Vision
 Amazing Homemade Inventions and Ingenious Machines ▶2
 BlueROV2 dykk ved hurtigbåtkaien i Ølen.
 New Product: The Ping Sonar Altimeter and Echosounder!
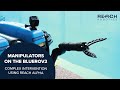 Complex Intervention using Reach Alpha Manipulators on the BlueROV2
 ROV Thrusters - Part 1
 Homebuilt ROV Submarine - Seafox Class
 Alaska Submarine recovers crashed drone from a lake with ROV.
 Build Your Own Underwater Drone
 Blue Robotics "BlueROV2" with towed camera sled: Part 1 - 380'
 Introducing the Ping360 Scanning Imaging Sonar for ROVs!
![Geneinno TITAN T1 Underwater ROV with CLAW Review - Part 1 - [Unboxing, Setup & CLAW CRUSH TEST]](https://i.ytimg.com/vi/FVfuvIkhPW4/default.jpg) Geneinno TITAN T1 Underwater ROV with CLAW Review - Part 1 - [Unboxing, Setup & CLAW CRUSH TEST]
Geneinno TITAN T1 Underwater ROV with CLAW Review - Part 1 - [Unboxing, Setup & CLAW CRUSH TEST] DIY Underwater Drone! COMPLETELY WIRELESS (4K 360 Camera)