How To Draw An Impossible Star Step By Step - 3D Star - Impossible Shapes
Drawing Fundamentals course: https://mydrawingtutorials.com/basics
More Drawing Courses: https://mydrawingtutorials.com/store
For more drawing tutorials, sign up for our FREE newsletter: https://mydrawingtutorials.com/join
Connect With Us:
Facebook: https://www.facebook.com/MyDrawingTutorials
Google+: http://mydrawingtutorials.com/googleplus
Twitter: https://twitter.com/MyDrawingTutor
Pinterest: http://pinterest.com/mydrawingtutor/
Full Lesson Details:
http://mydrawingtutorials.com/how-to-draw-an-impossible-star-step-by-step/
Video Transcript:
Step 1 – Draw A Regular Star
The first step is to draw a normal star shape.
First, put a dot in the middle of your paper. This will represent the very center of your impossible star.
Next, draw a perfectly vertical line going up from this dot. The length of this line will represent the length of the branches of your star.
Ok, so we got one of the five branches. Now it’s time to draw in the other ones. To do this, imagine that there is a circle around the center dot and you want to divide this circle into 5 equal pieces. And you can use that first vertical line as your starting point.
You’ll want to make the angle between each lines 72 degrees.
Now just connect the ends of these lines in this pattern to form a star. And voilà! We have a perfect start.
Ok, hard part’s over. Now we can turn this regular star into an impossible star.
Step 2 – Turning “Regular Star” Into Impossible Star!
Now, go to the tip of one of the star branch and measure a small distance down. Then draw a horizontal line across this point.
Then repeat this process for the other 4 star branches.
Next just erase the tip of each of the branches.
So before we go any further, let’s ink in the lines that we want to keep to avoid confusion. I’ll use a 1.0 copic multiliner pen to in the outline of our drawing.
And let’s just erase some these guidelines so it doesn’t get too messy. I’ll keep these guidelines that form a pentagon as they’ll come in handy later on.
Now just connect the corners of our star-like shape in the following way.
Notice that we now have 2 pentagon shapes at the center of our drawing. A large pentagon here. And a medium pentagon here. Now let’s draw a third pentagon inside the medium one.
The best way to do this is to draw the sides of the medium pentagon again, expect move them inward so that they form a smaller pentagon.
Now let’s ink in this small pentagon.
To ink in the rest of the drawing, just imagine that you are trying to get from the small pentagon to the large pentagon.
Here’s what I mean…
Let’s start with this side of the small pentagon.
To get to the large pentagon, you can either go left or right. For the first one, it doesn’t matter which one you pick, so let’s just go right.
Draw a line from the small pentagon to the large pentagon. Once you reaches one of the sides of the large pentagon, make a turn and go along that side until it ends.
Ok, let’s move on to the next one. Once again to get to the large pentagon, you can go left or right. But since the left side is blocked, we’ll have to go right. And once you reach the large pentagon, make a turn and run along it’s side.
And just repeat this process for the remaining 3 sides of the small pentagon.
The last step is to connect this line with the tip of the star.
And let’s do that for the other 4 lines as well.
Now just erase the pencil line and we have an impossible star.
Step 3 – Shading Your Impossible Star
Now let’s add some shading to give this drawing some dimension. Let’s work on this branch first.
I’ll start by using an HB pencil to put down a base tone in this area. Then I’ll put dark gradations at these 3 areas to emphasize the fact that the branches of the star are overlapping.
Now, let’s move to this section and put a gradation at this end and this end with a highlight area in between.
Next, let’s use a 2B pencil to go re-enforce the darker areas.
And now, we’ll just repeat this process for the other 4 branches.
Lastly, I’ll take a 4B pencil and add some hard shadows to the areas where the star branches are overlapping. This little bit of detail will really make the drawing look much more 3 dimensional.
And now, let’s just put our signature on it and call it a drawing!
Music: "Carefree"
Kevin MacLeod (http://incompetech.com)
Licensed under Creative Commons: By Attribution 3.0
http://creativecommons.org/licenses/by/3.0/
Видео How To Draw An Impossible Star Step By Step - 3D Star - Impossible Shapes канала My Drawing Tutorials
Показать
Комментарии отсутствуют
Информация о видео
Другие видео канала
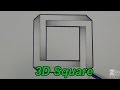 How To Draw An Impossible Square - 3D Square - Impossible Shapes (Narrated)
 optical illusion 3d wall painting | wall art painting decoration | interior design
 Como dibujar el triangulo imposible
 How to Draw 3D Letter M - Drawing with pencil - Awesome Trick Art.
 OPTICAL ILLUSION 3D WALL PAINTING || 3D WALL DECORATION || EFEK CAT TEMBOK 3D
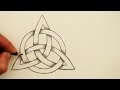 How to Draw a Celtic Knot: The Triquetra with a Circle
 How to Draw the Impossible Triangle | Optical Illusion Fun
 How to Draw an Impossible Pentagram
 3D Trick Art on Paper, Letter "A" with Graphite Pencil
 How To Draw An Impossible Hexagon - Impossible Shapes (Narrated)
 How To Draw a Chain Link - EASY- Step By Step
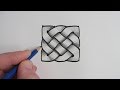 How to Draw a Celtic Knot: Step by Step
 Impossible star drawing(How to draw? Step-by-Step for five steps, super easy!)
 How to Draw 3D Arrows Optical Illusion: Narrated
 OPTICAL ILLUSION 3D WALL ART PAINT || CAT KAMAR KREATIF || DESAIN CAT DINDING 3D - INTERIOR DESIGN
 How To Draw ✎ Geometric EYE | DearingDraws
 How to Draw an Impossible Star of David - 3D Star - Impossible Shapes (Narrated)
 How to Draw The Impossible Triangle with 3d Cubes: Optical Illusion
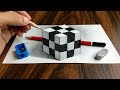 3D Trick Art on Paper Realistic Cube